LOCUS 2019
LOCUS- noun
>Technical: a particular position or place where something occurs or is situated; it is impossible to specify the exact locus in the brain of these neural events.
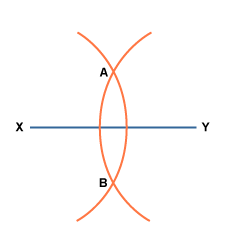
>Mathematics: a curve or other figure formed by all the points satisfying a particular equation of the relation between coordinates, or by a point, line, or surface moving accordingly to mathematically defined conditions.
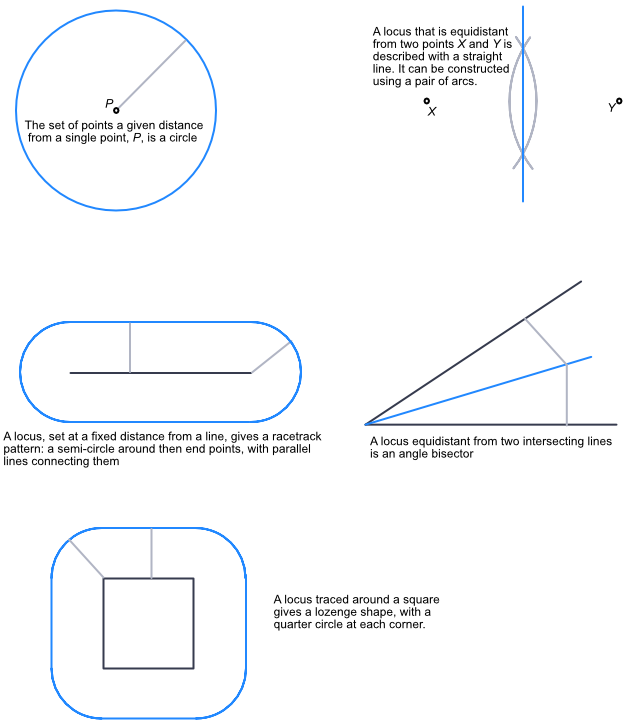
To start this project, we started looking at our “Context”. In the case of makers, it was whether or not you were more of an artist, craftsperson, or designer. Below is a diagram by wood turner/ artist Stephen Hogbin that captures the different strands of making.
Hogbin, S. (1984). Wood turning. SydneyFergusen.
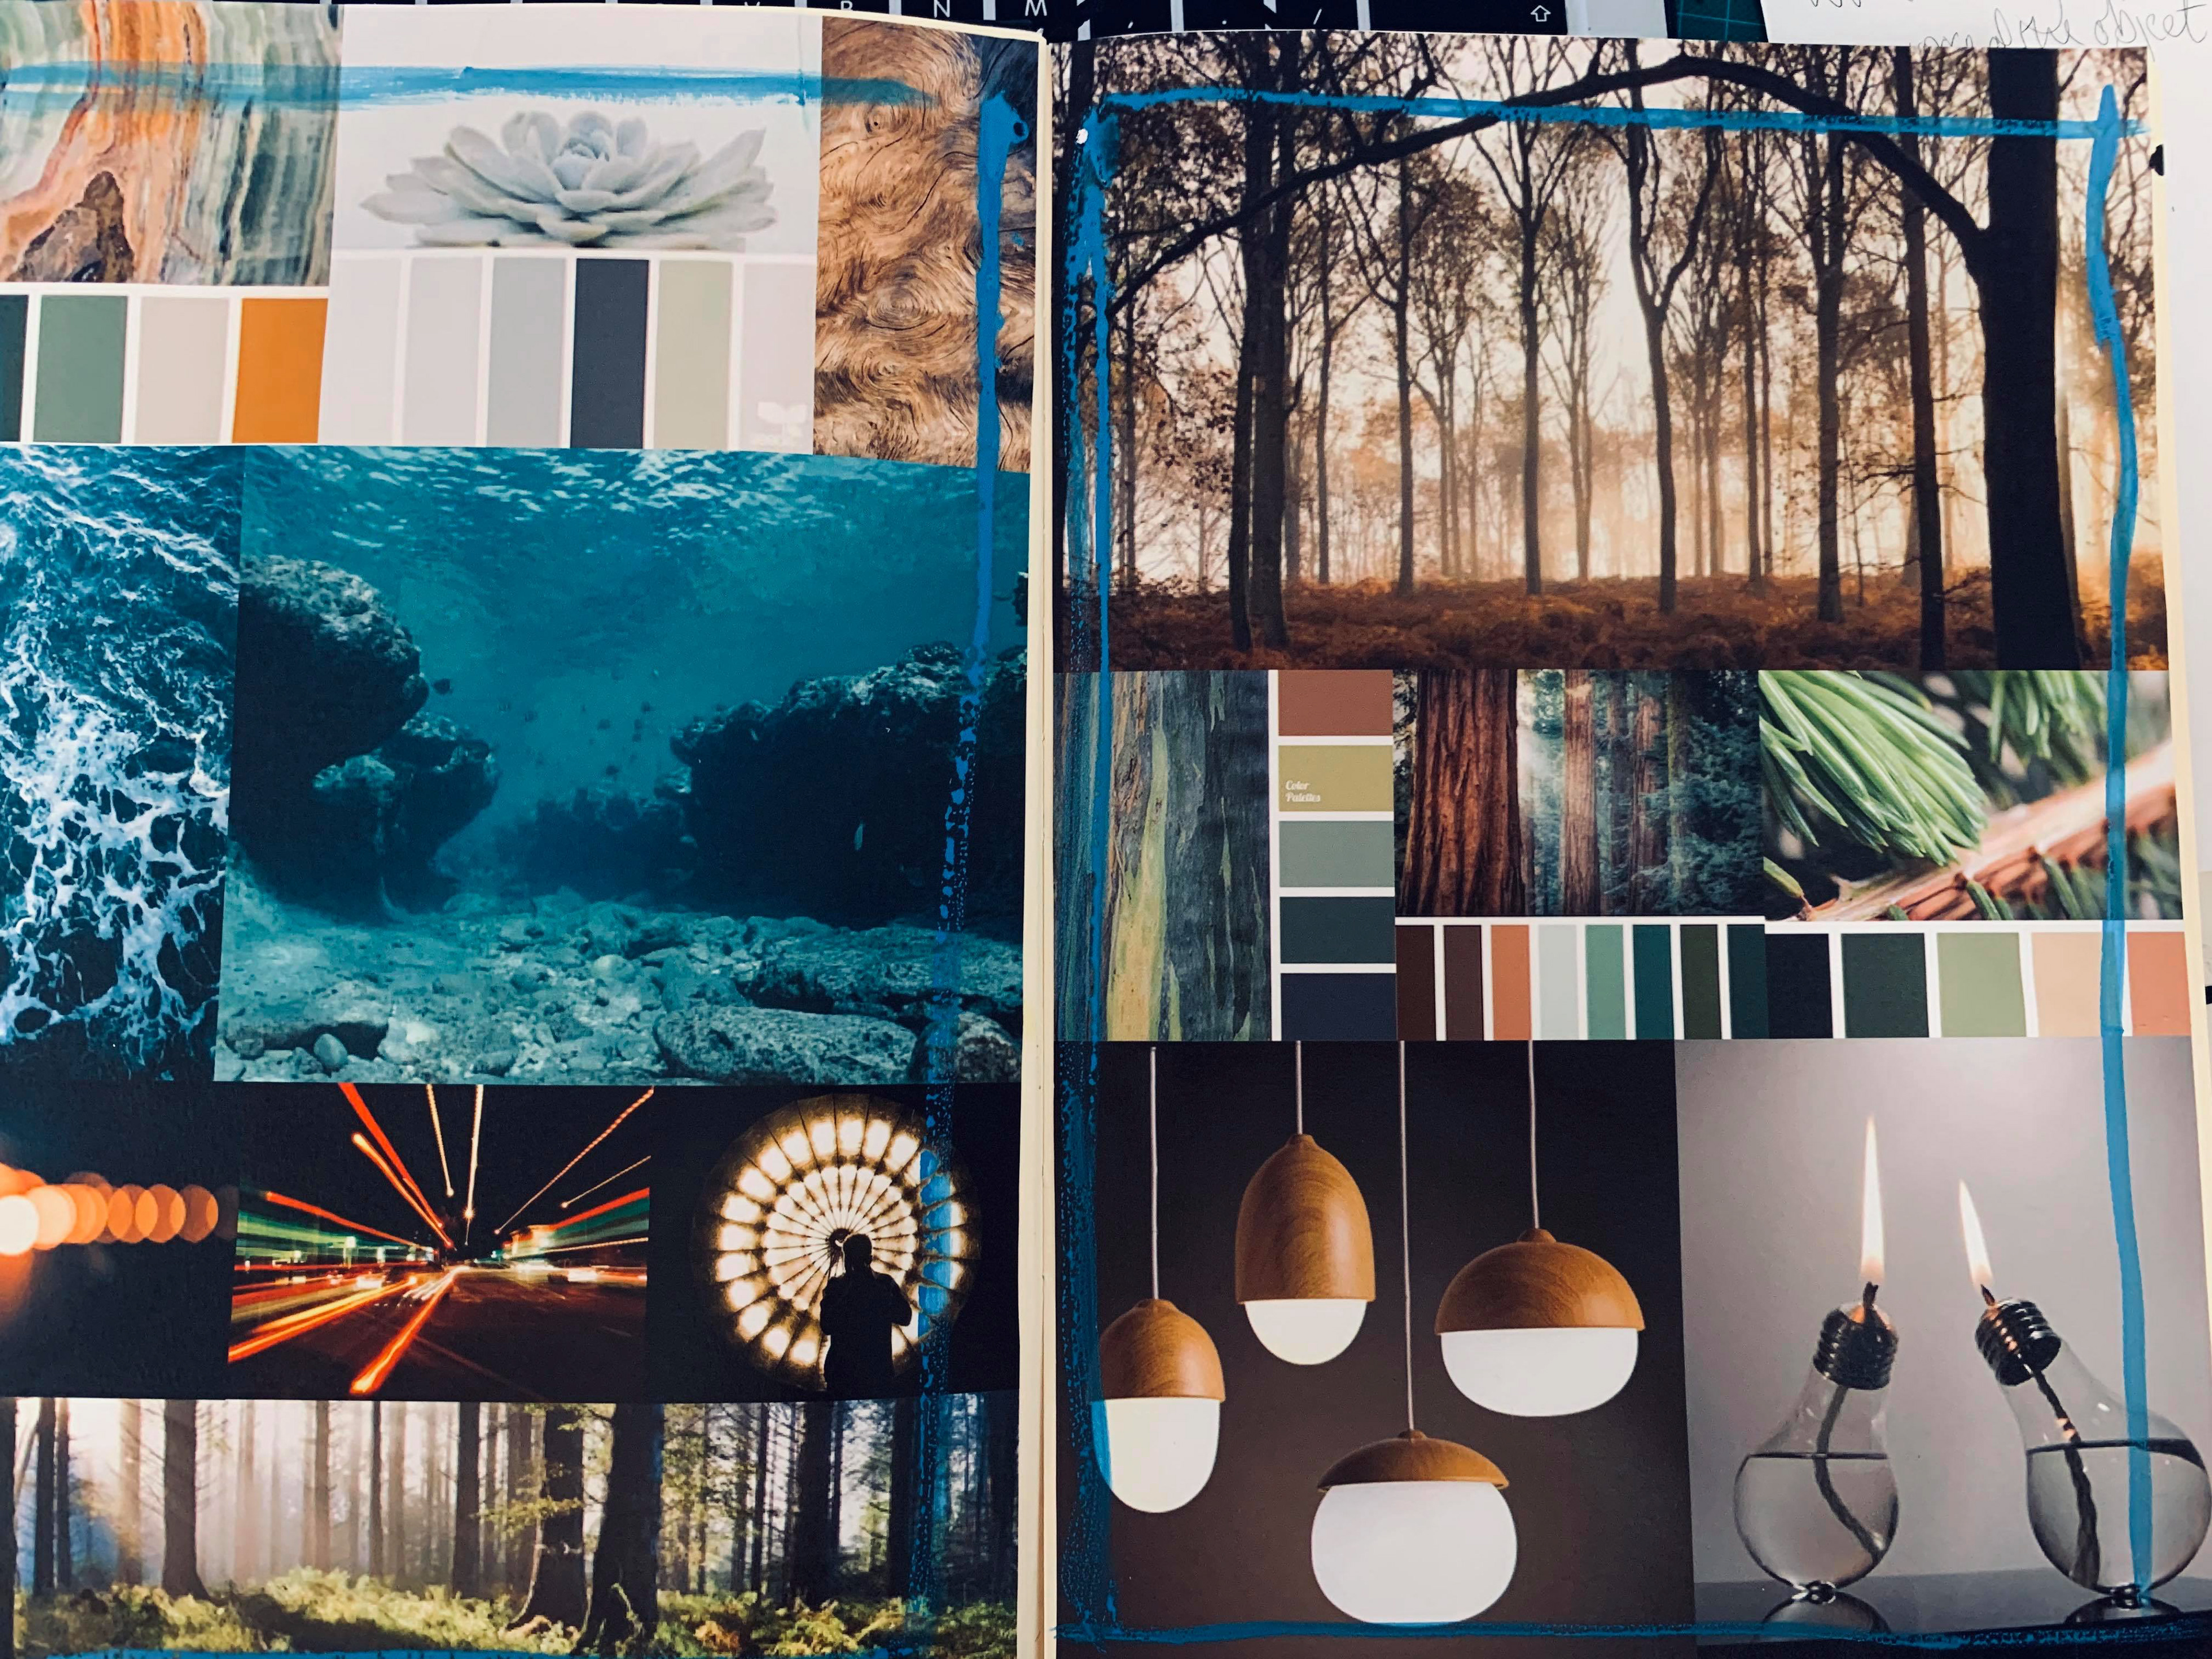
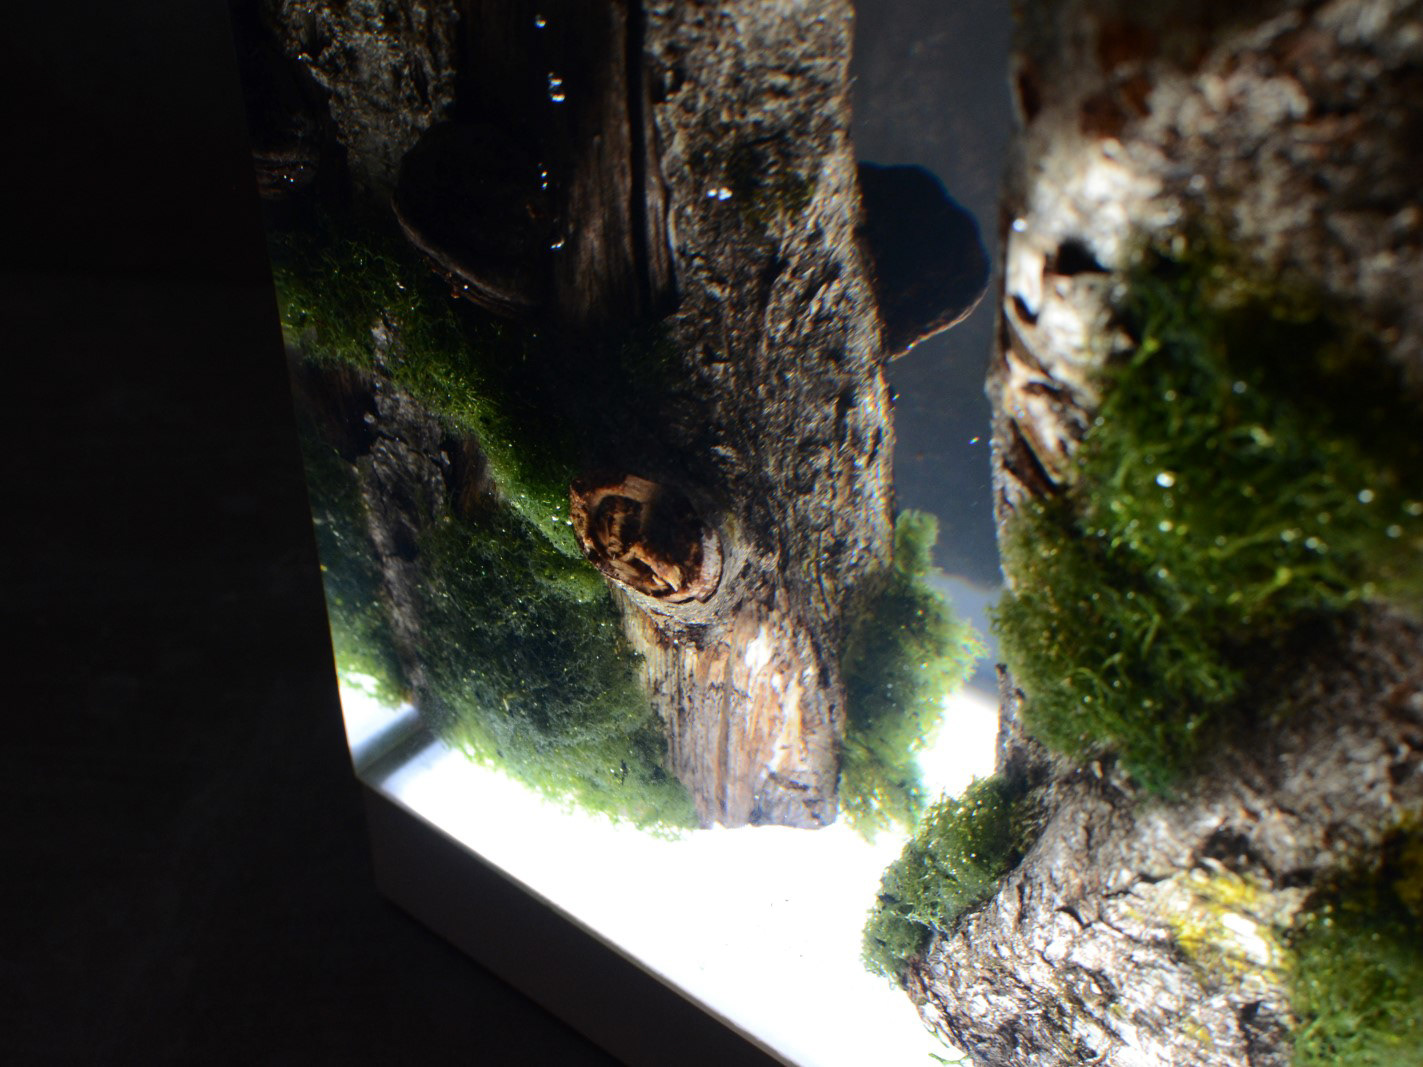
Next, I started to think about the kind of stuff that I want to make/ be able to make. This helped me to create a starting point for a few designs. I also collated some images to help me with my inspiration.

As I do with most projects, I put together a mind map to show my initial ideas and thoughts about where I could take this project.
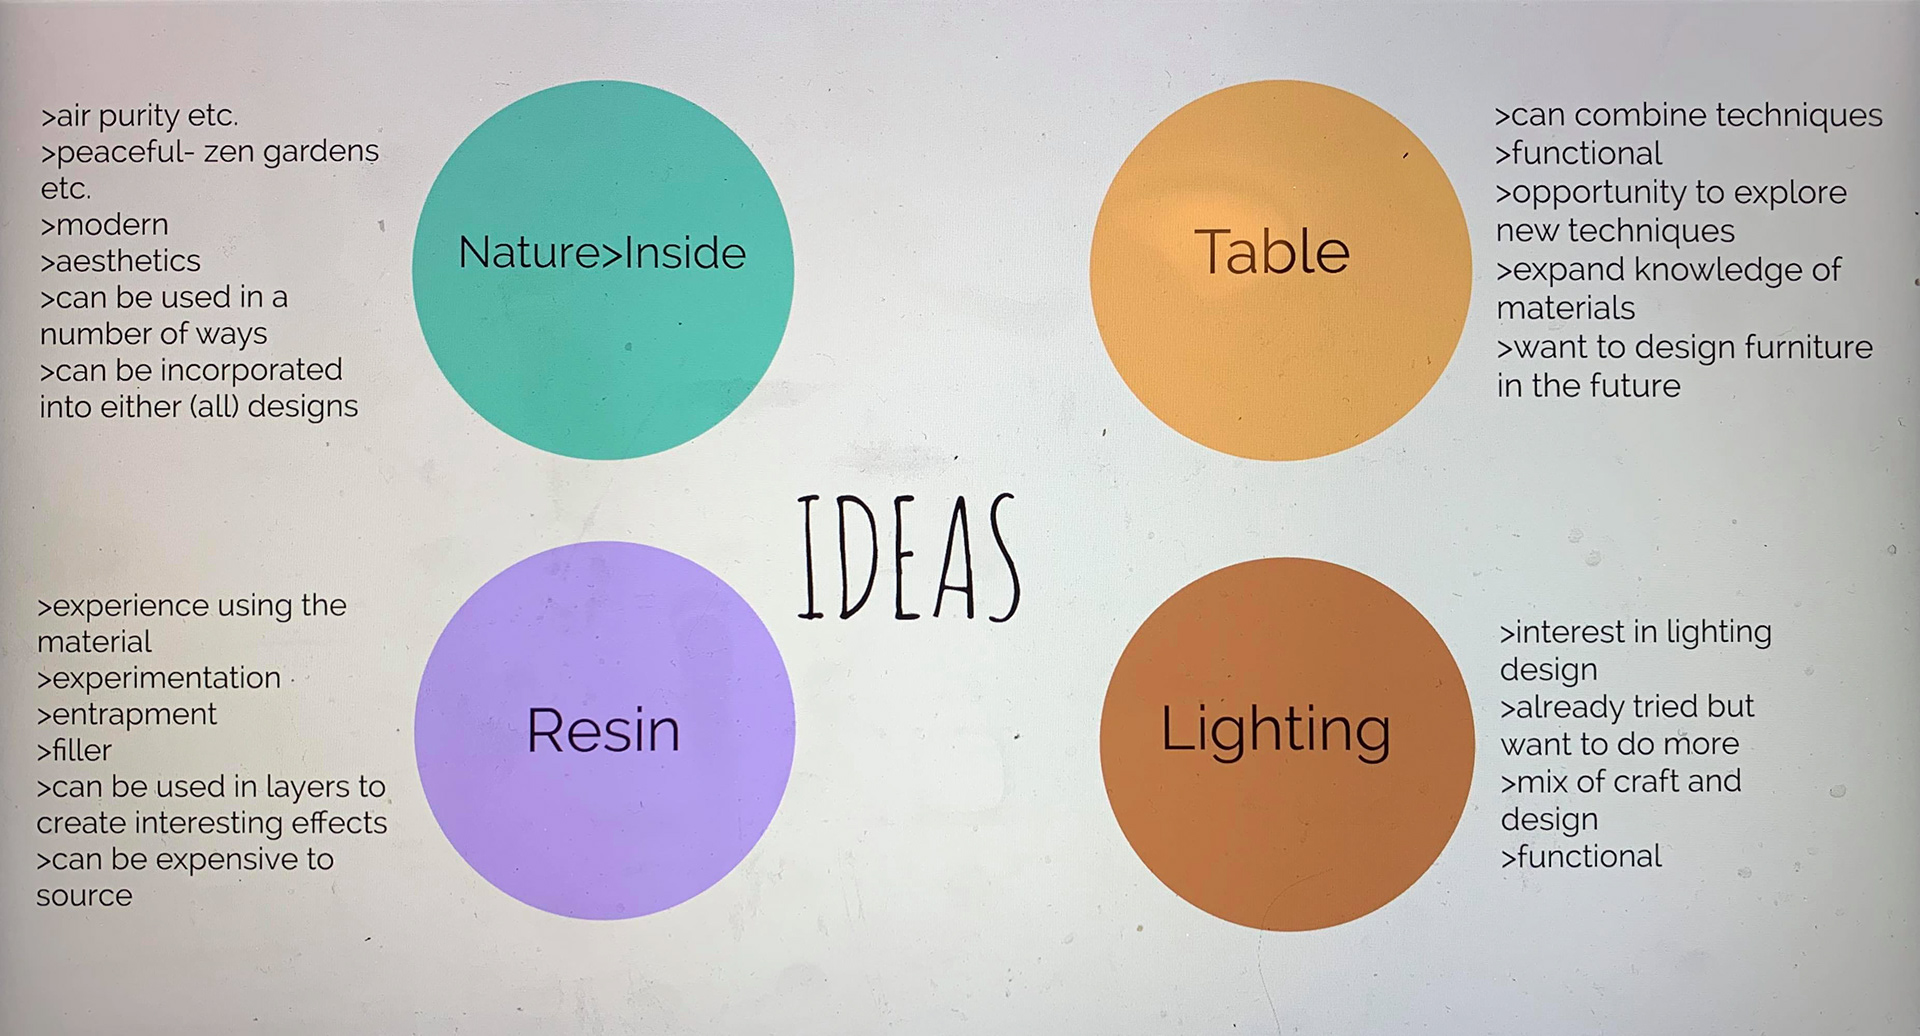
As part of our design process, we had group tutorials to discuss where we should go from ideas to reality. For this we had to make a presentation with a brief note on where we were going to take this.
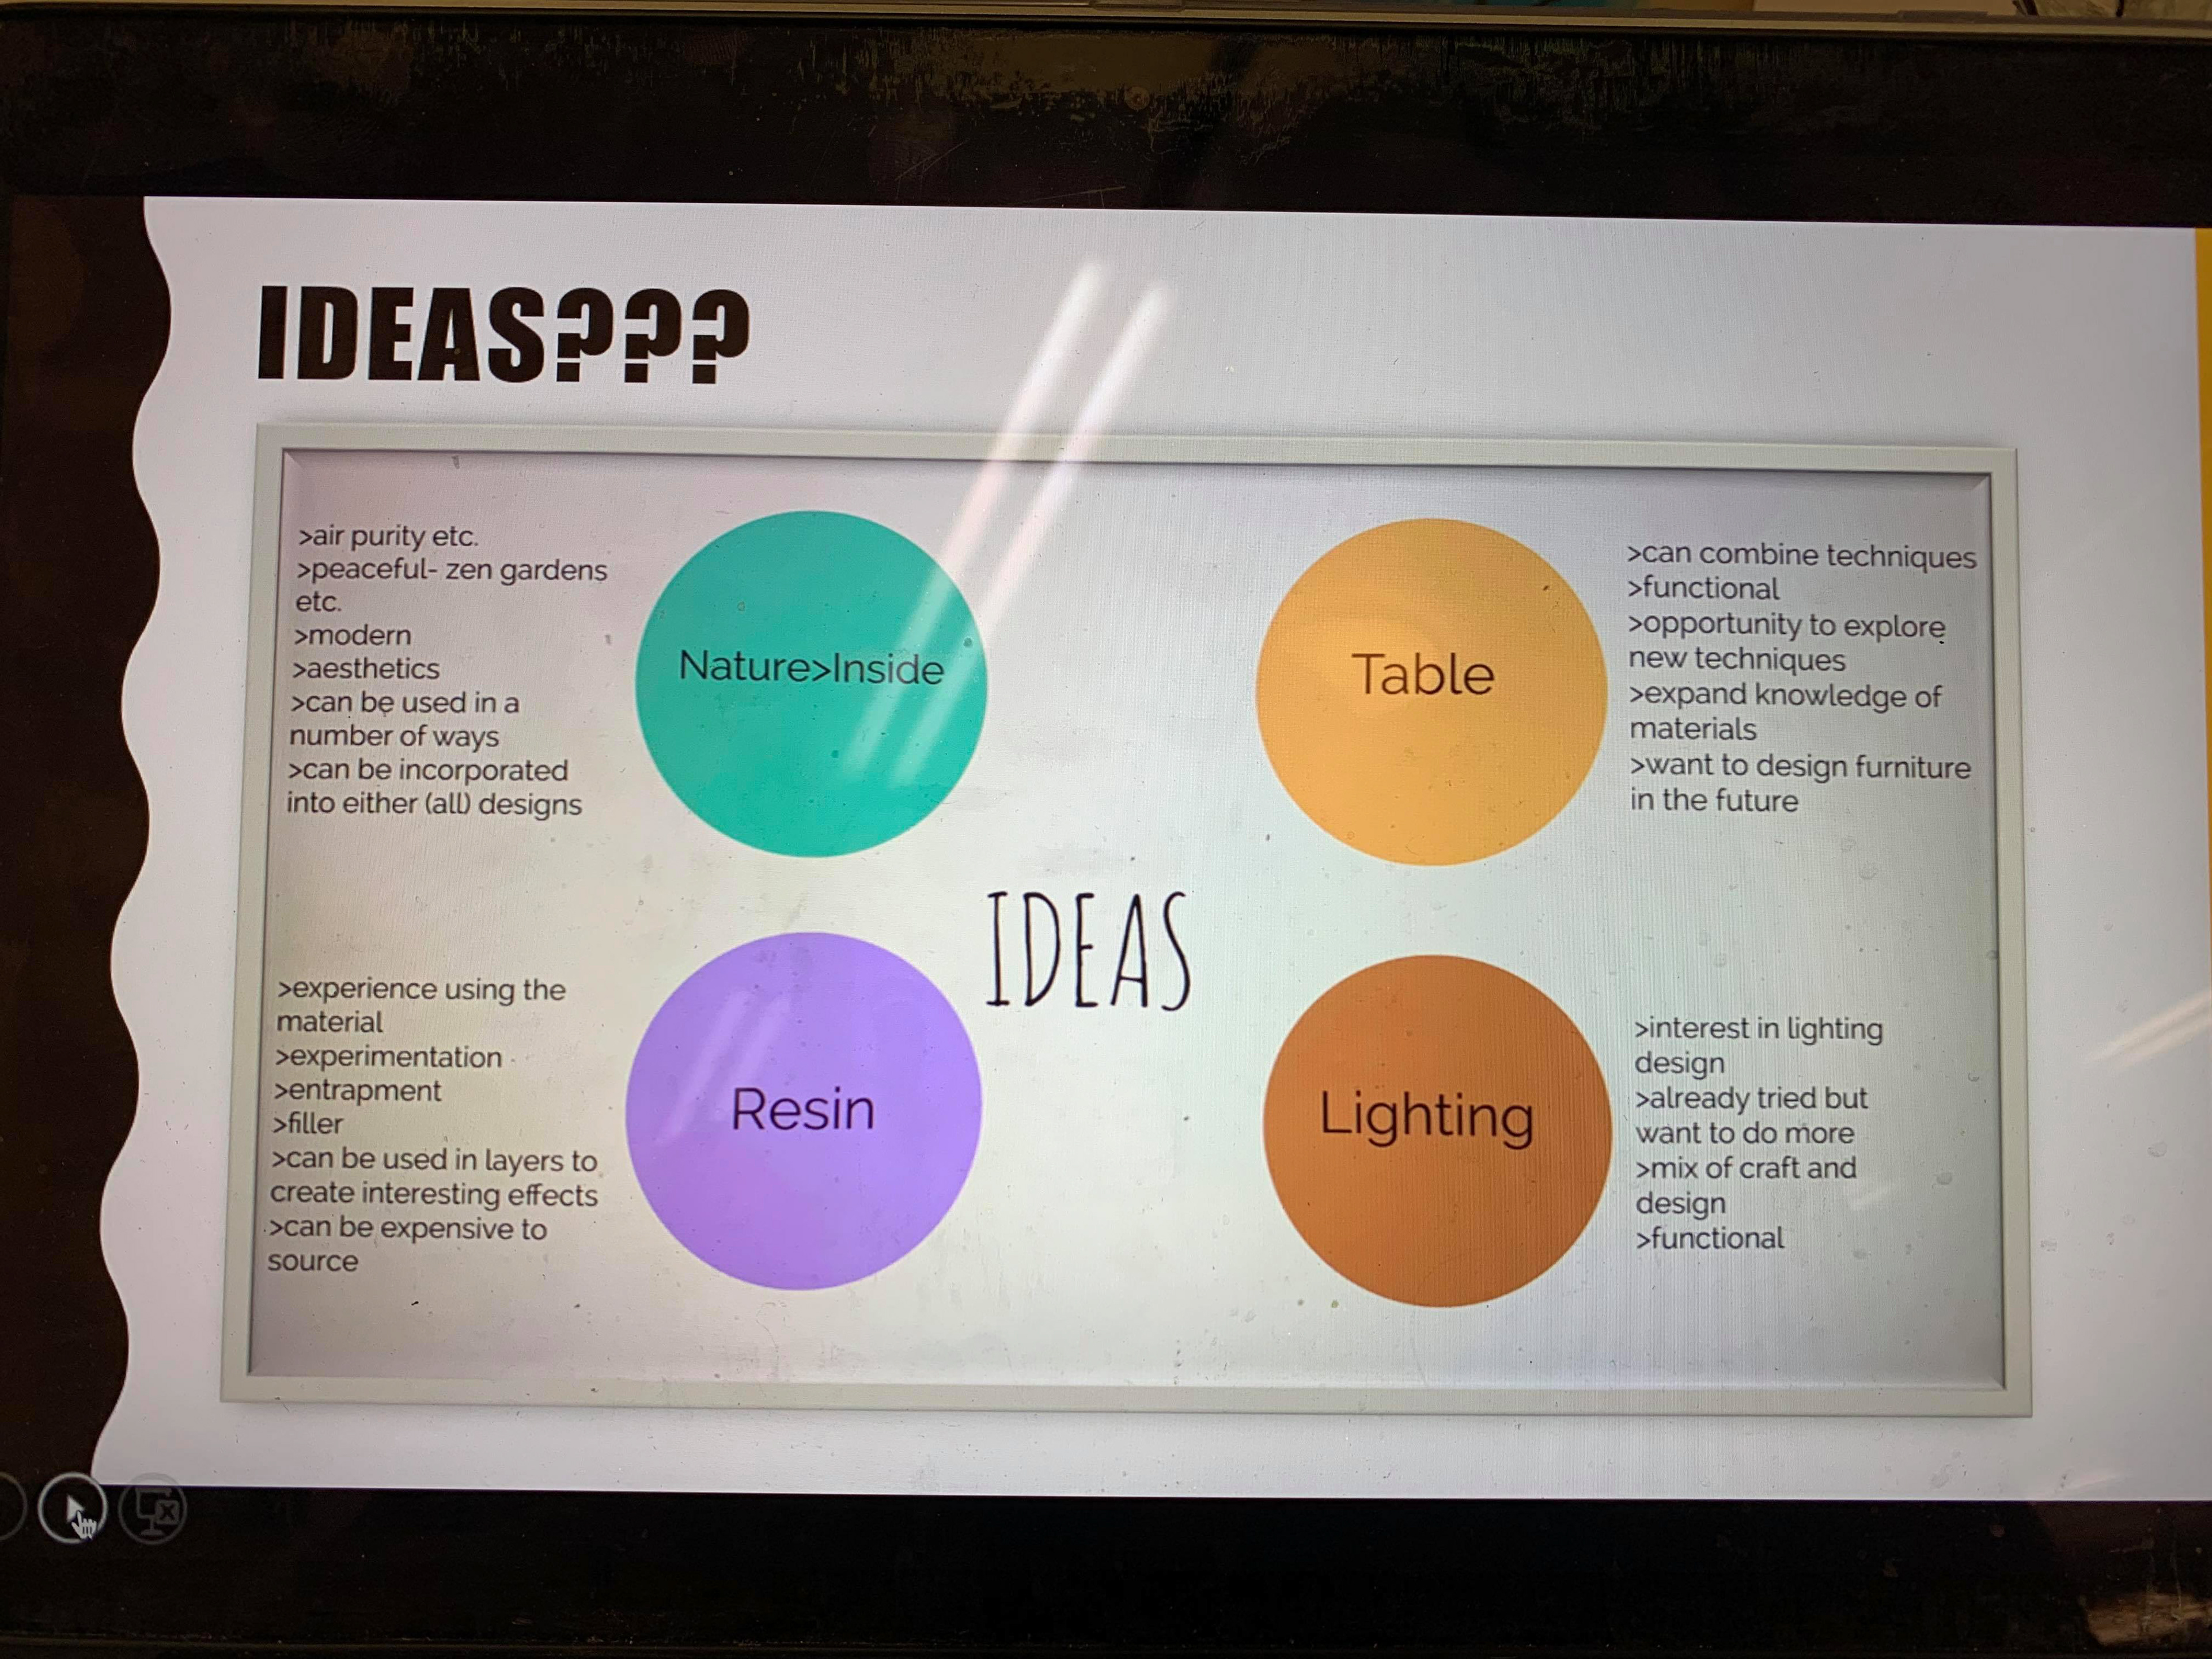

Snippets of my presentation.
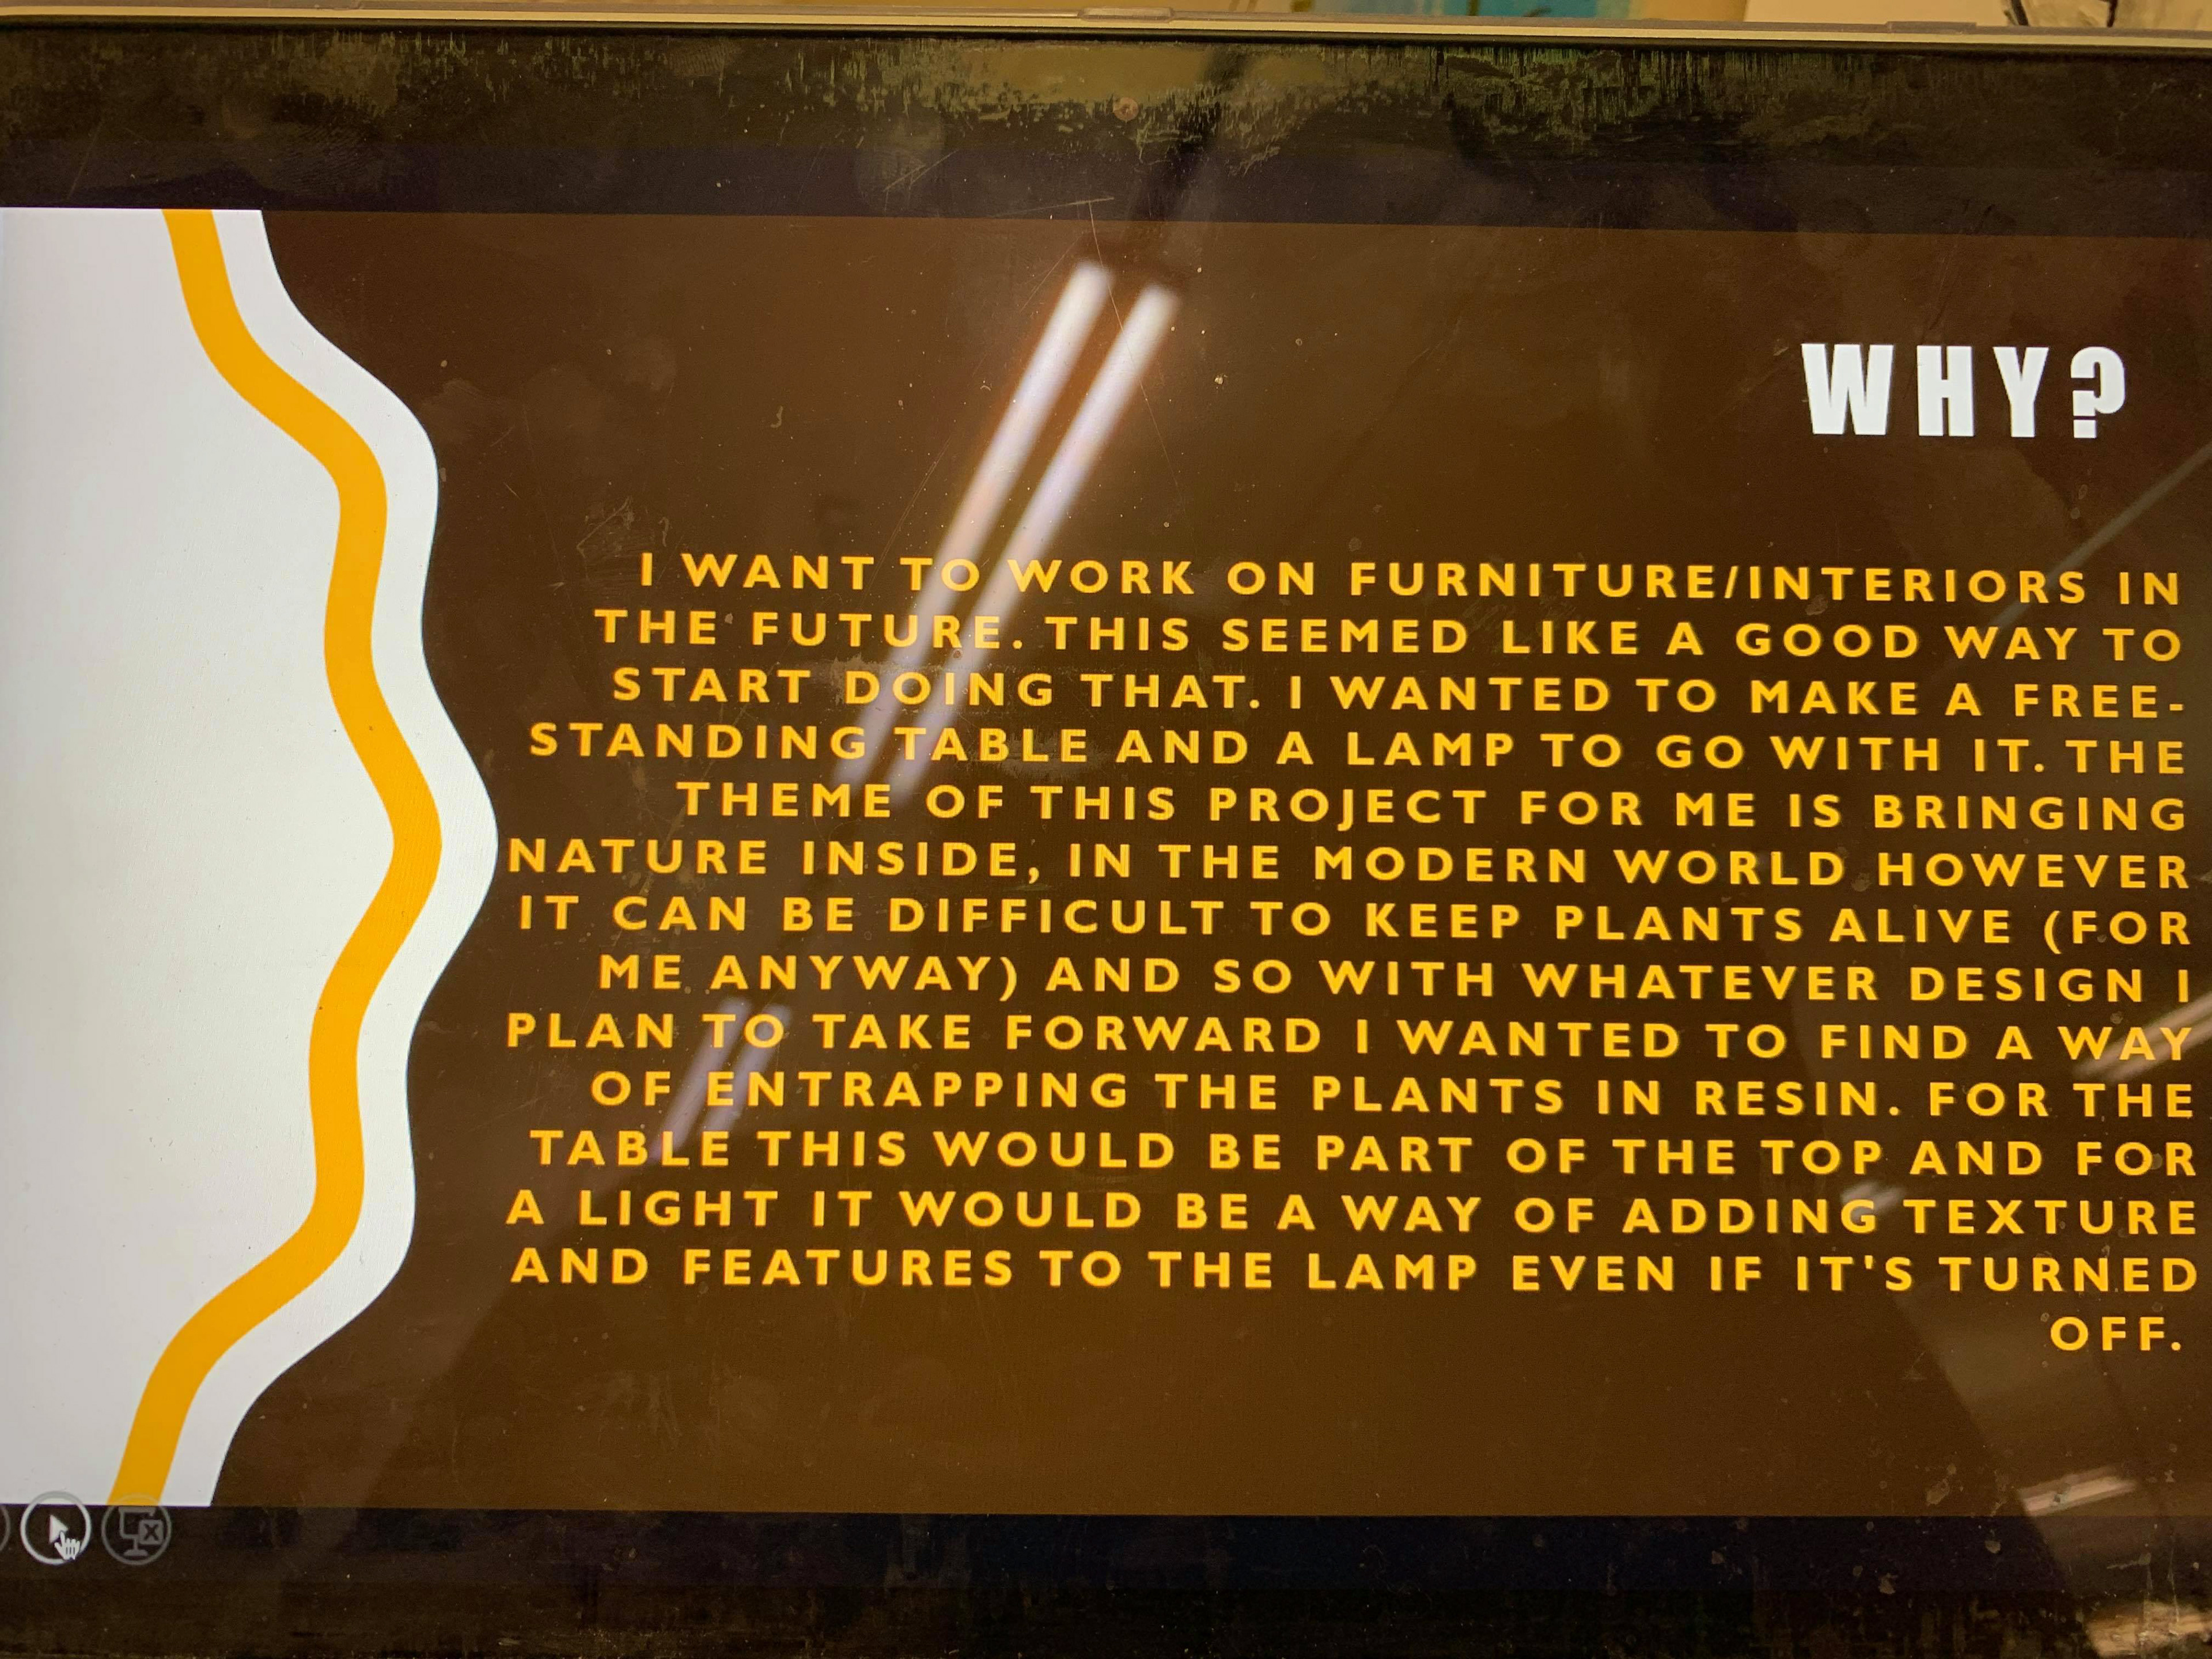
After this session I decided to make a start on my designs for the table, as I felt like this was the one, I was going to go with.
At this point in the project I feel like I will have to seriously think about how much my design is going to cost. I was planning on going on the trip to La Perdix, however, I am going to use the money I would spend going on that on this table. Ultimately ceramics isn't something I want to centre my practice around, and so the best way to start off my portfolio would be with something that I actually plan to do. I know that the sourcing of the materials I need is going to be difficult and pricy but will be worth it in the end.
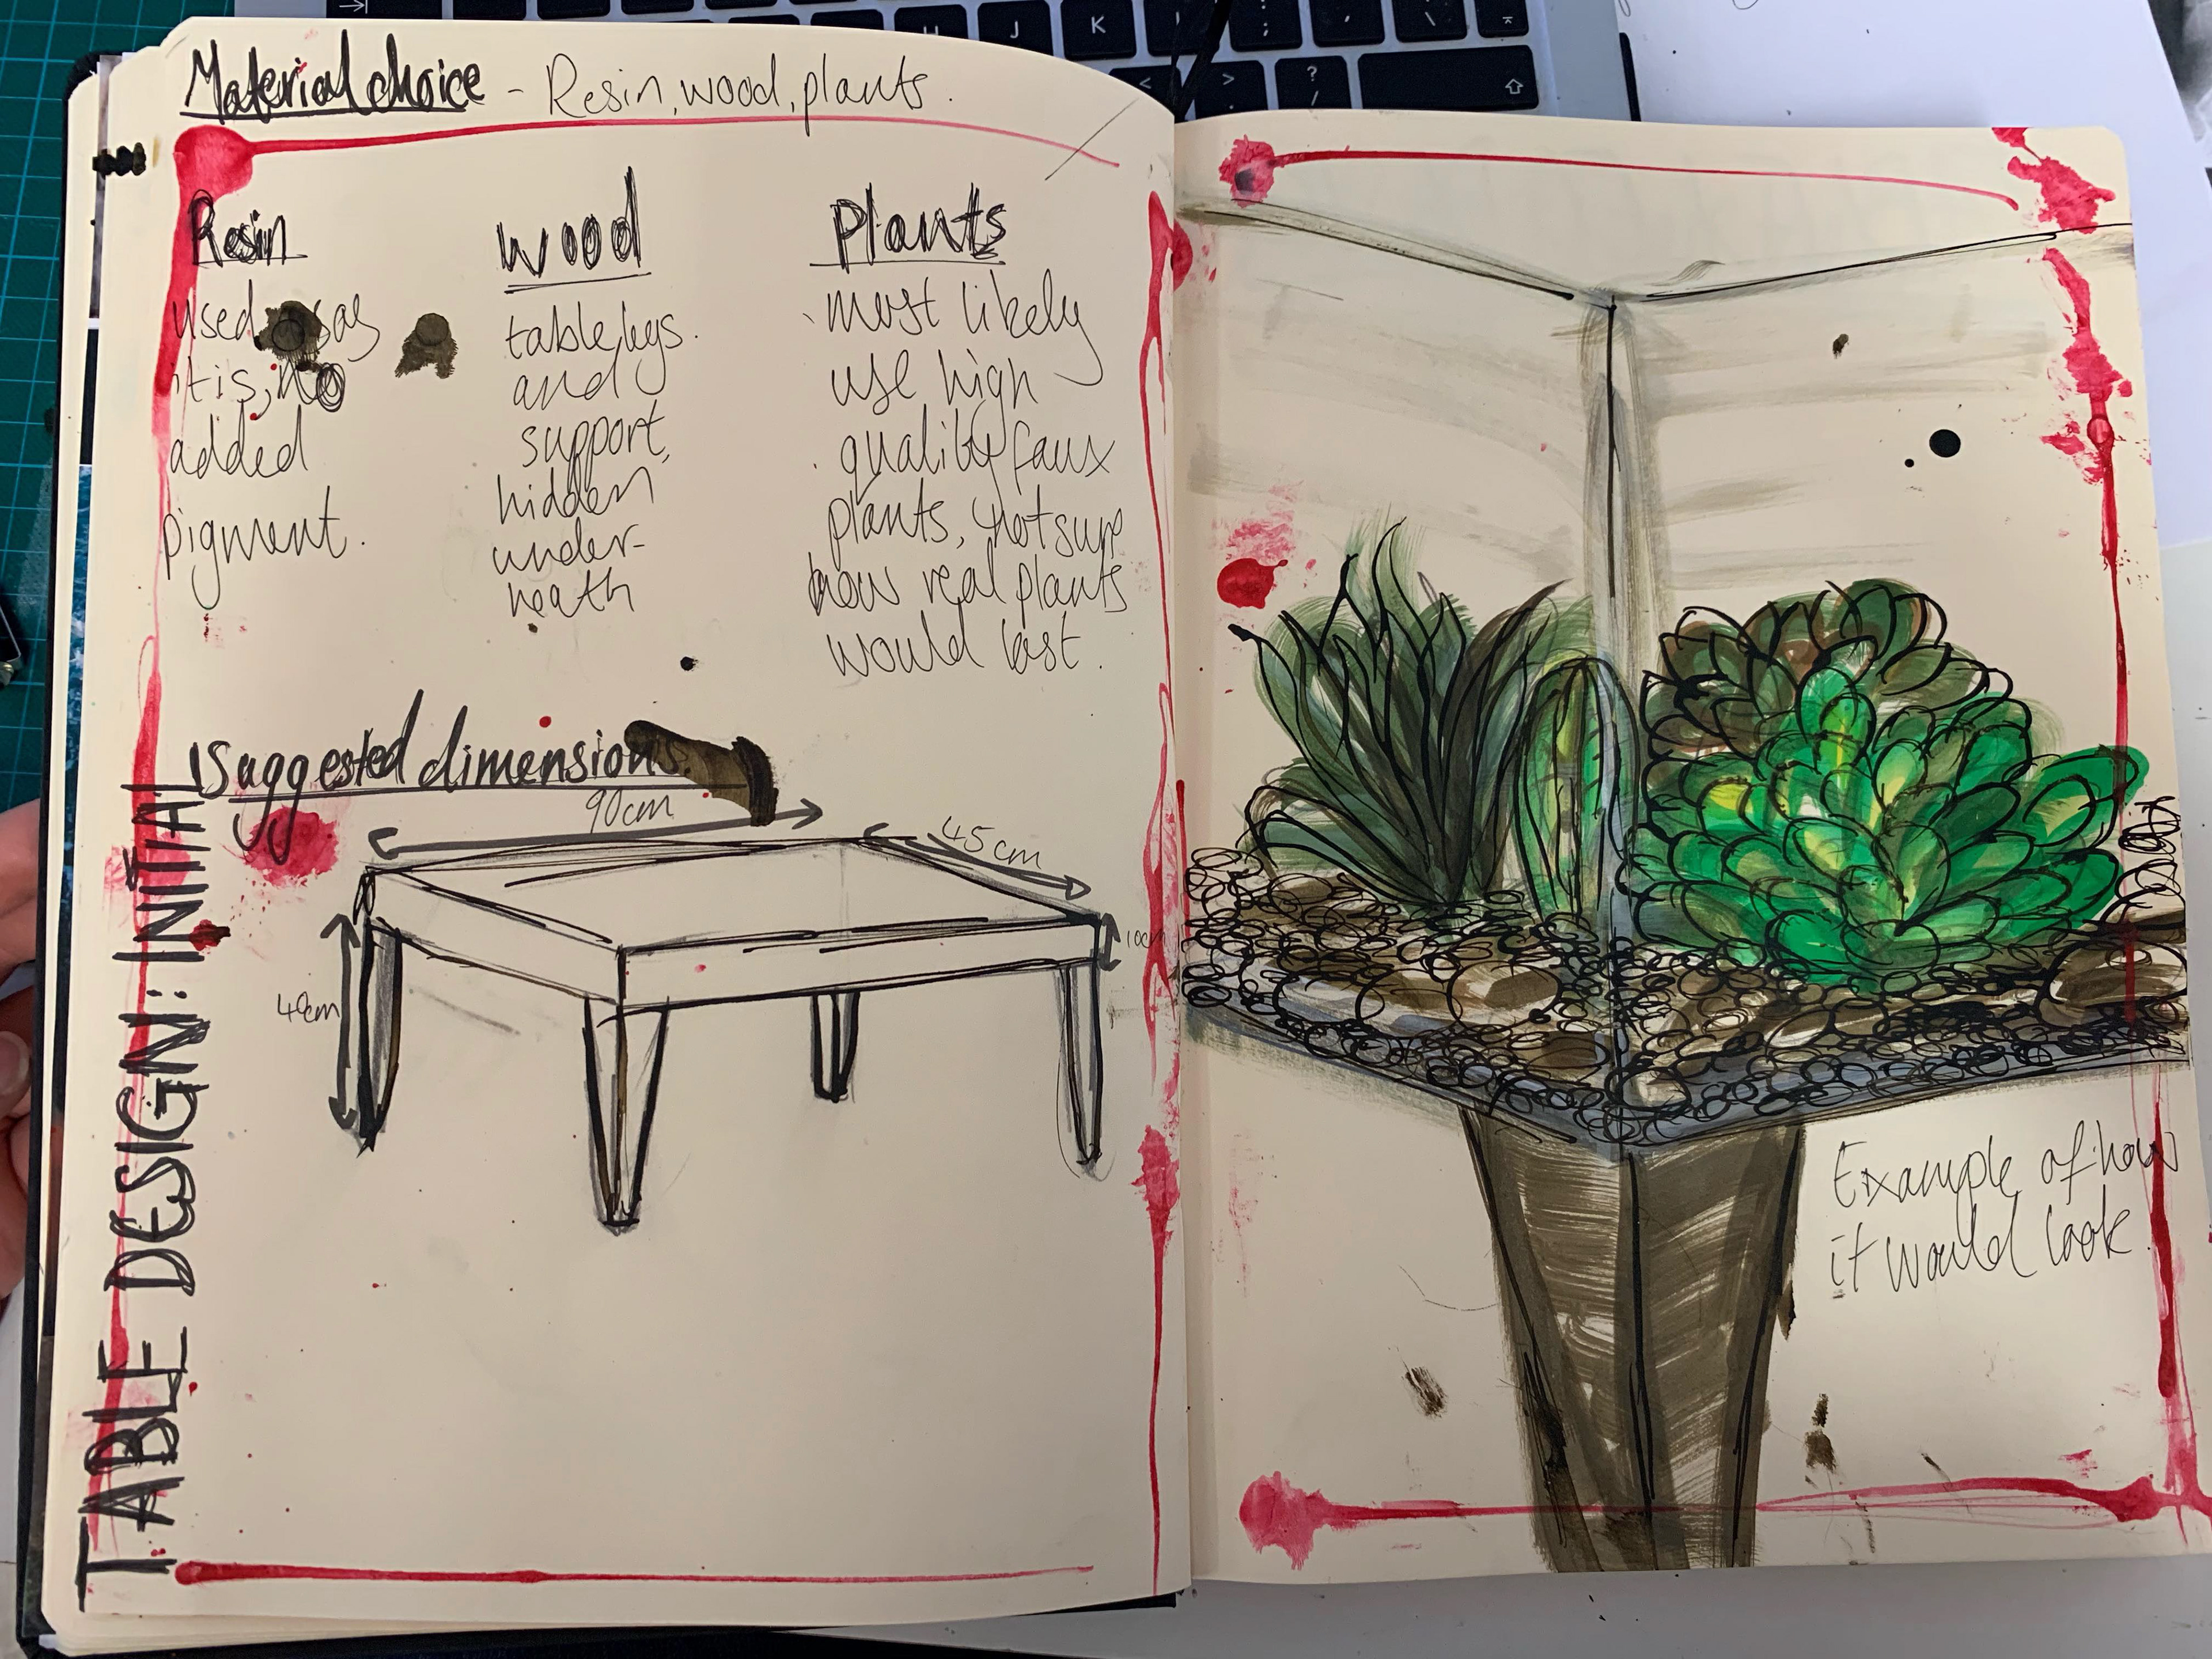
I initially designed my table with wooden legs but have decided to make it with metal poles. There are several reasons behind this the main one being price. To make the wooden legs the materials could get very pricy however in the metal workshop there are poles that are free to have, cutting this cost down. However, I also feel that the use of the metal would have a more contemporary feel; more fitting to the design I have imagined. The idea behind this project was to use succulents because they were a modern muse, so is metal. Therefore, I feel that the combination is more amicable and appropriate.

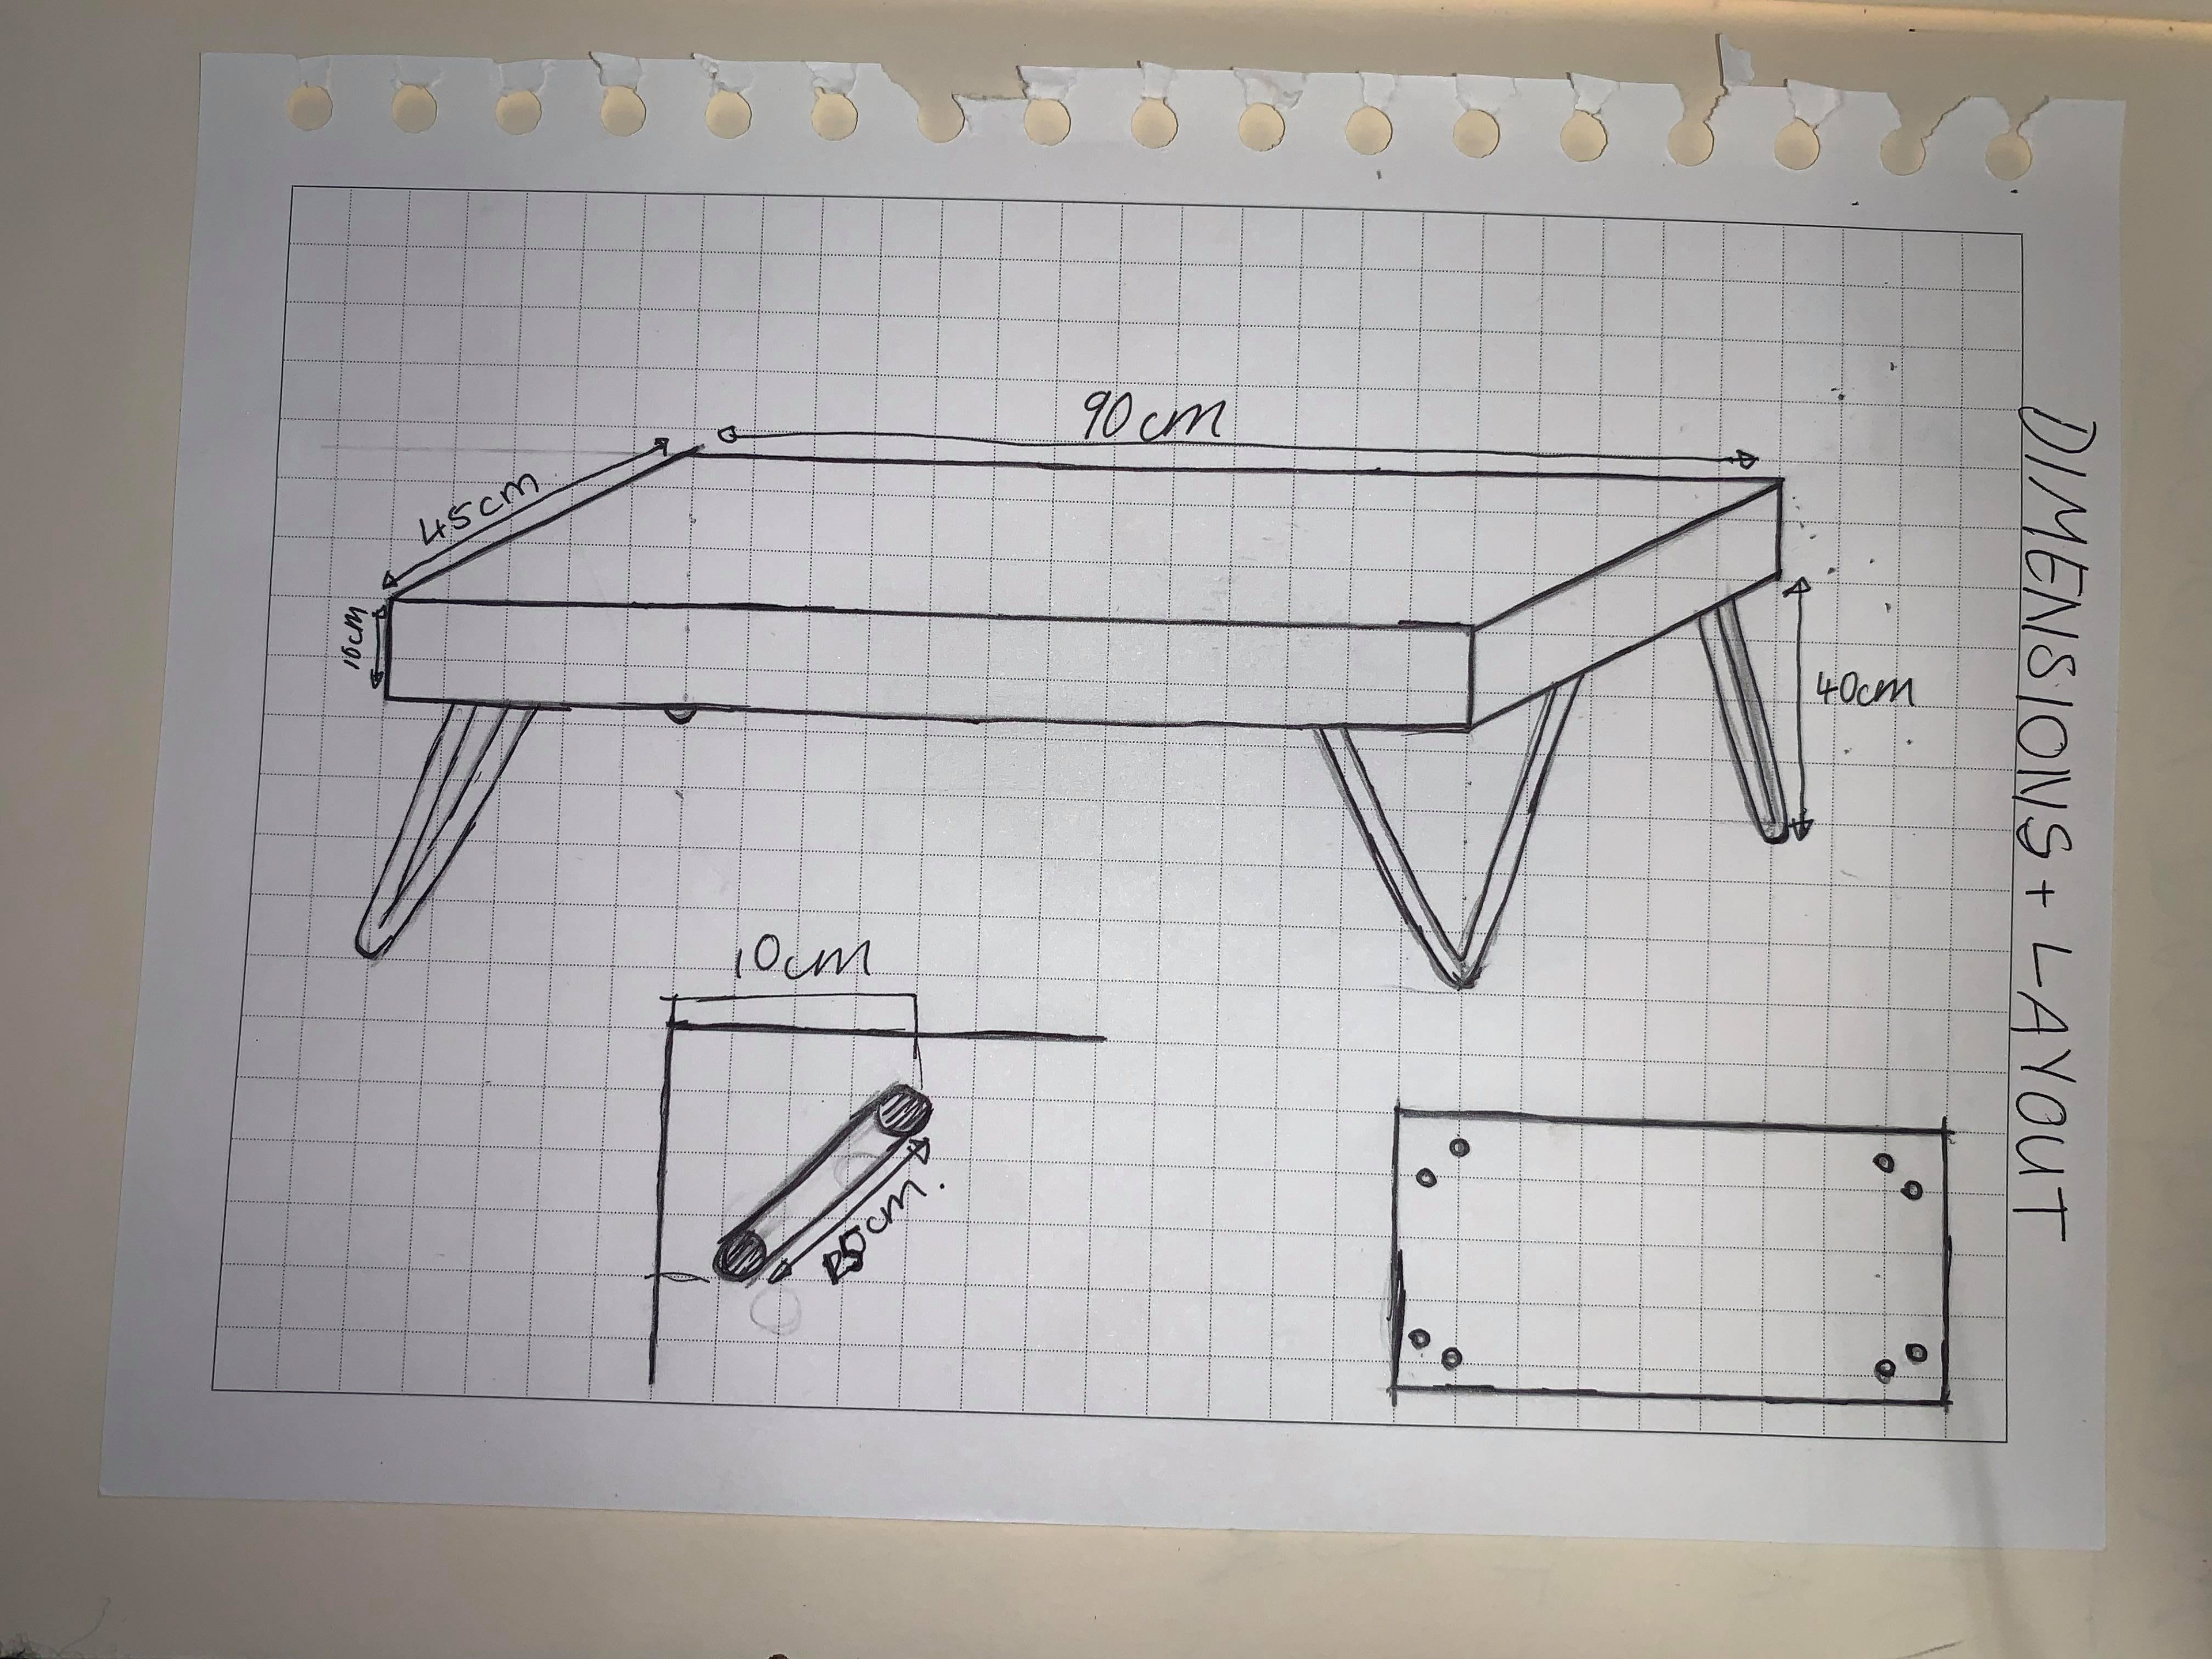
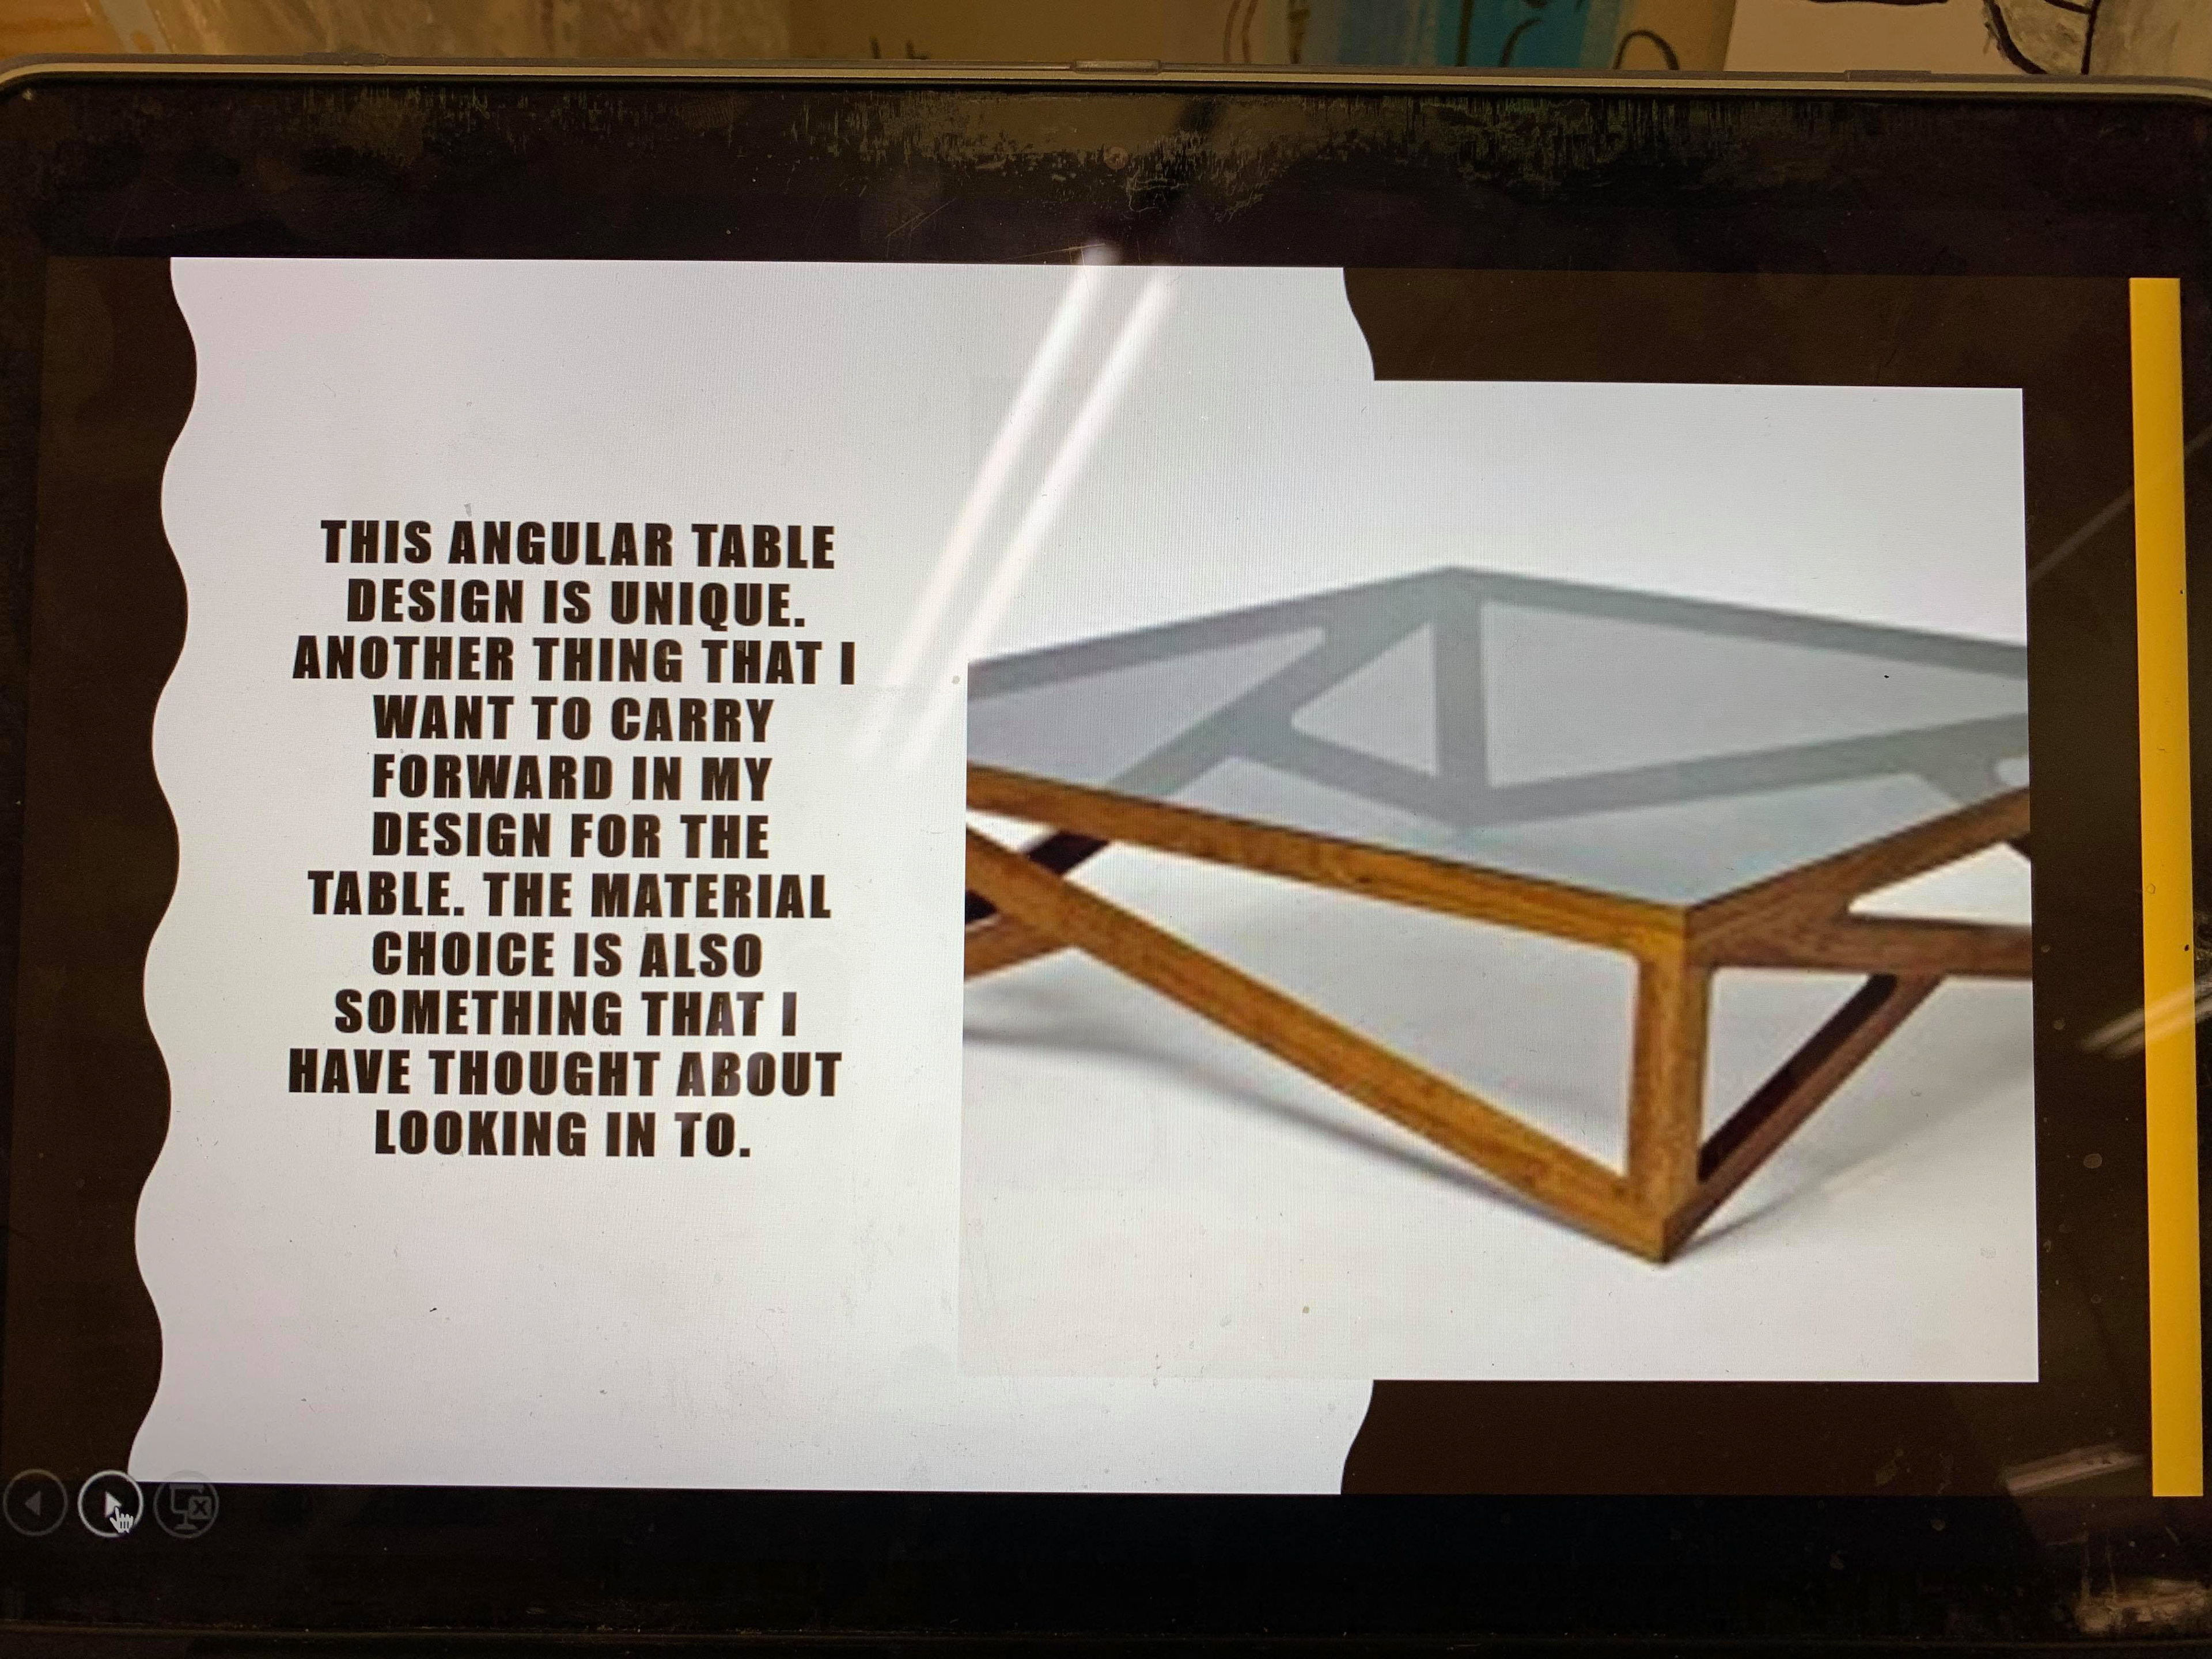
I designed the table to have angular legs, like those above. However, when I got down to the workshops the metal that I had planned to use had already been used by another student. After talking to Dallas I found a different type I could use. The metal however was as easy to shape. This meant that I had to quickly rethink my design. The way I did this meant that the legs are slightly bulkier but shouldn’t distract from the main element; the table top.


Images showing the before and after of the table legs.
When I first got the metal, it was very dirty and rusted in places, even though I really liked the look, I need to sand them down to remove the layers of dirt. The effect was quite interesting; it bought out dimpling in the metals and the shine underneath.
Overall, I think that I actually prefer the shape and believe that they would actually be more stable and supportive than the original design.
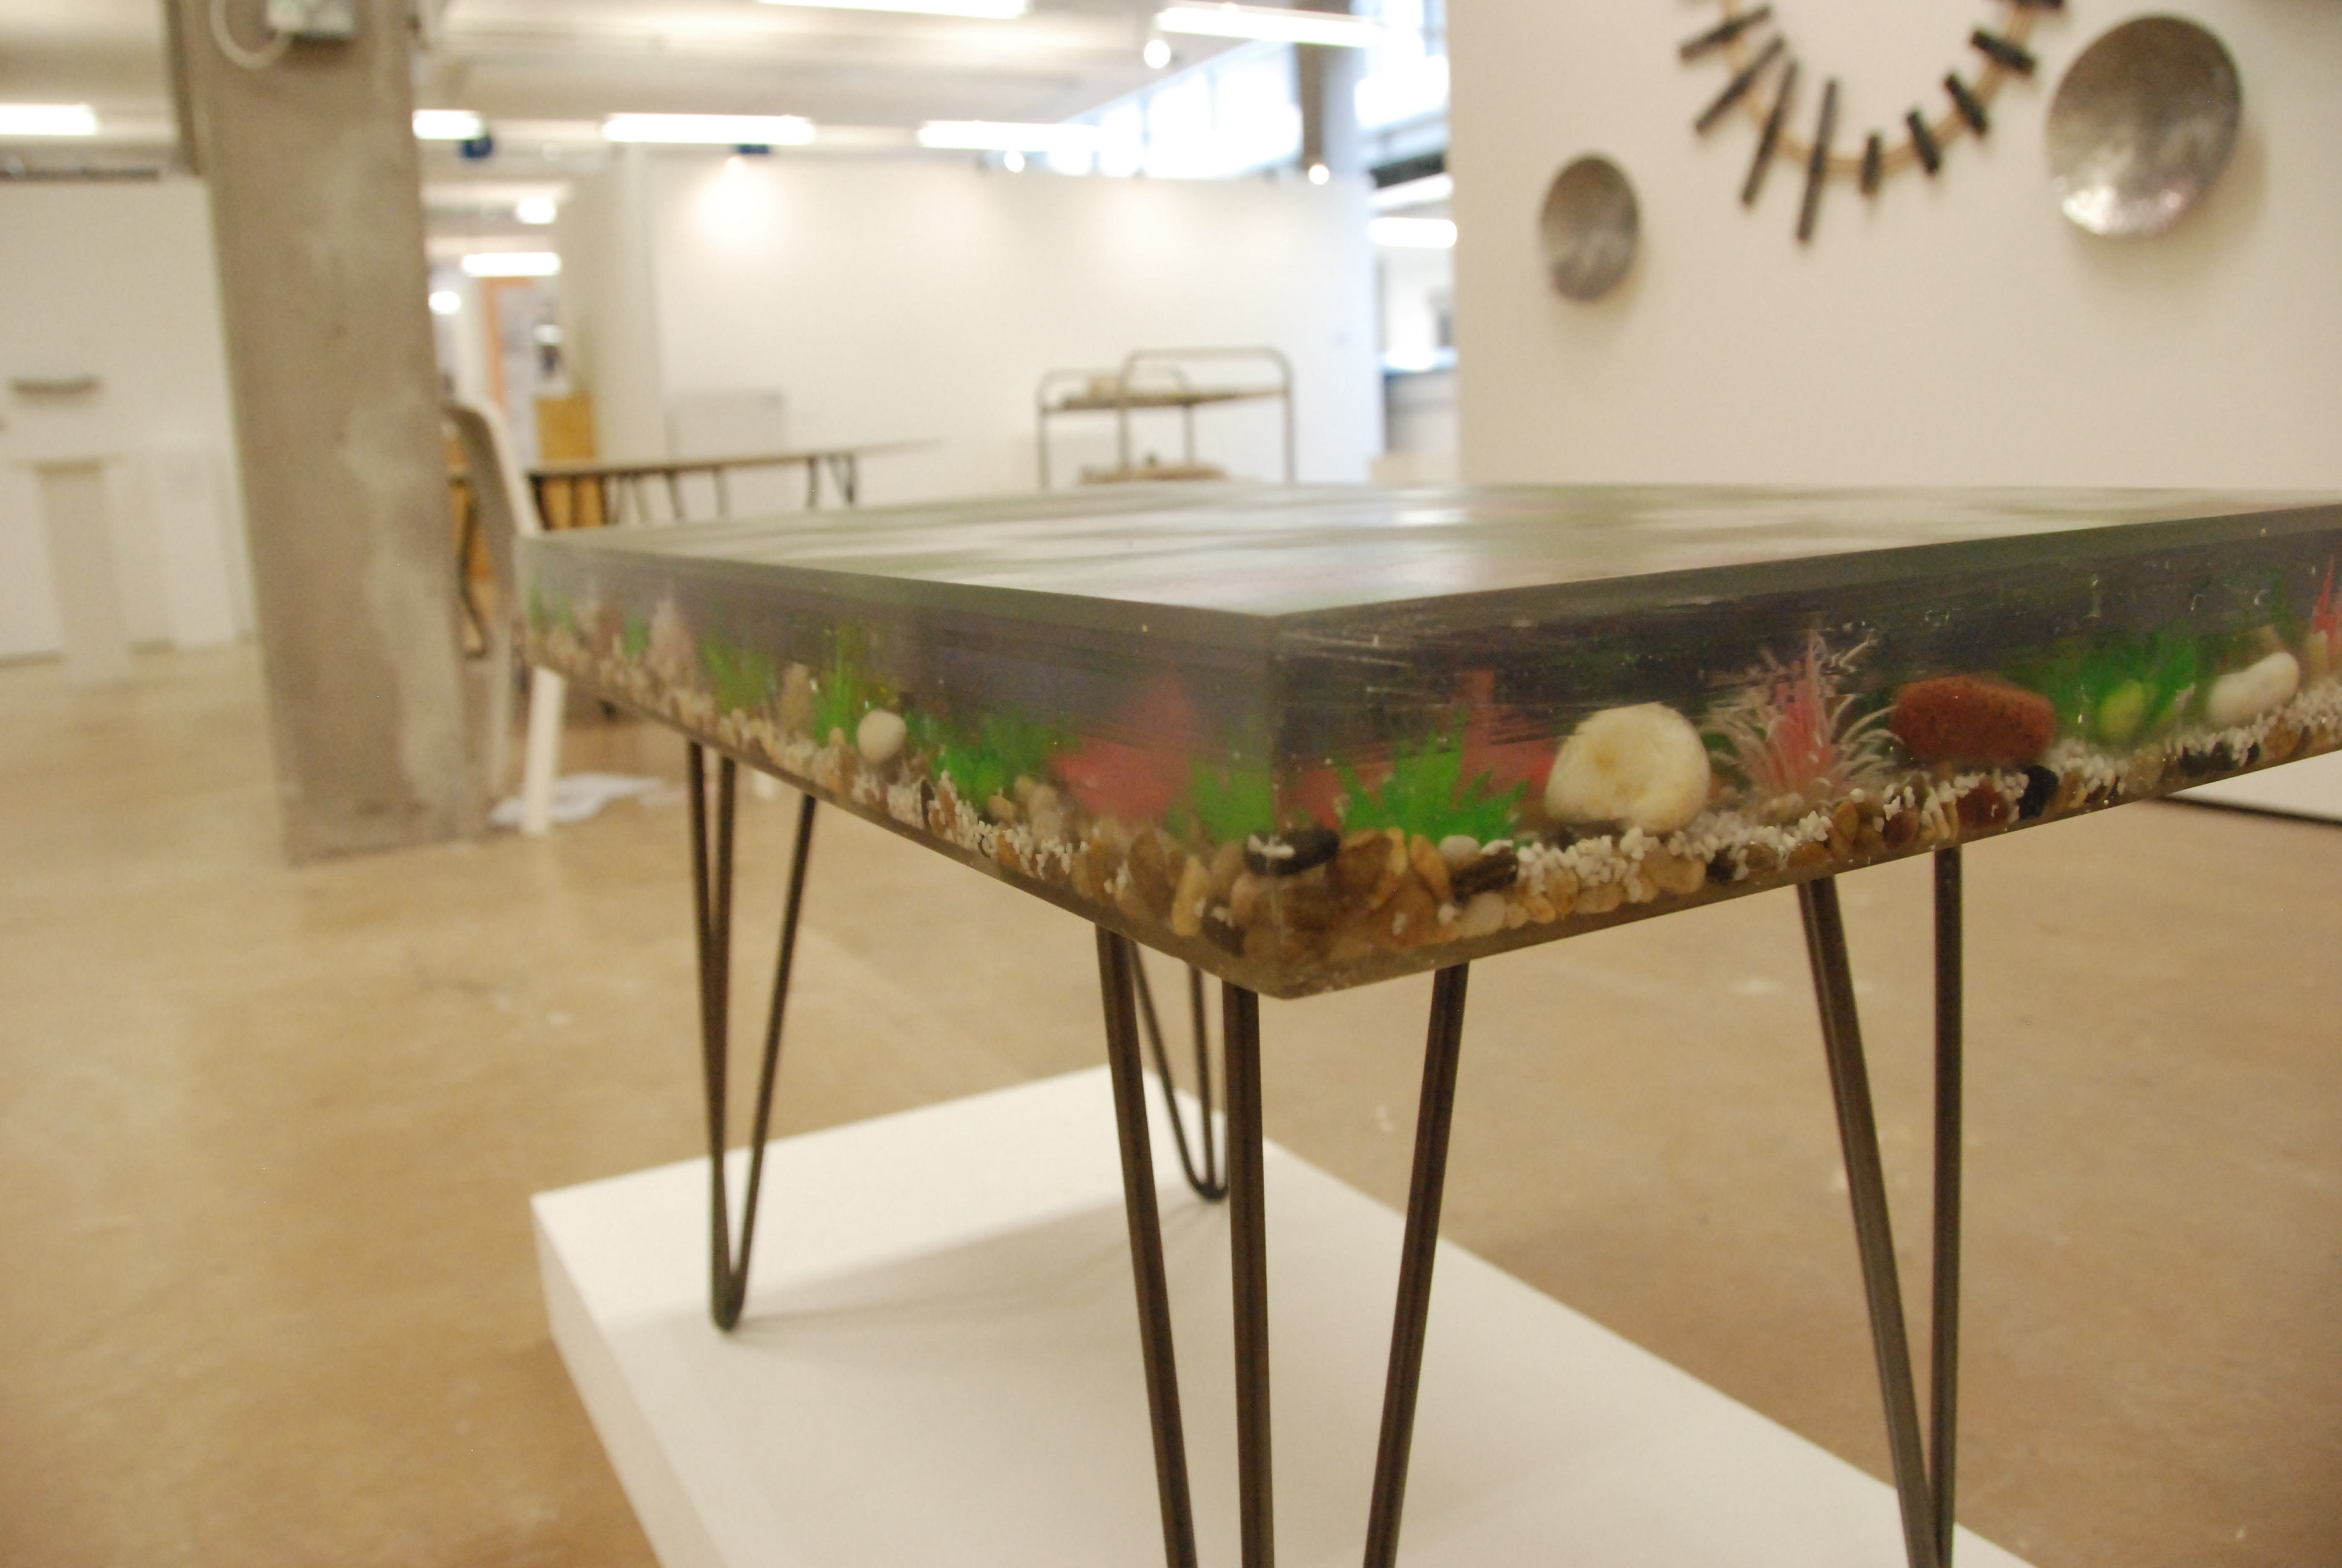
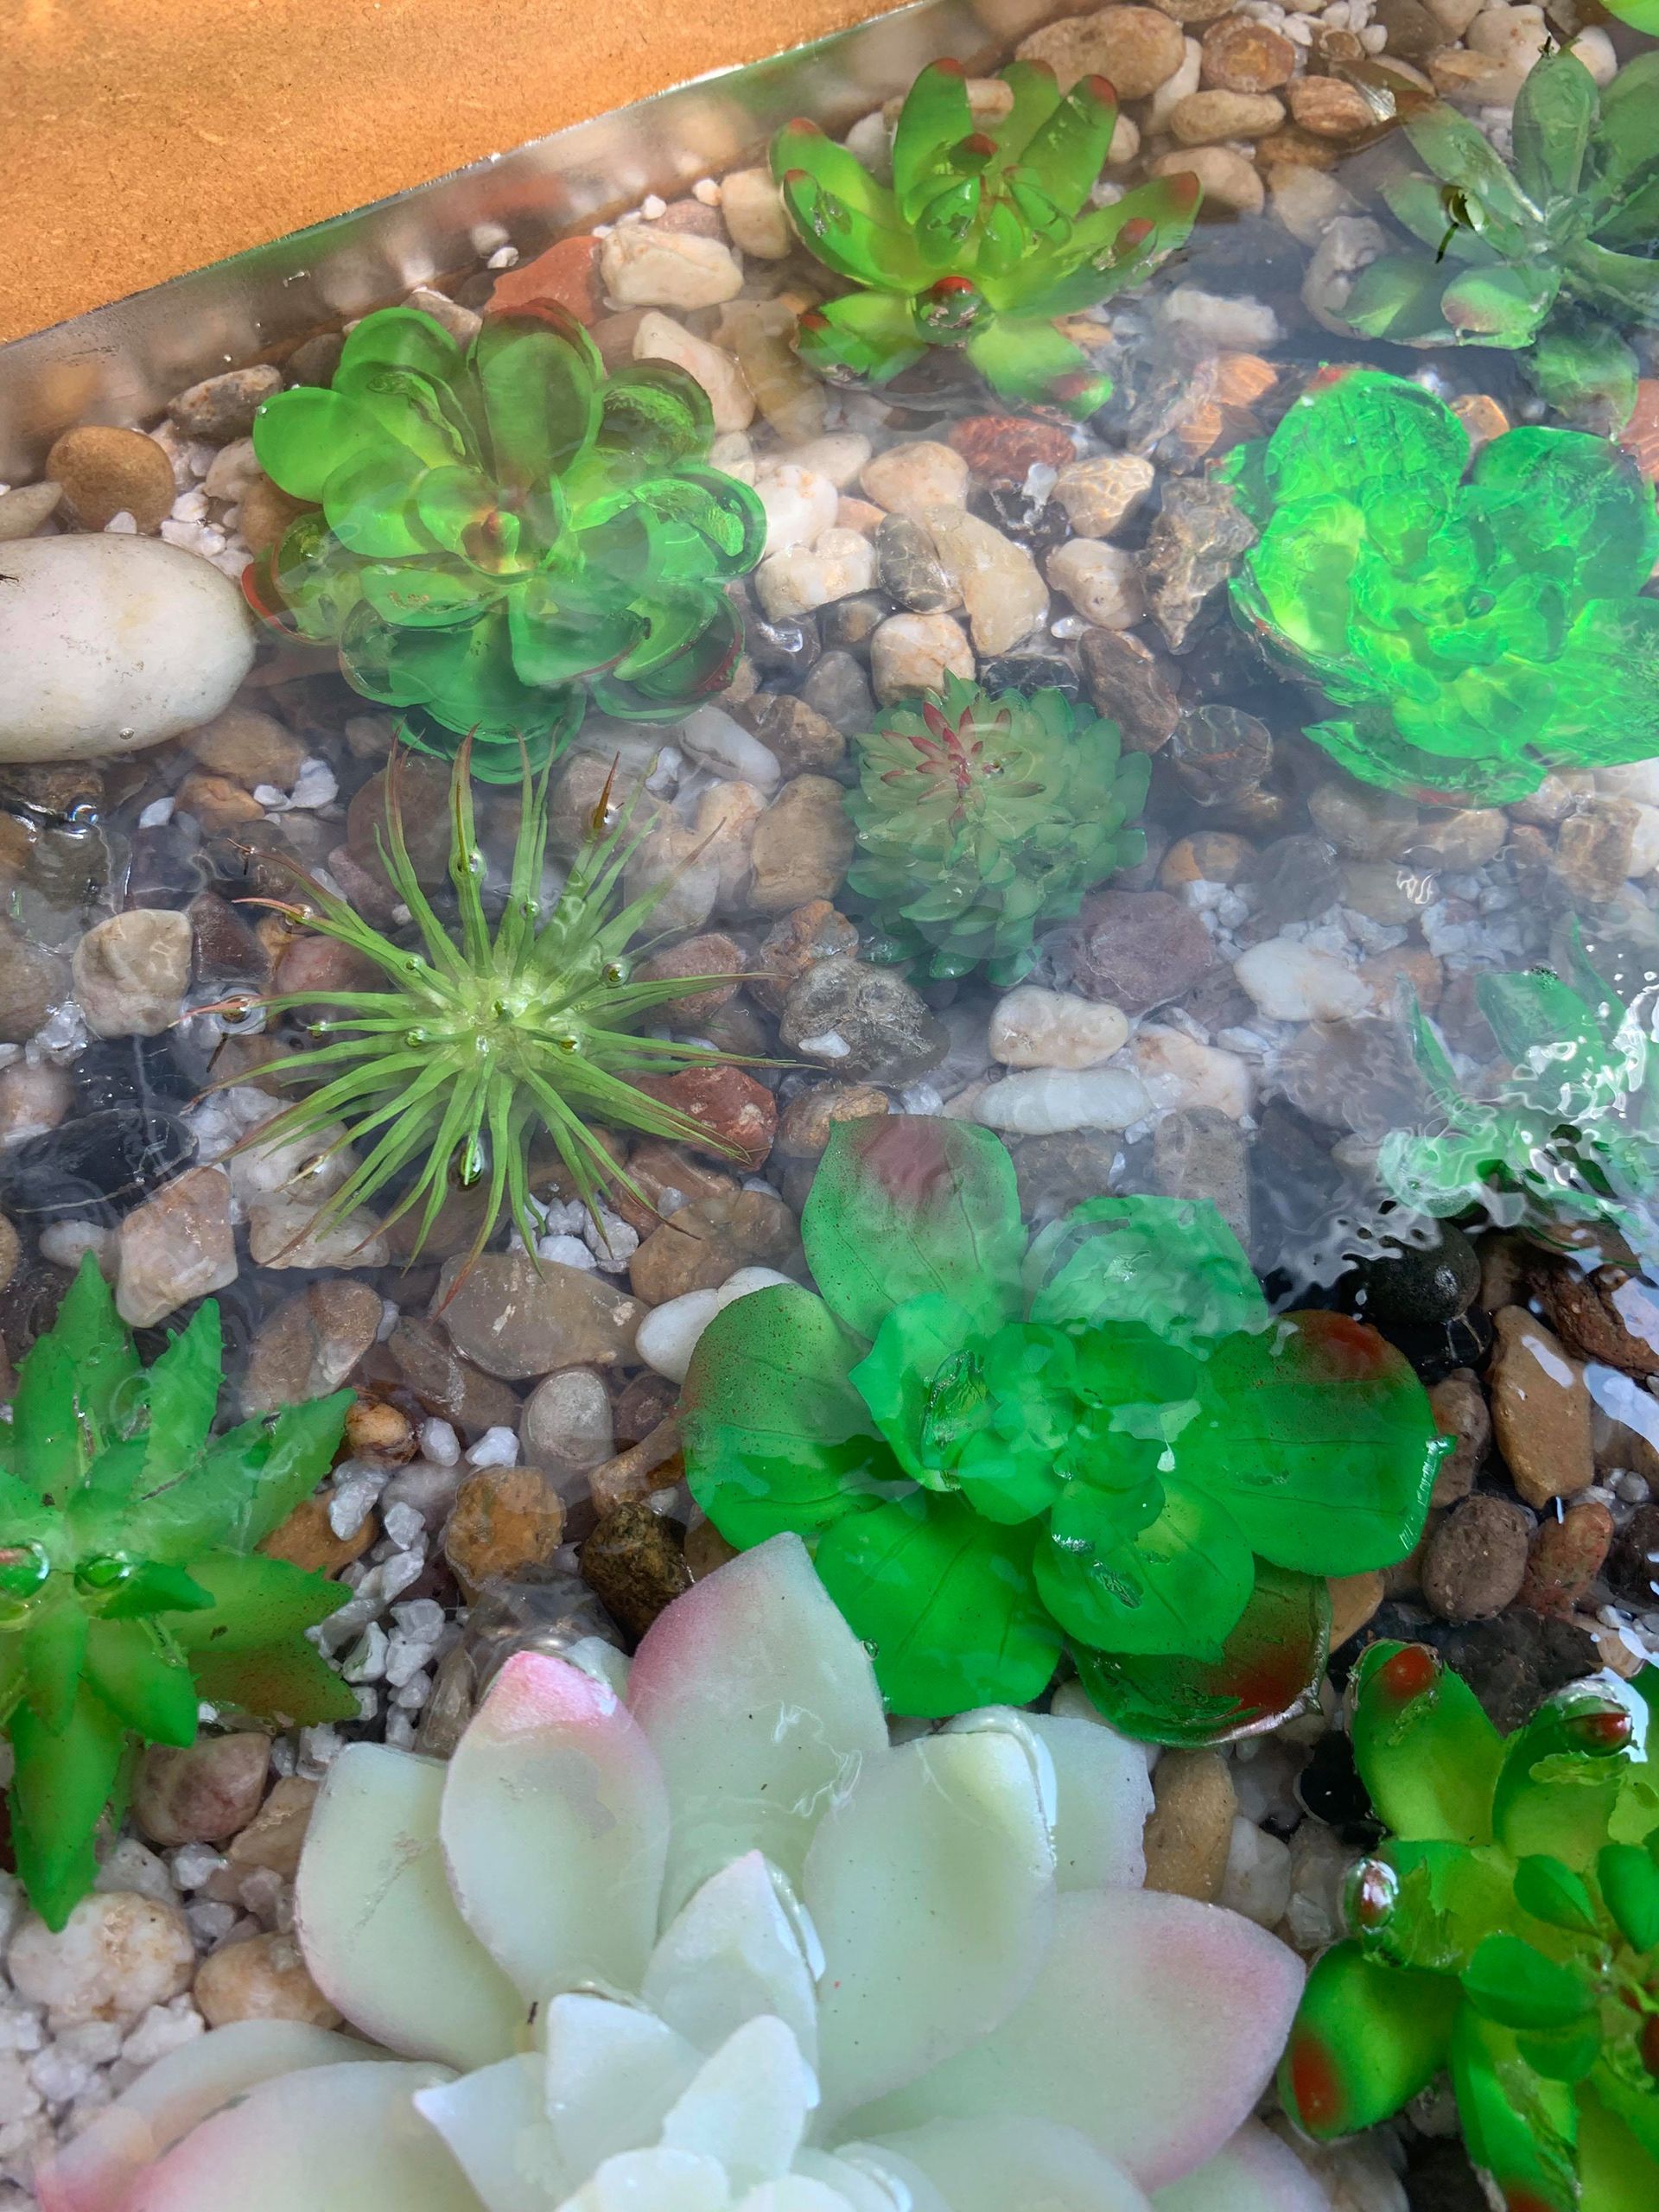
The next stage for me was to start sampling the resin. I got the resin from an online source; I wasn’t sure how good the quality was going to be but from what I saw it was going to be reasonable. The resin I got was polyester casting resin. I hadn't used this type of resin before and so knew that I definitely needed to sample it. The mix consistency was very good; in my experience some resins can be a bit cloudy, however, this wasn’t the case. The resin was water clear; as it was labelled. It was easy to mix and fluid; I find that some resins can be quite dense and isn’t that easy to manipulate.
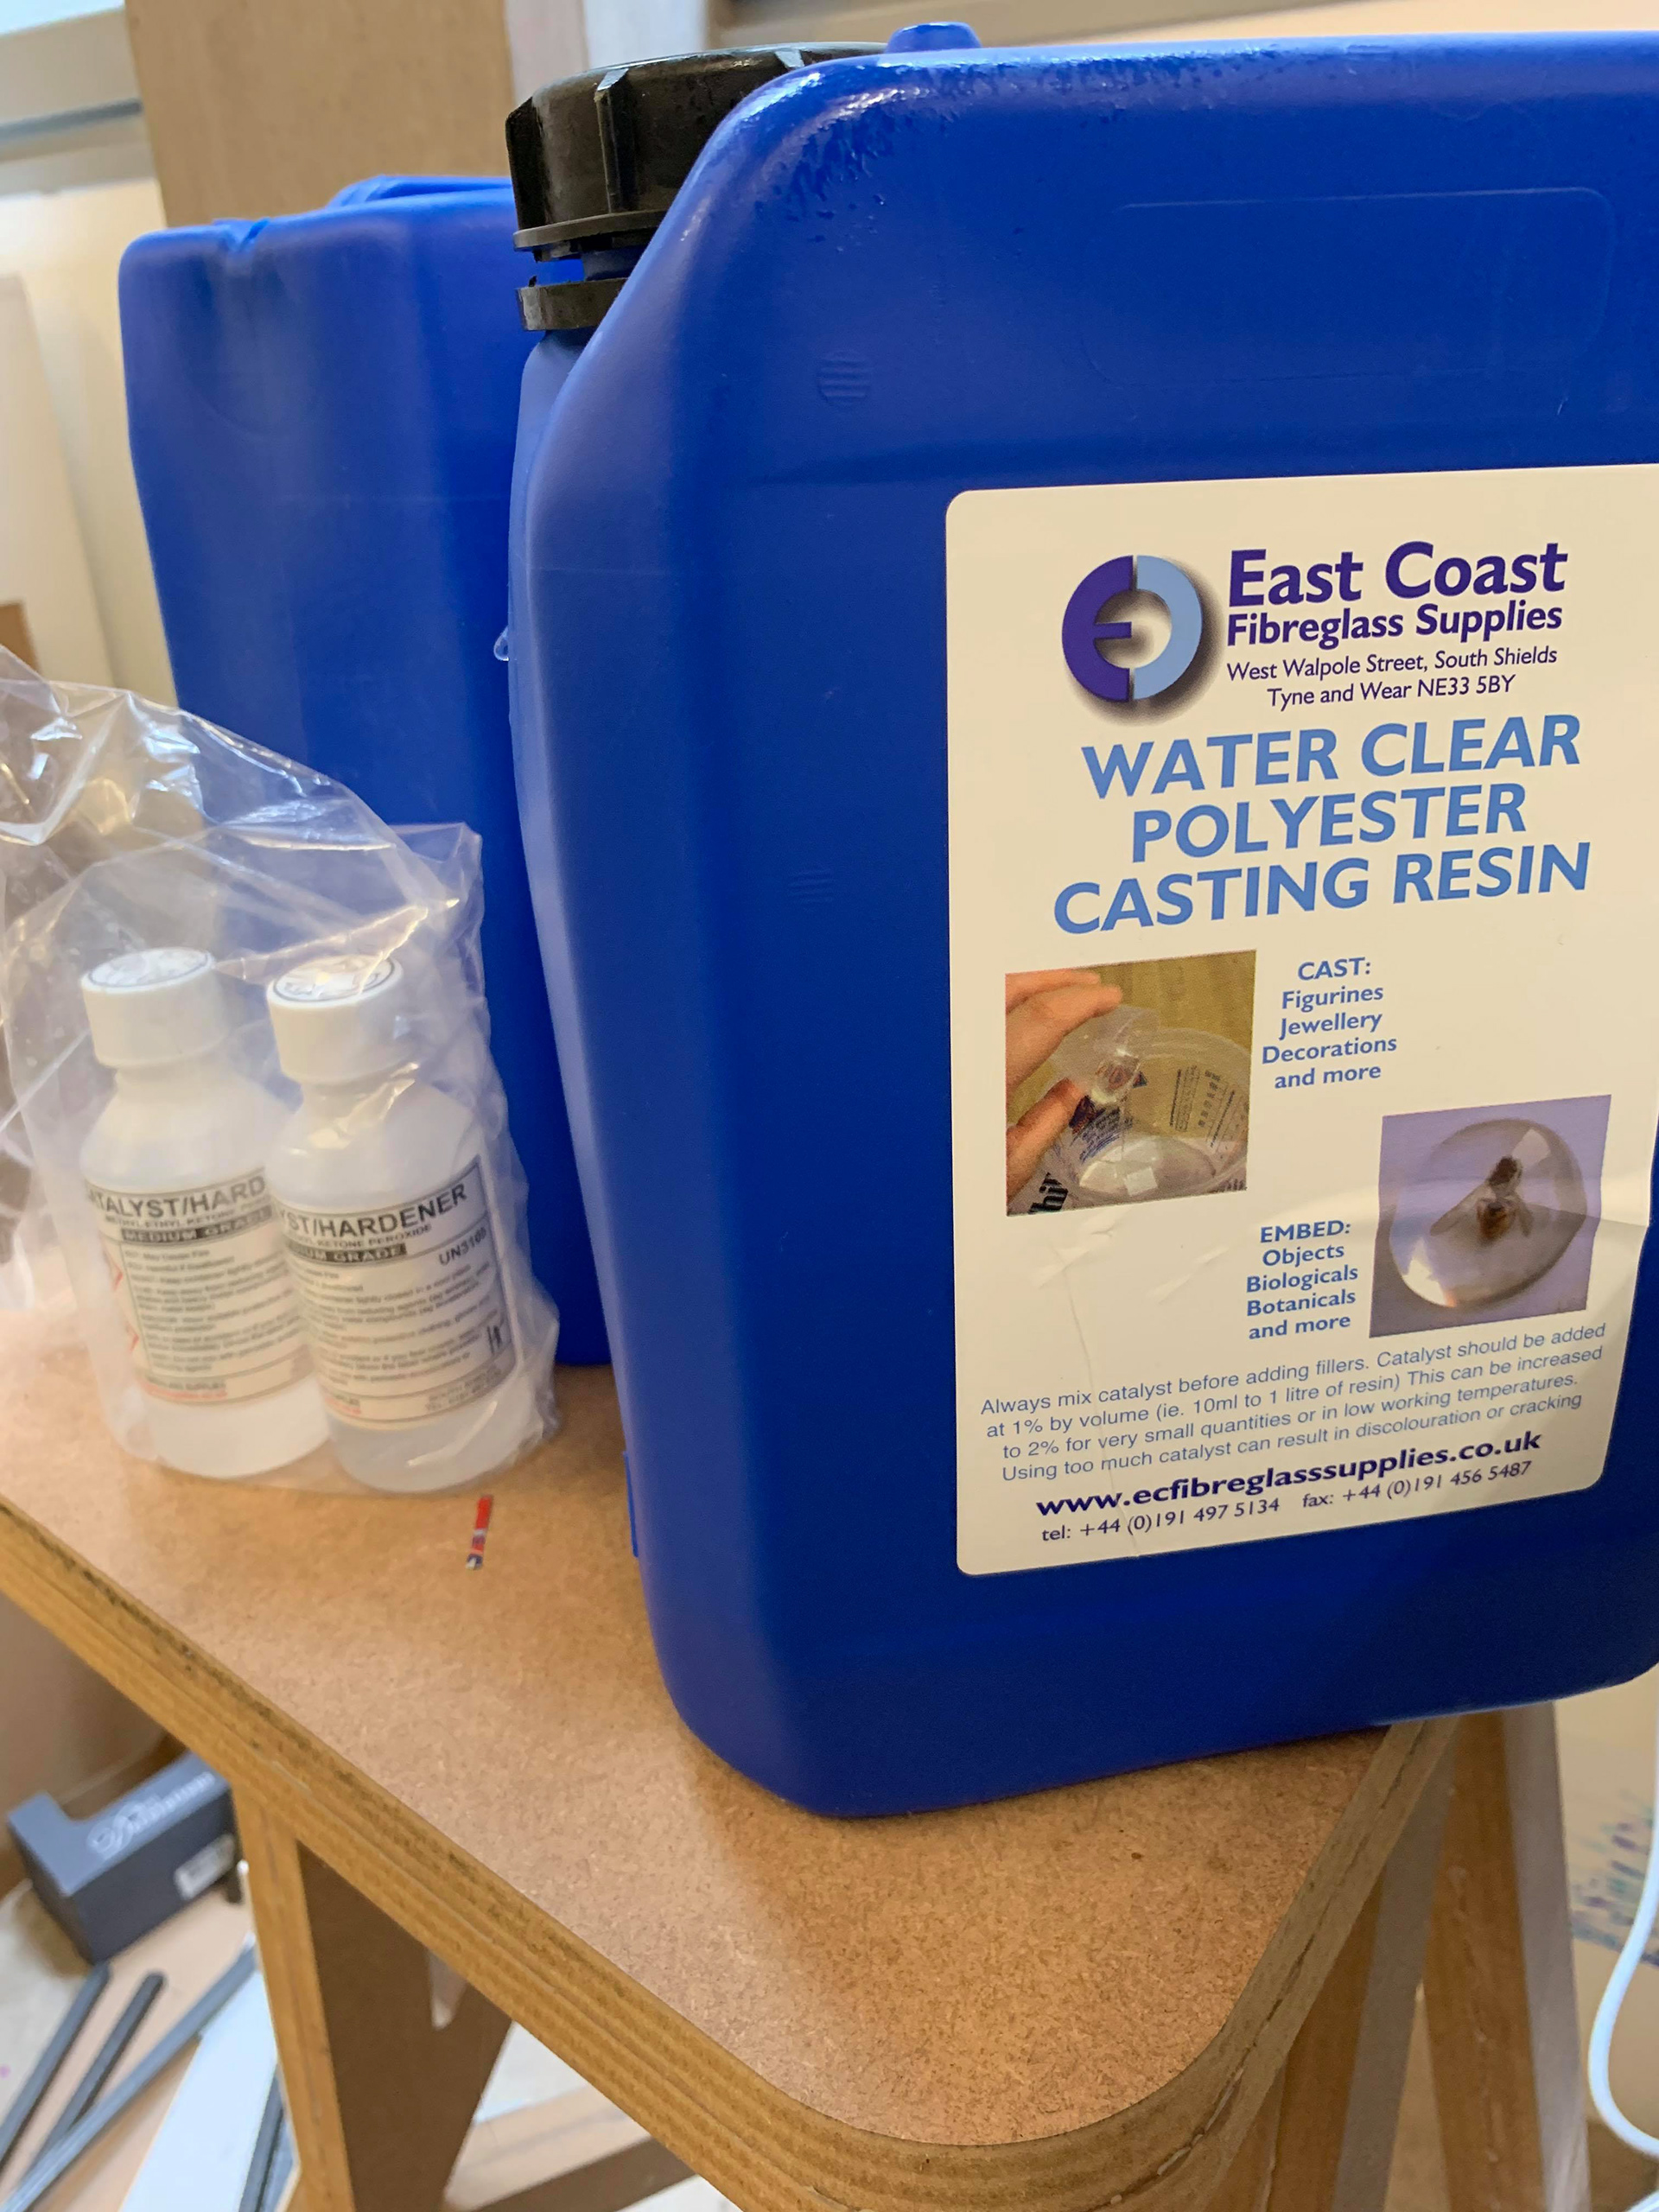
Image of the resin.
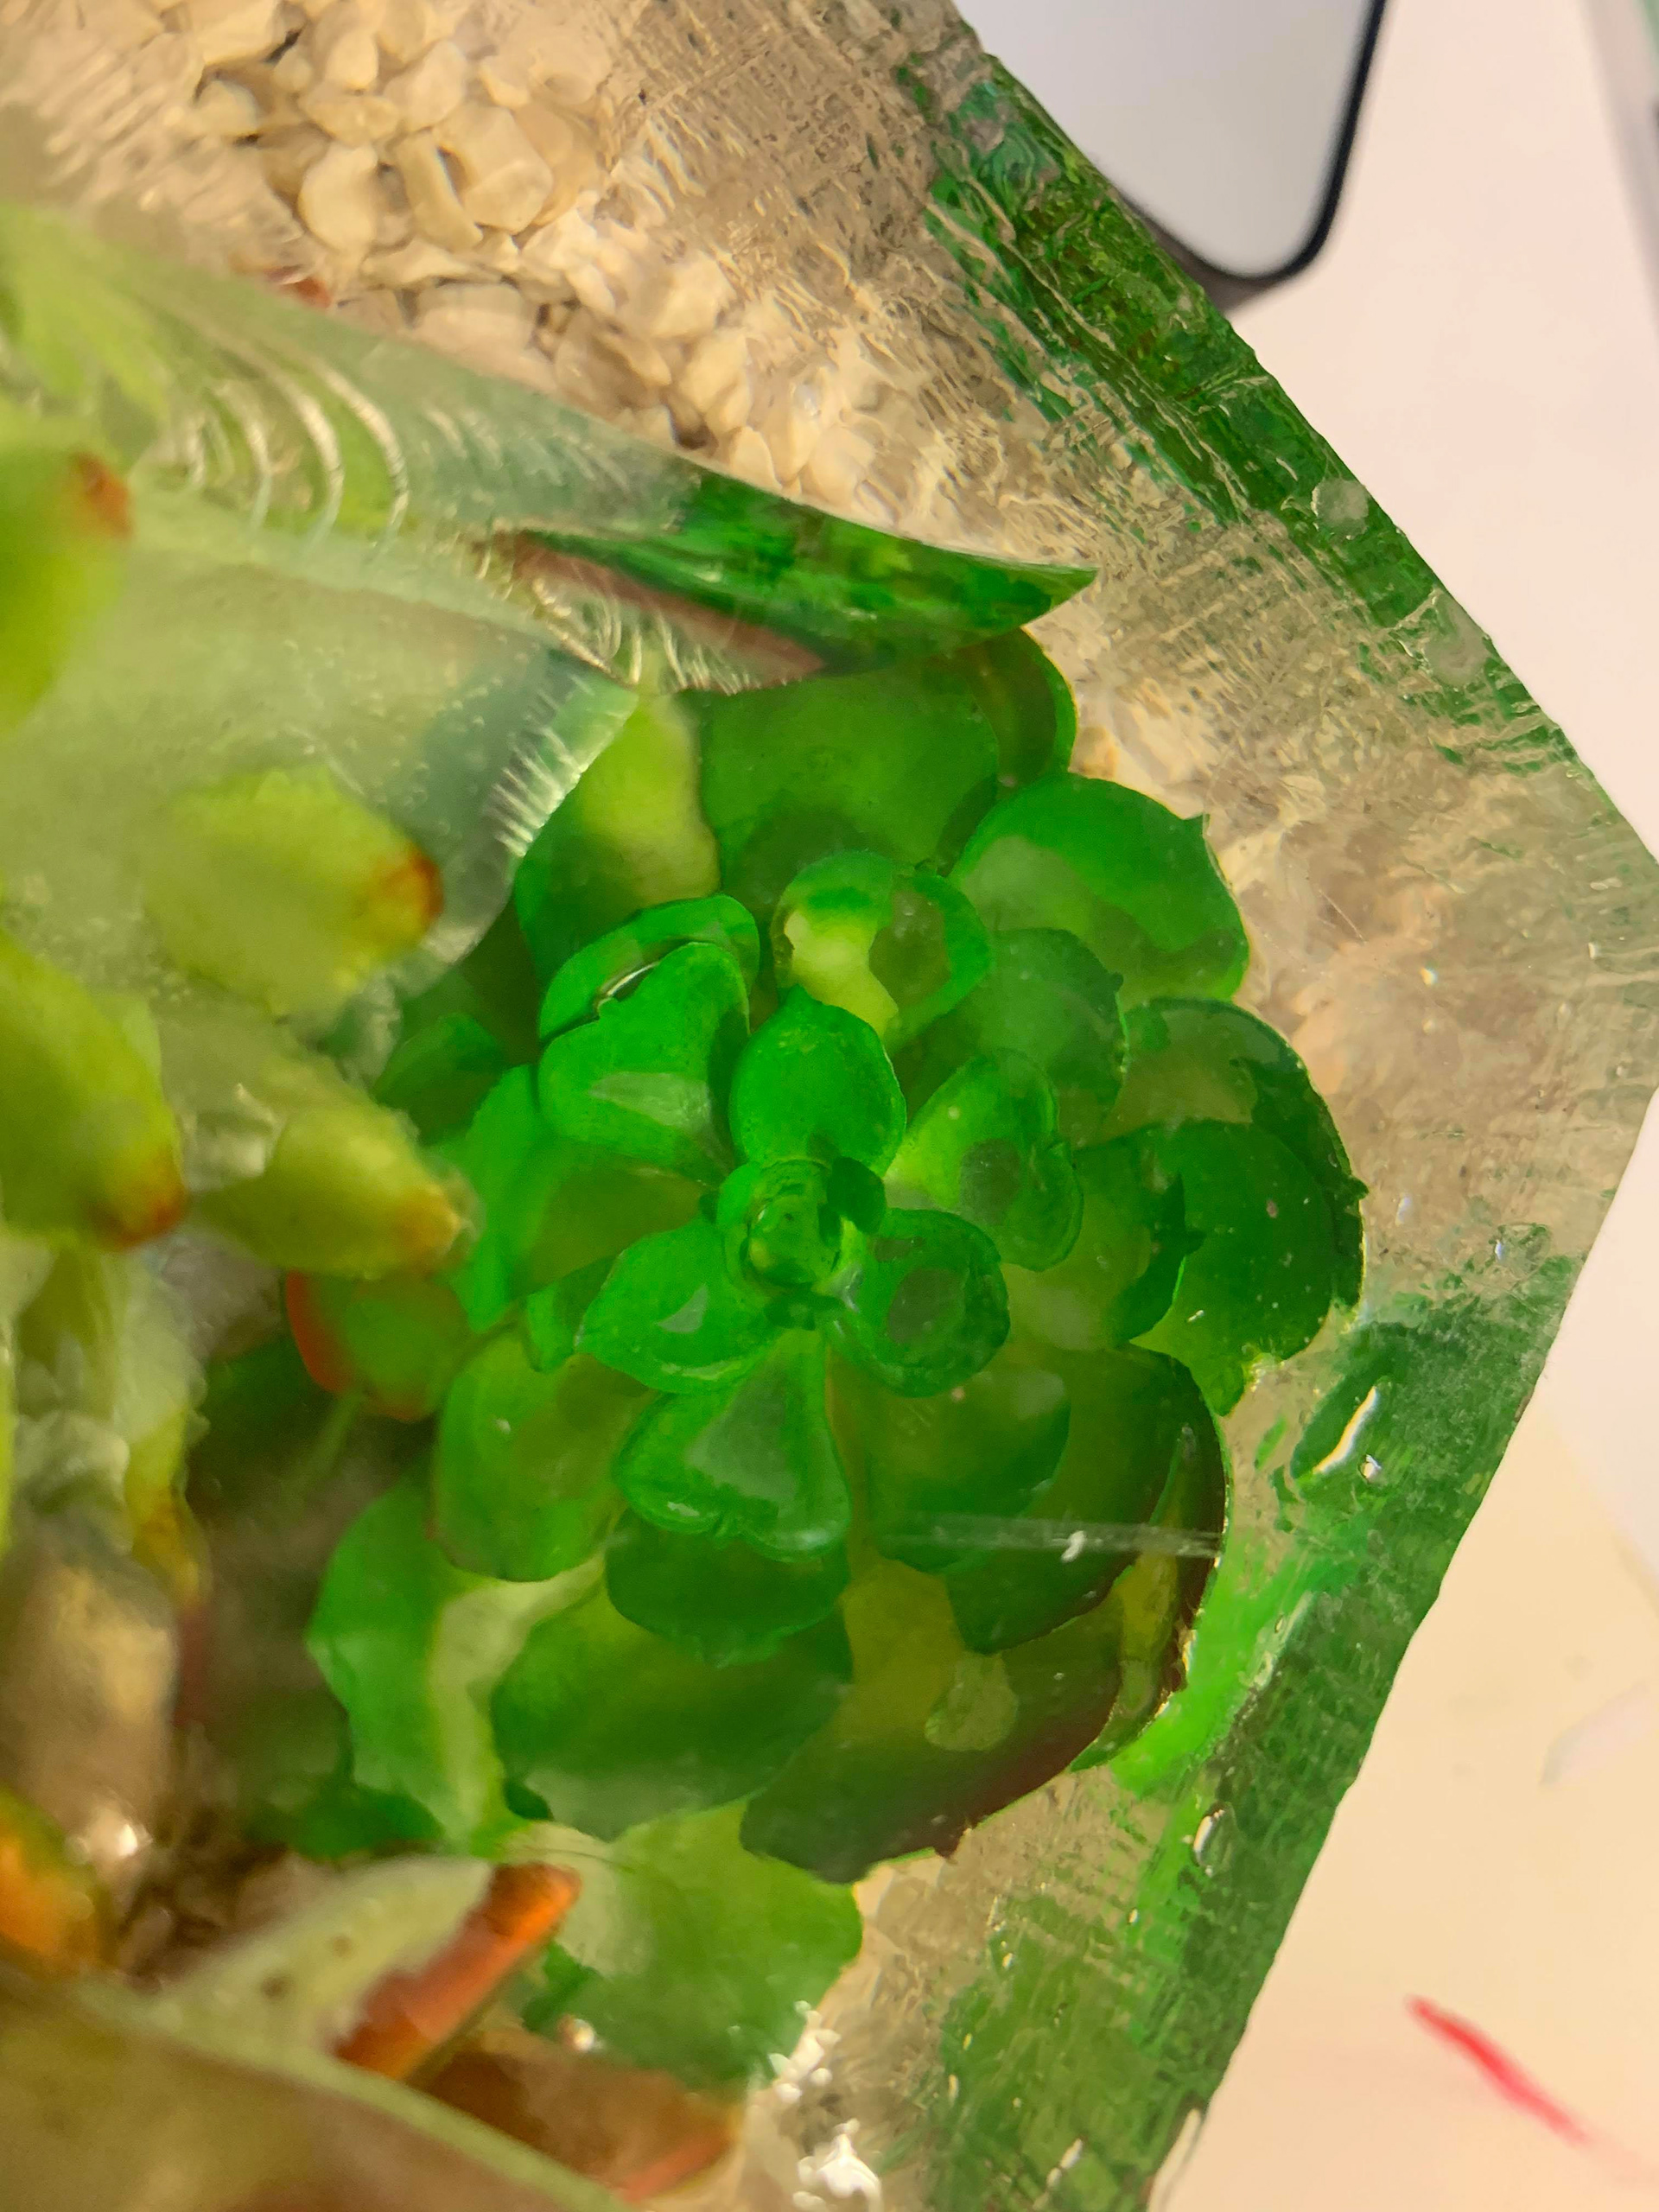
Due to the movement of the material, the pour was easy and didn’t actually make the objects float like I was worried they would. I did the pour in several layers but didn’t realise how hot the material got whilst it was setting or how long I needed to wait between layers. The heat generated by the material setting was something I underestimated. As I didn’t wait long enough between each pour the heat generated by all the layers actually caused some of the plastic plants to melt. I spoke to martin and that really shouldn’t have happened. I now know that I should really be waiting 8 or more hours between each pour; this should mean that the same amount of heat will definitely not happen again. Another problem that occurred was that the resin started to crack; martin reassured me that this was also due to the amount of heat that was produced by all of the pours.
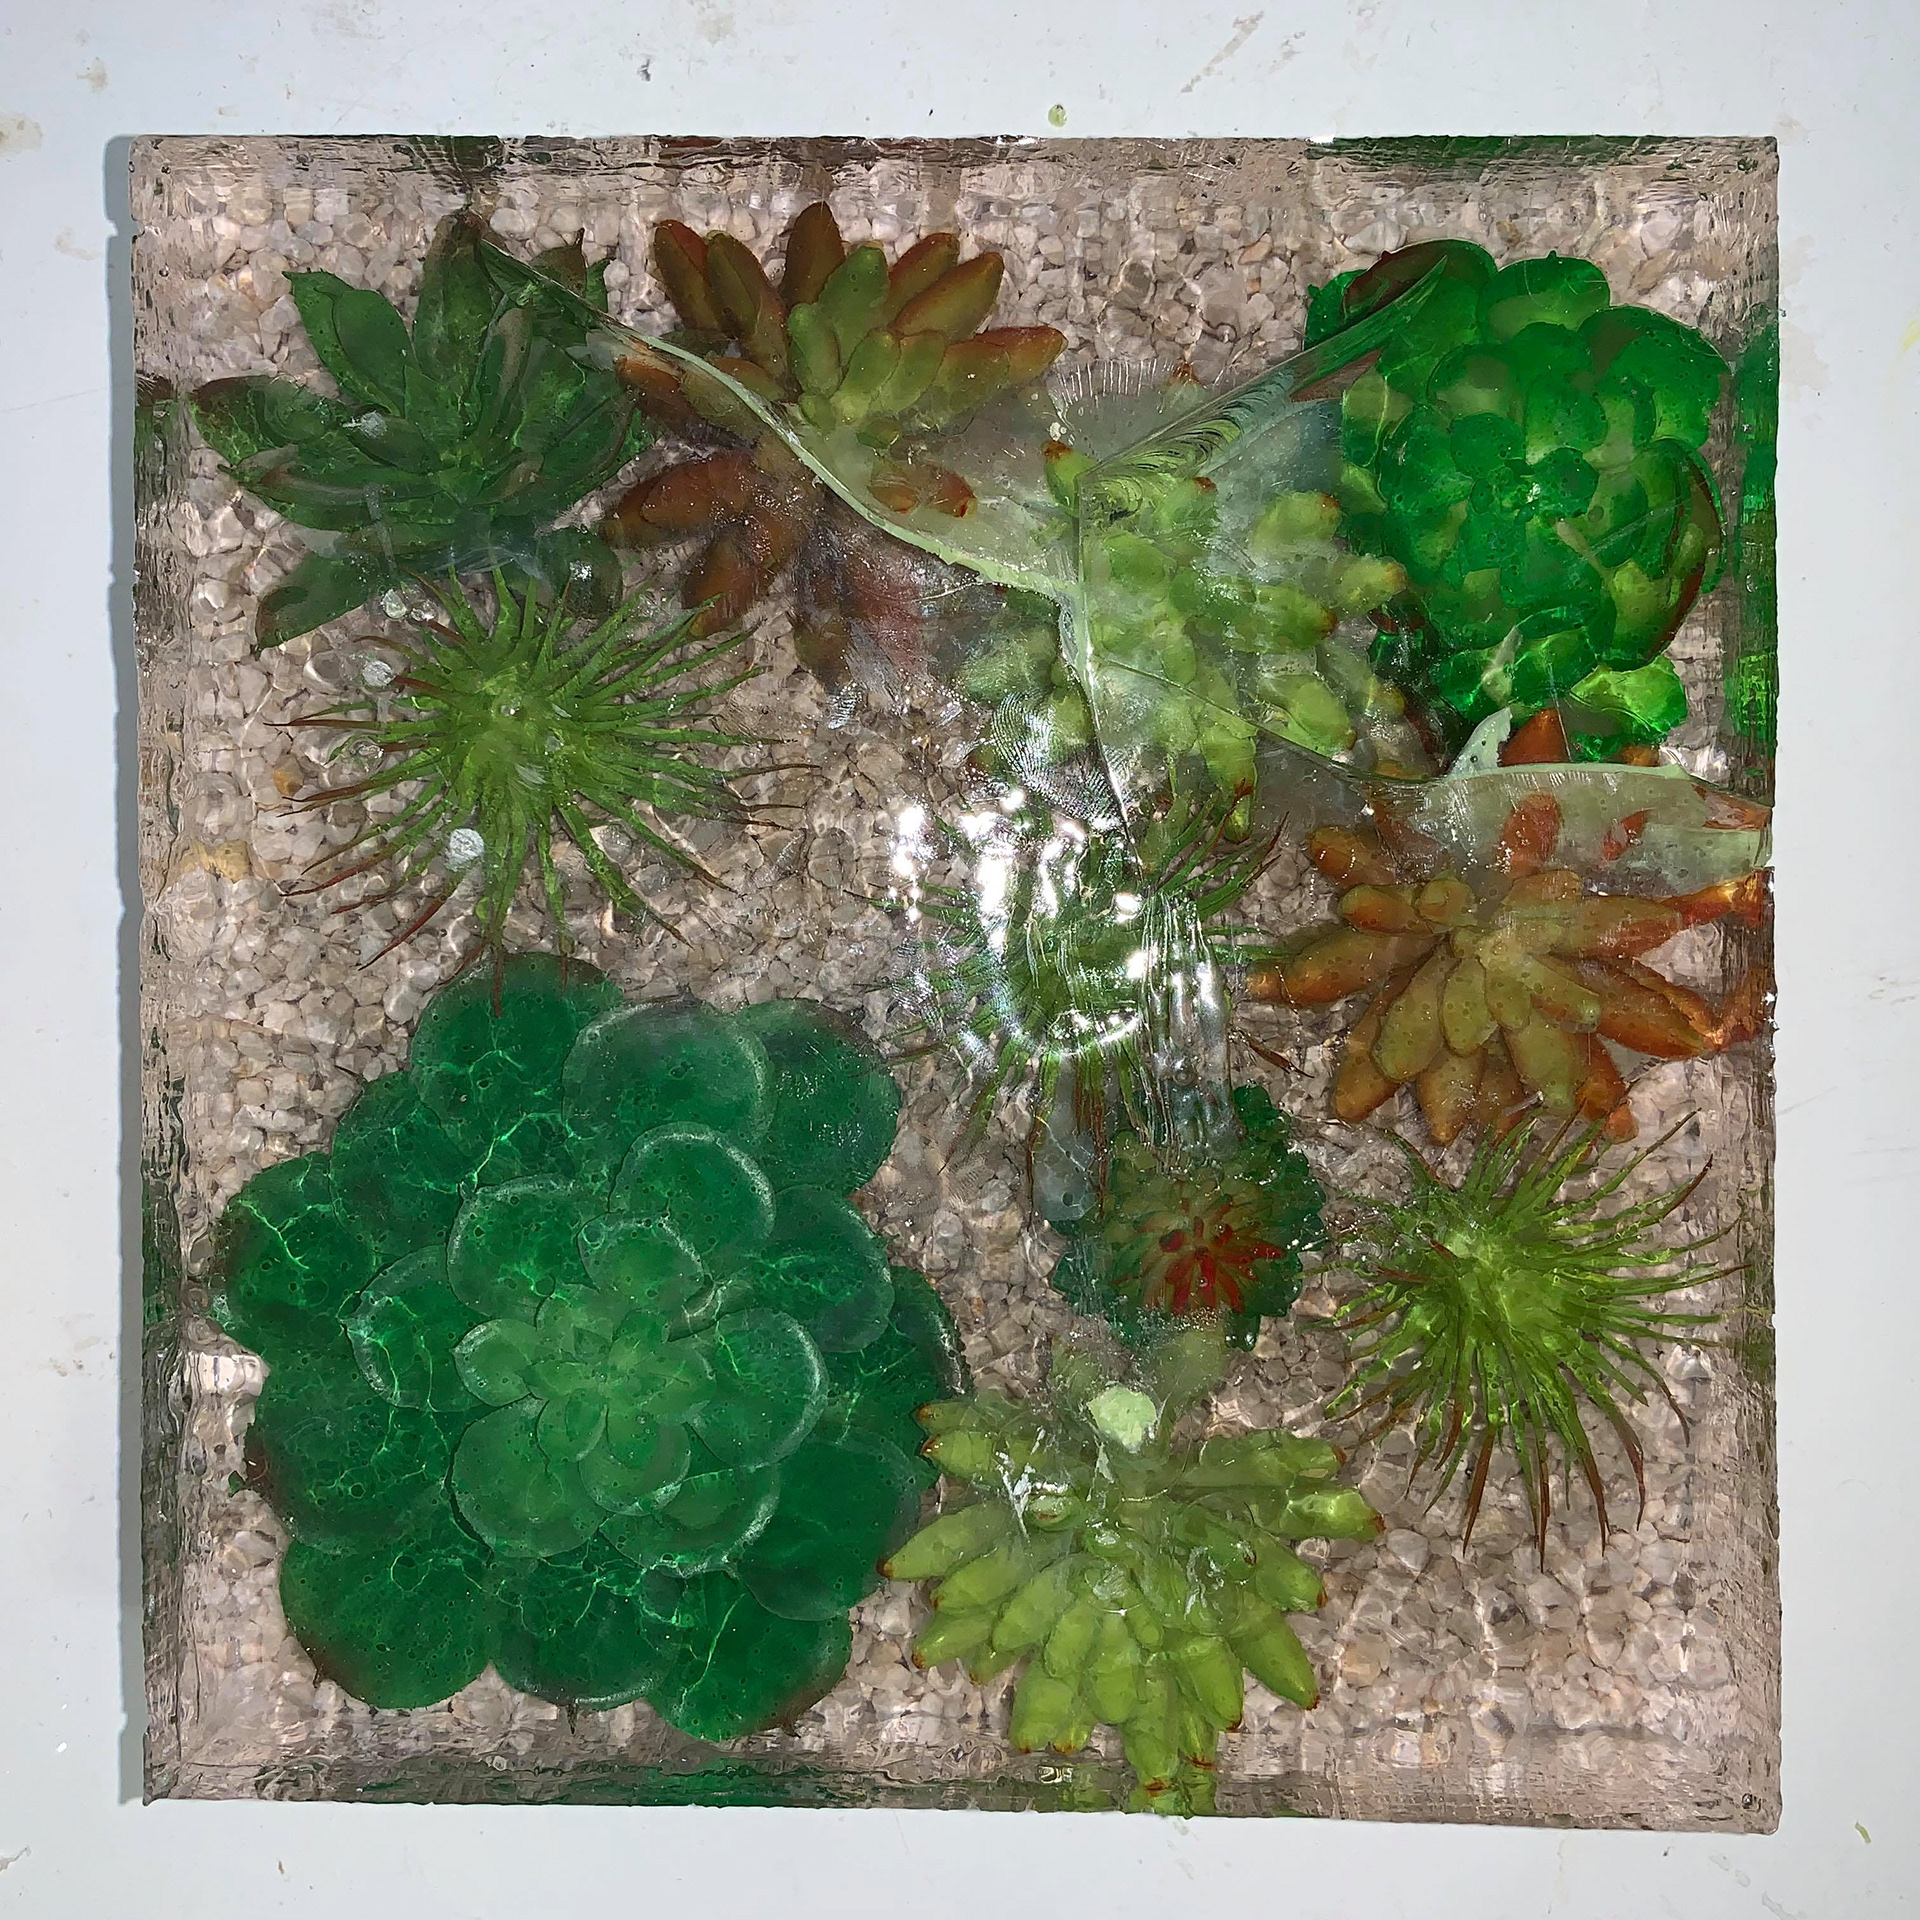
sample
As you can see the clarity of the resin is fantastic and is a brand that I will definitely investigate again. I'm sure that all of the problems that occurred were all my fault and due to my inexperience with the product.

Images of sample.
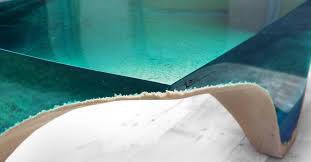
When it came to make the mould for the sample, I used MDF and liquid silicone to seal it. This left an interesting effect on the outside of the sample but isn’t what I want for the actual table. I want to create a smooth glass like finish that will let light pass through it with ease. This led to me having to find another way to seal the mould; it was recommended to me that I use wax. The wax would act as a resist and filler that wouldn’t make the resin stick. Once I had filled all corners and edges with the wax, I coated the face of the MDF with a shellac polish, this would help to create a surface that would stop the resin from sticking. After this, there was then 3 layers of sealant wax to make sure that it will release properly.


Images of completed mould
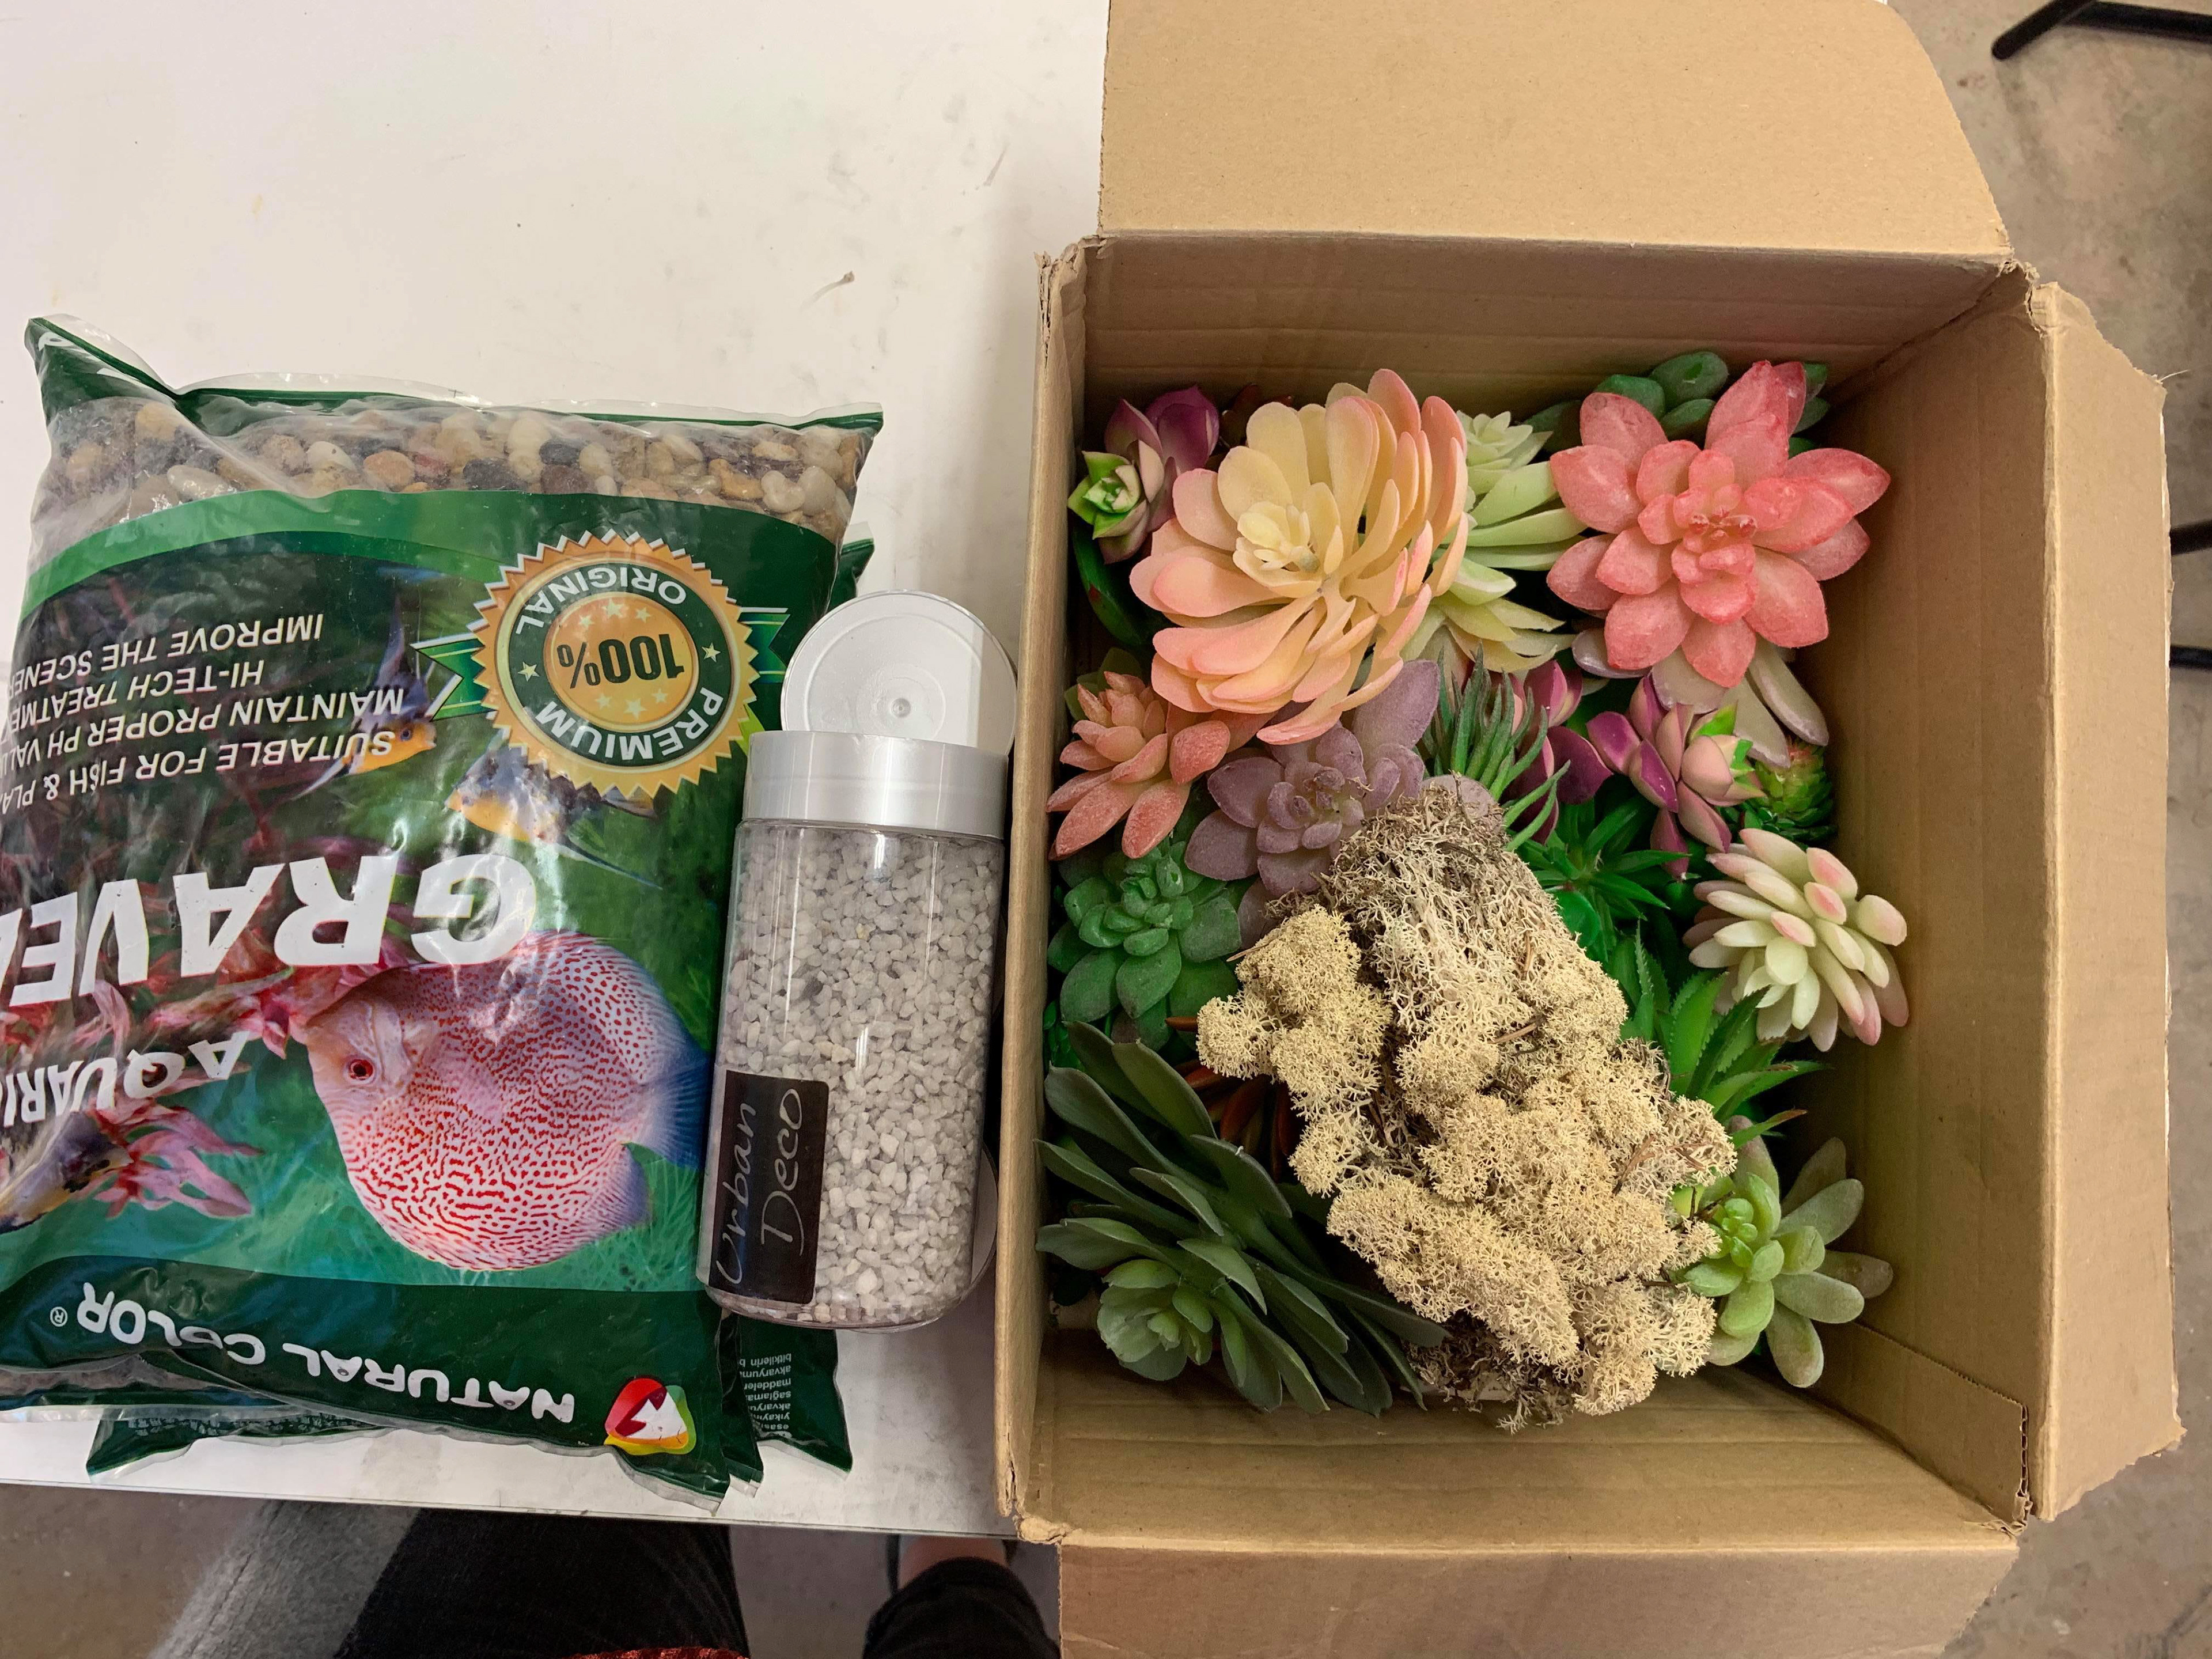
Materials sourced for table.
The plan for the pour is to do it 1cm at a time, this is approximately 4L of resin. The size of the mould should mean that there is a large enough surface area that the heat will disperse better. To tackle the problem of ventilation I am having to do the pours after hours when the number of people is at a minimum. I am also using the maker workshop with is extraction and with an open window. There is also a small extraction unit that can be used that is connected to a greenhouse of sorts that can send the fumes straight outside. The problem with the extraction for the resin is that the fumes sink as opposed to rise, which is why standard extraction units aren't great. Hopefully the precautions I am taking should be enough to cope with the situation.
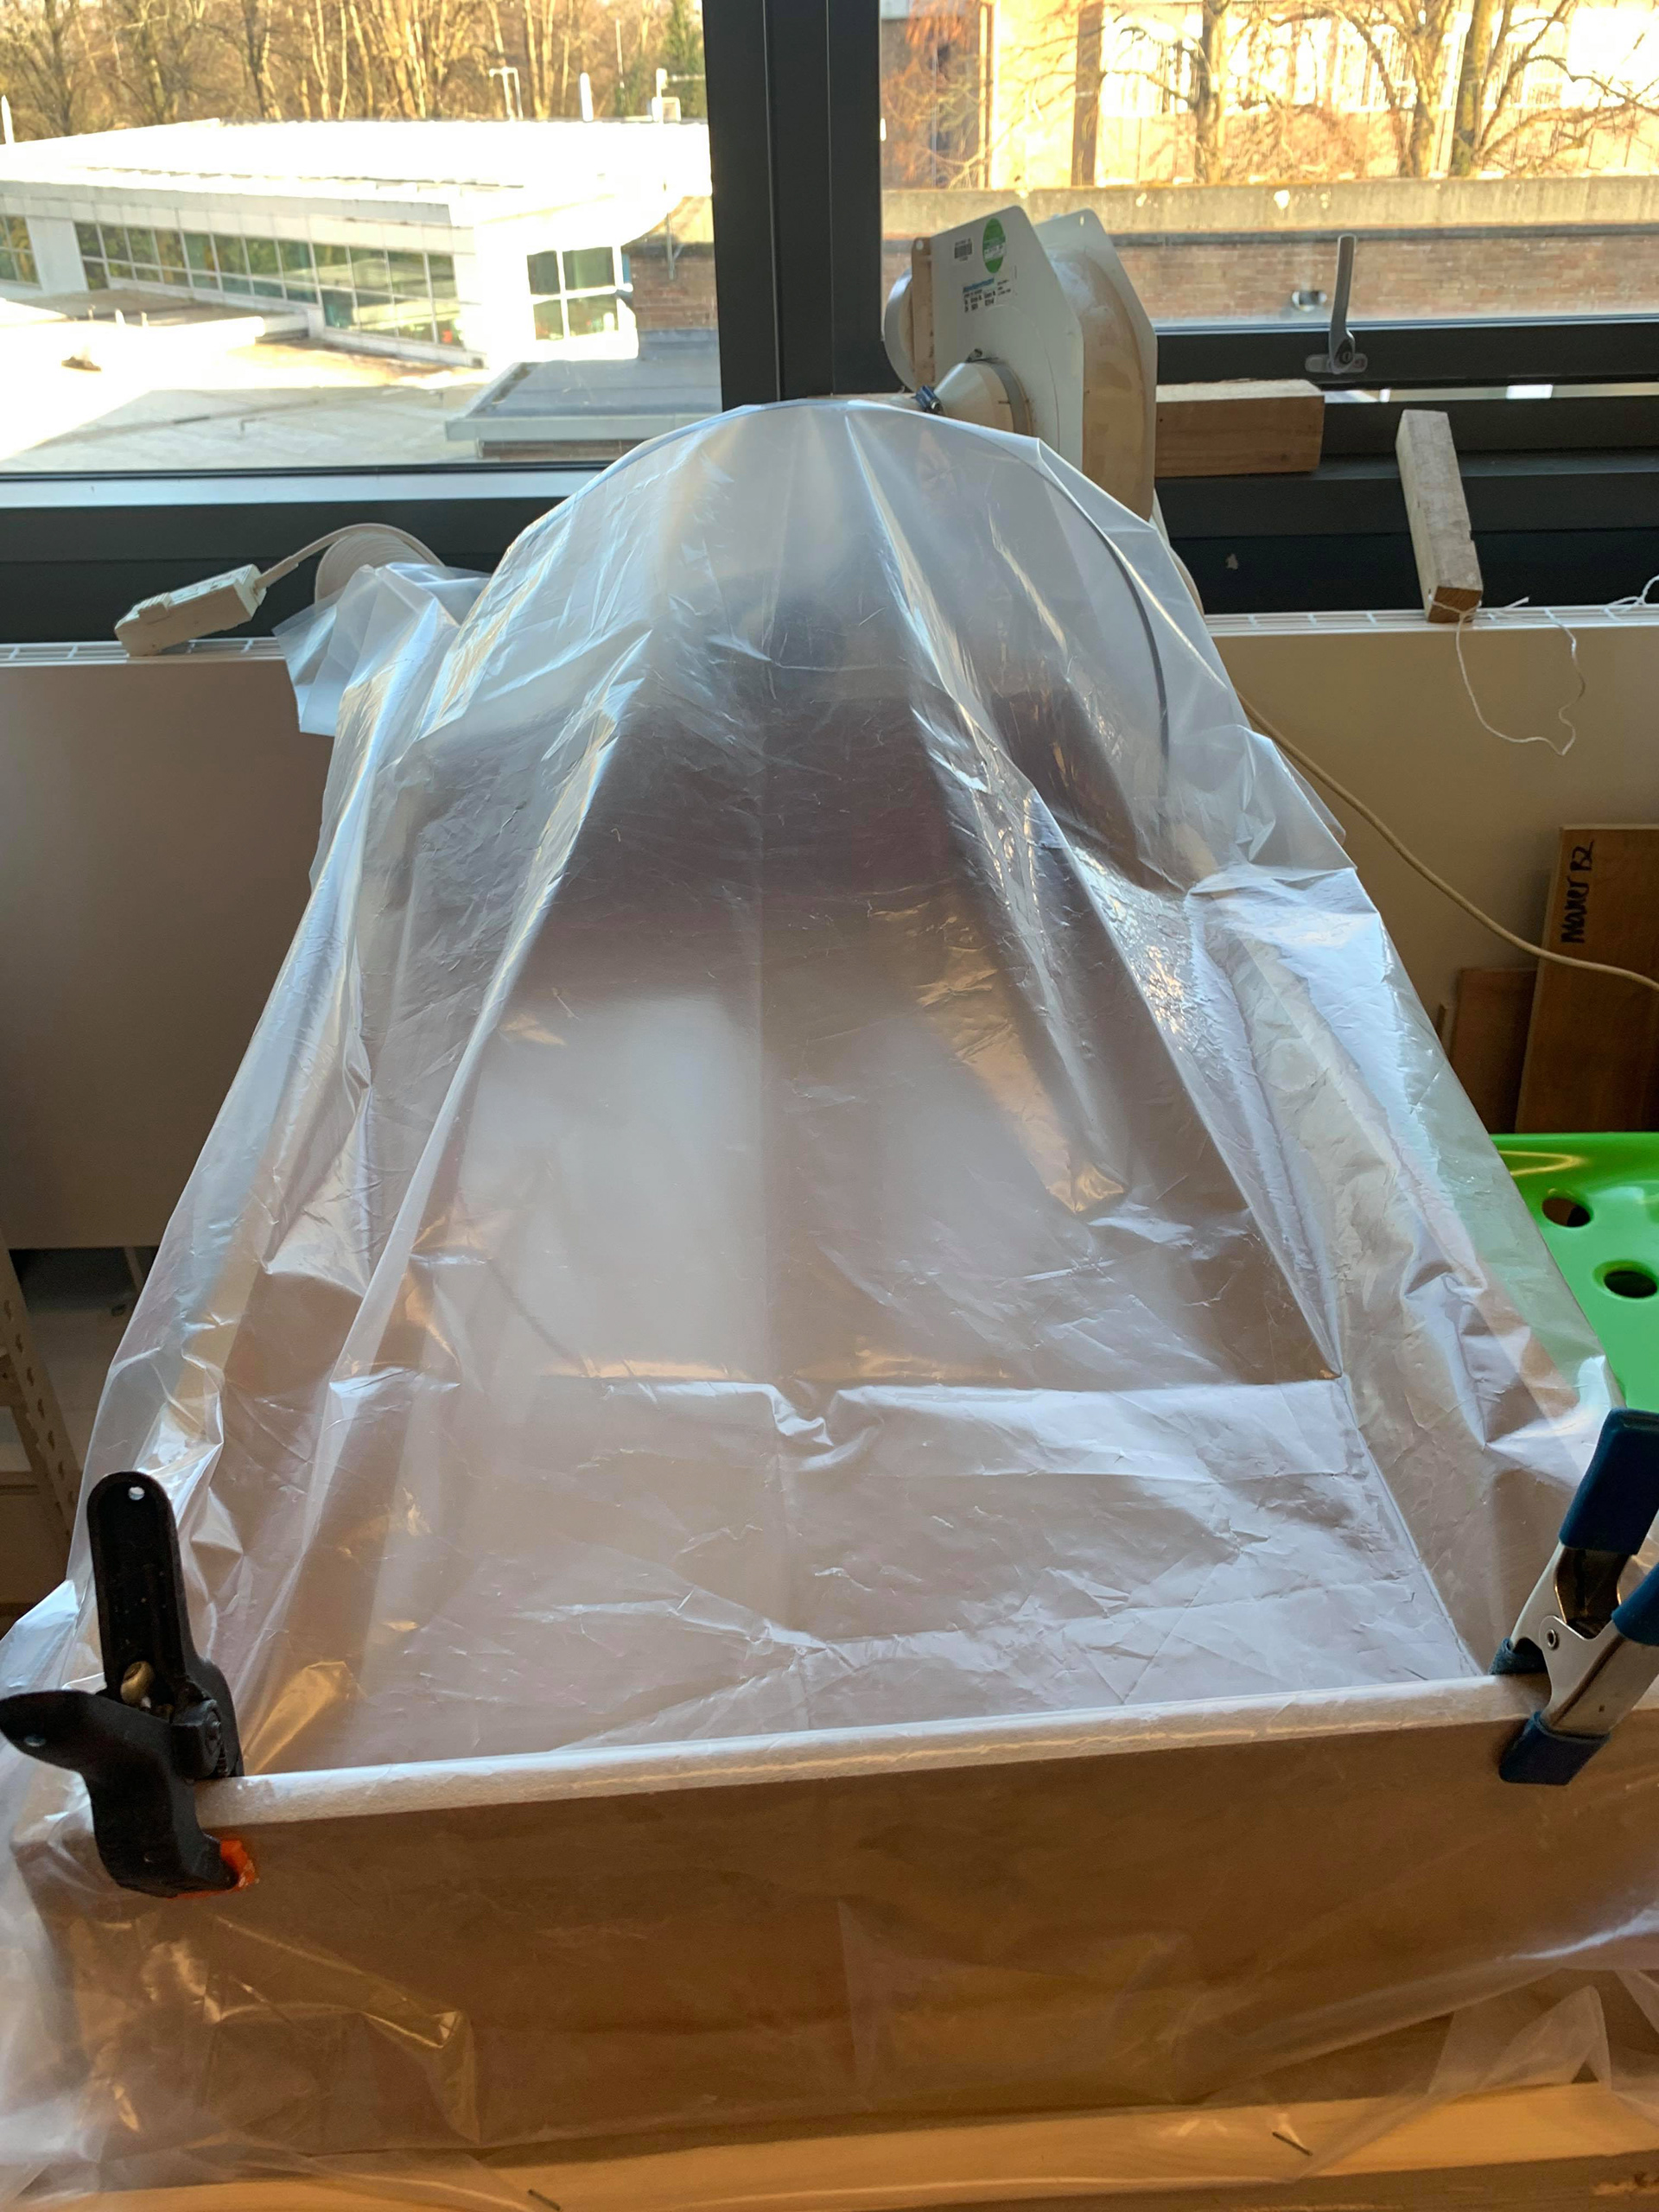

Images of set up and ventilation solution.
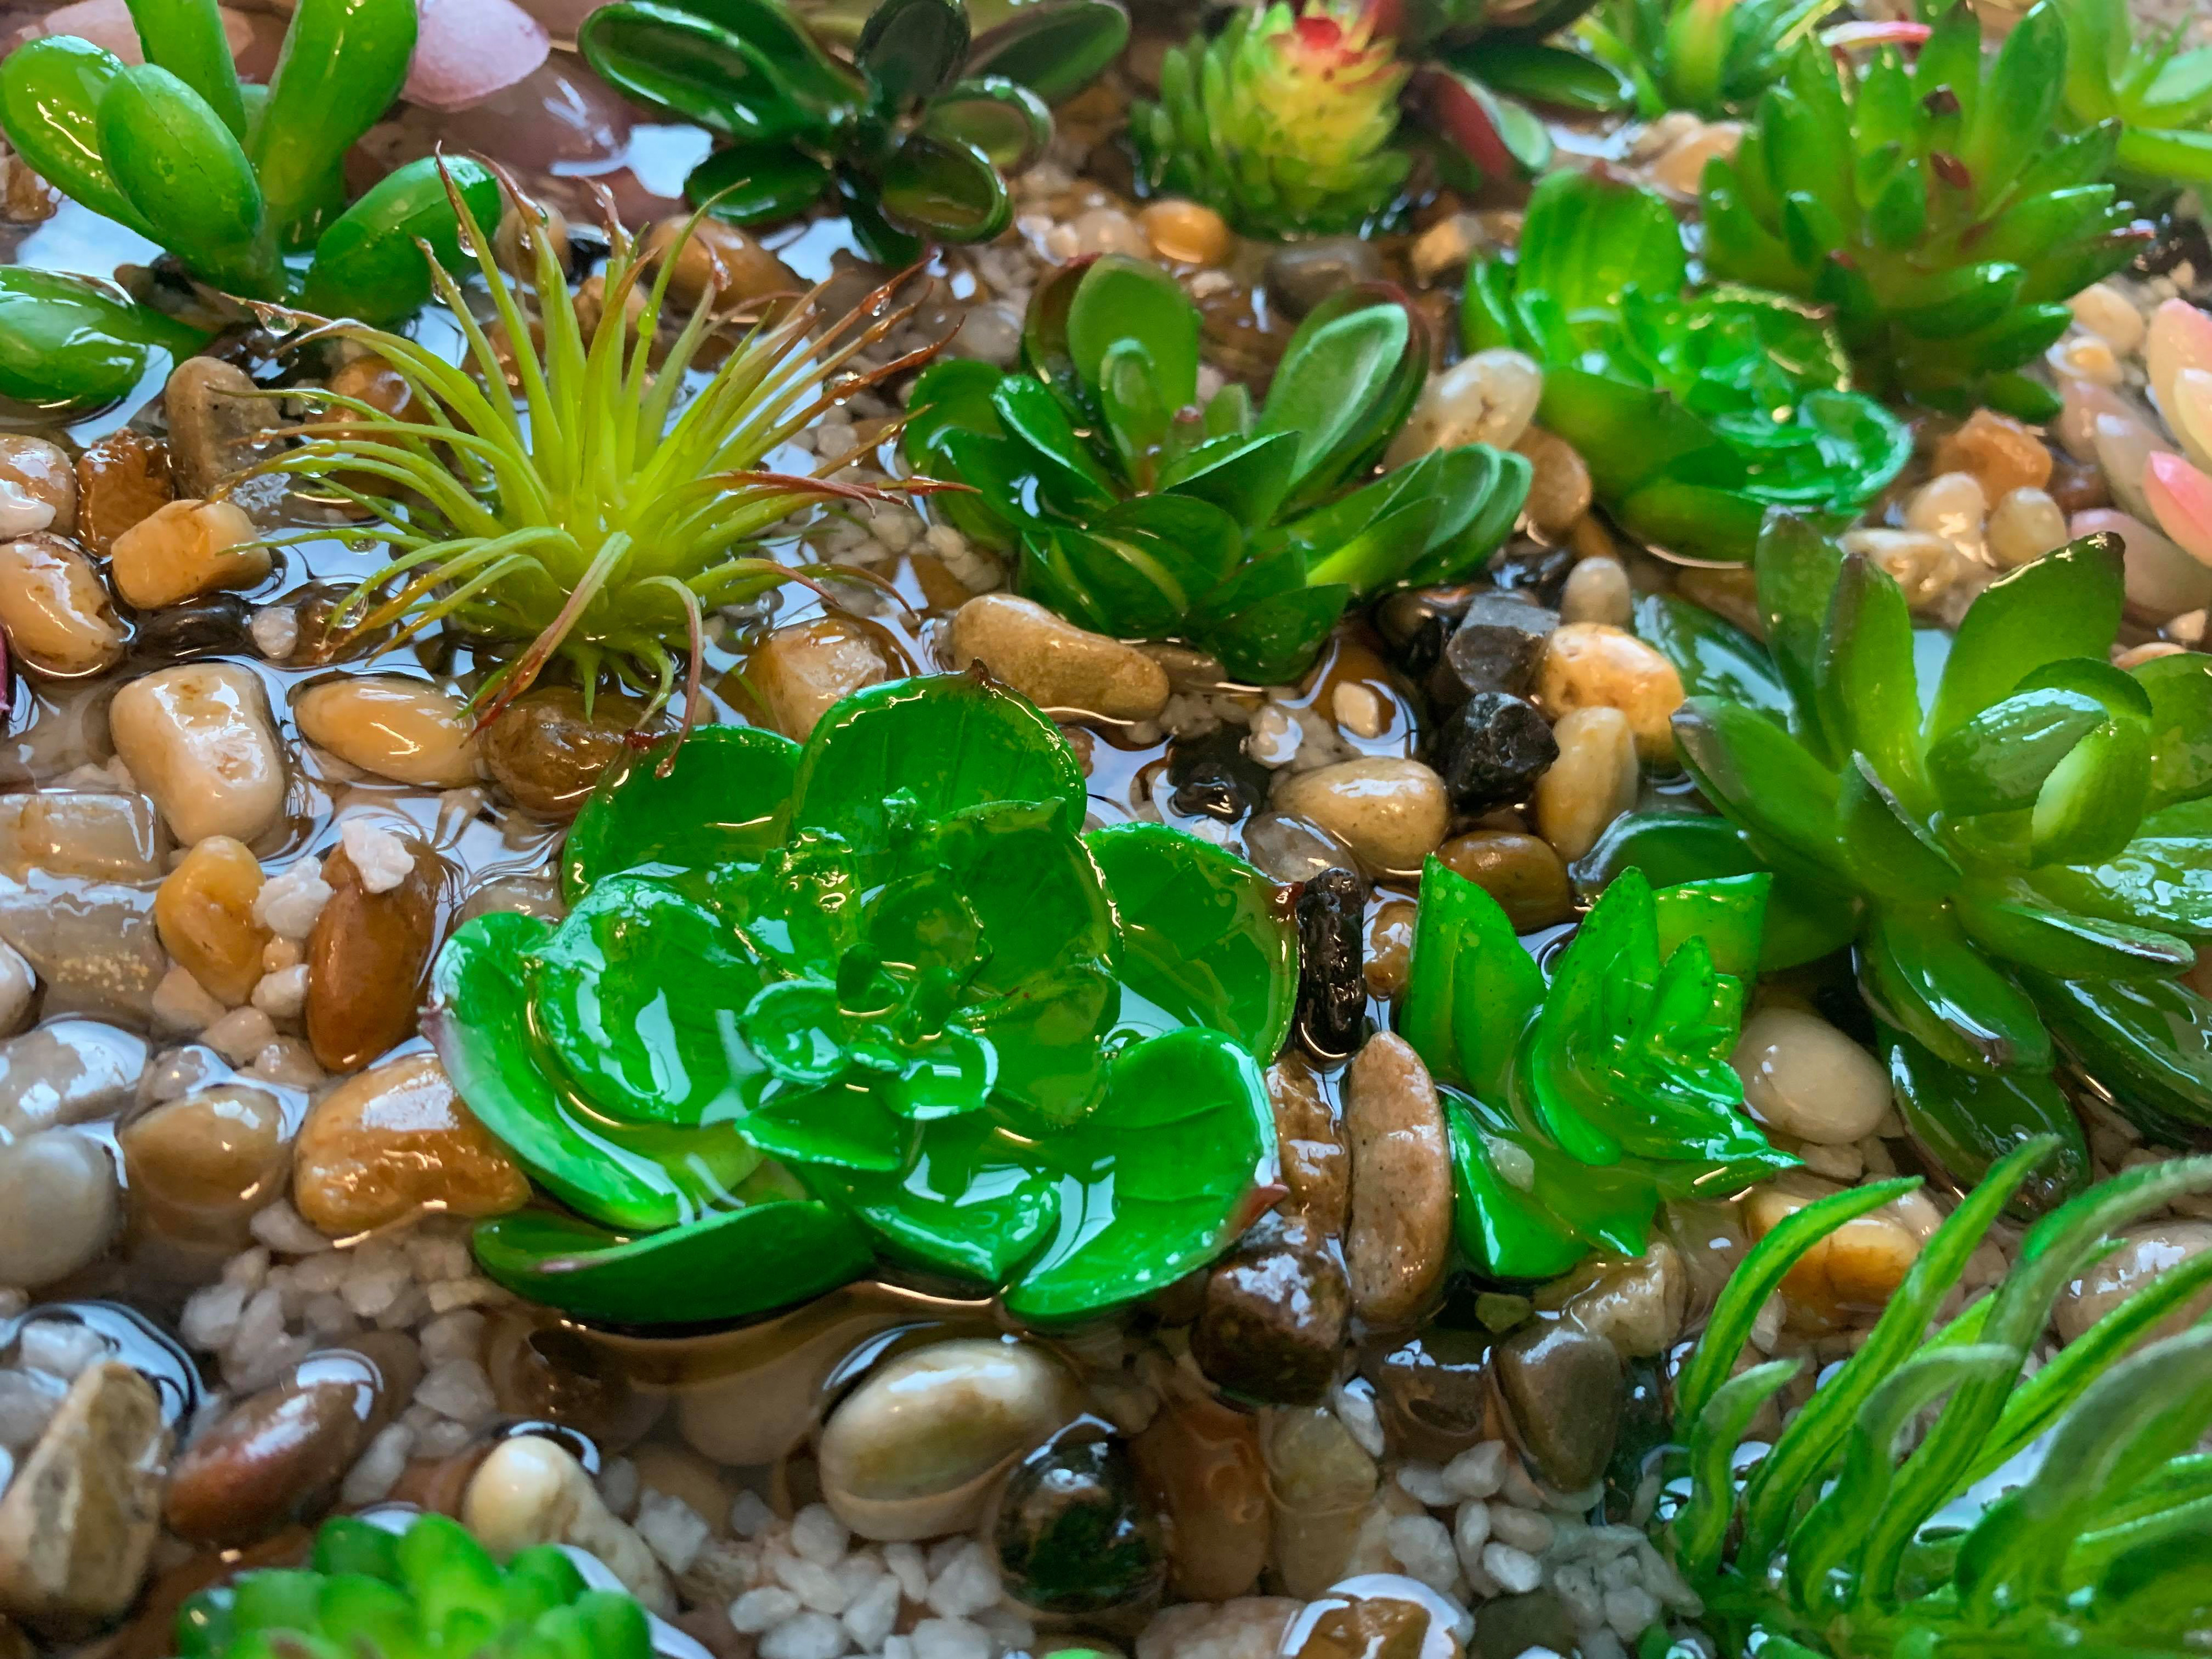
To start the pour, I mixed 2L of resin. This would be enough to coat the bottom of the mould and act as a sort of glue for the objects whilst managing to get crisp corners; this is something that I didn’t manage to achieve on my sample. On the sample I put the stones and plants in first and poured the resin over top. This layer should insure that this doesn’t happen. Once the resin had sat there for 30 minutes it became like a gel, this is when I added the objects. The initial layer acts like a glue for when I put the next layer down. i am doing the pour in 4L instalments so once I had placed the objects, I put the next layer to hold everything in place as it sets.
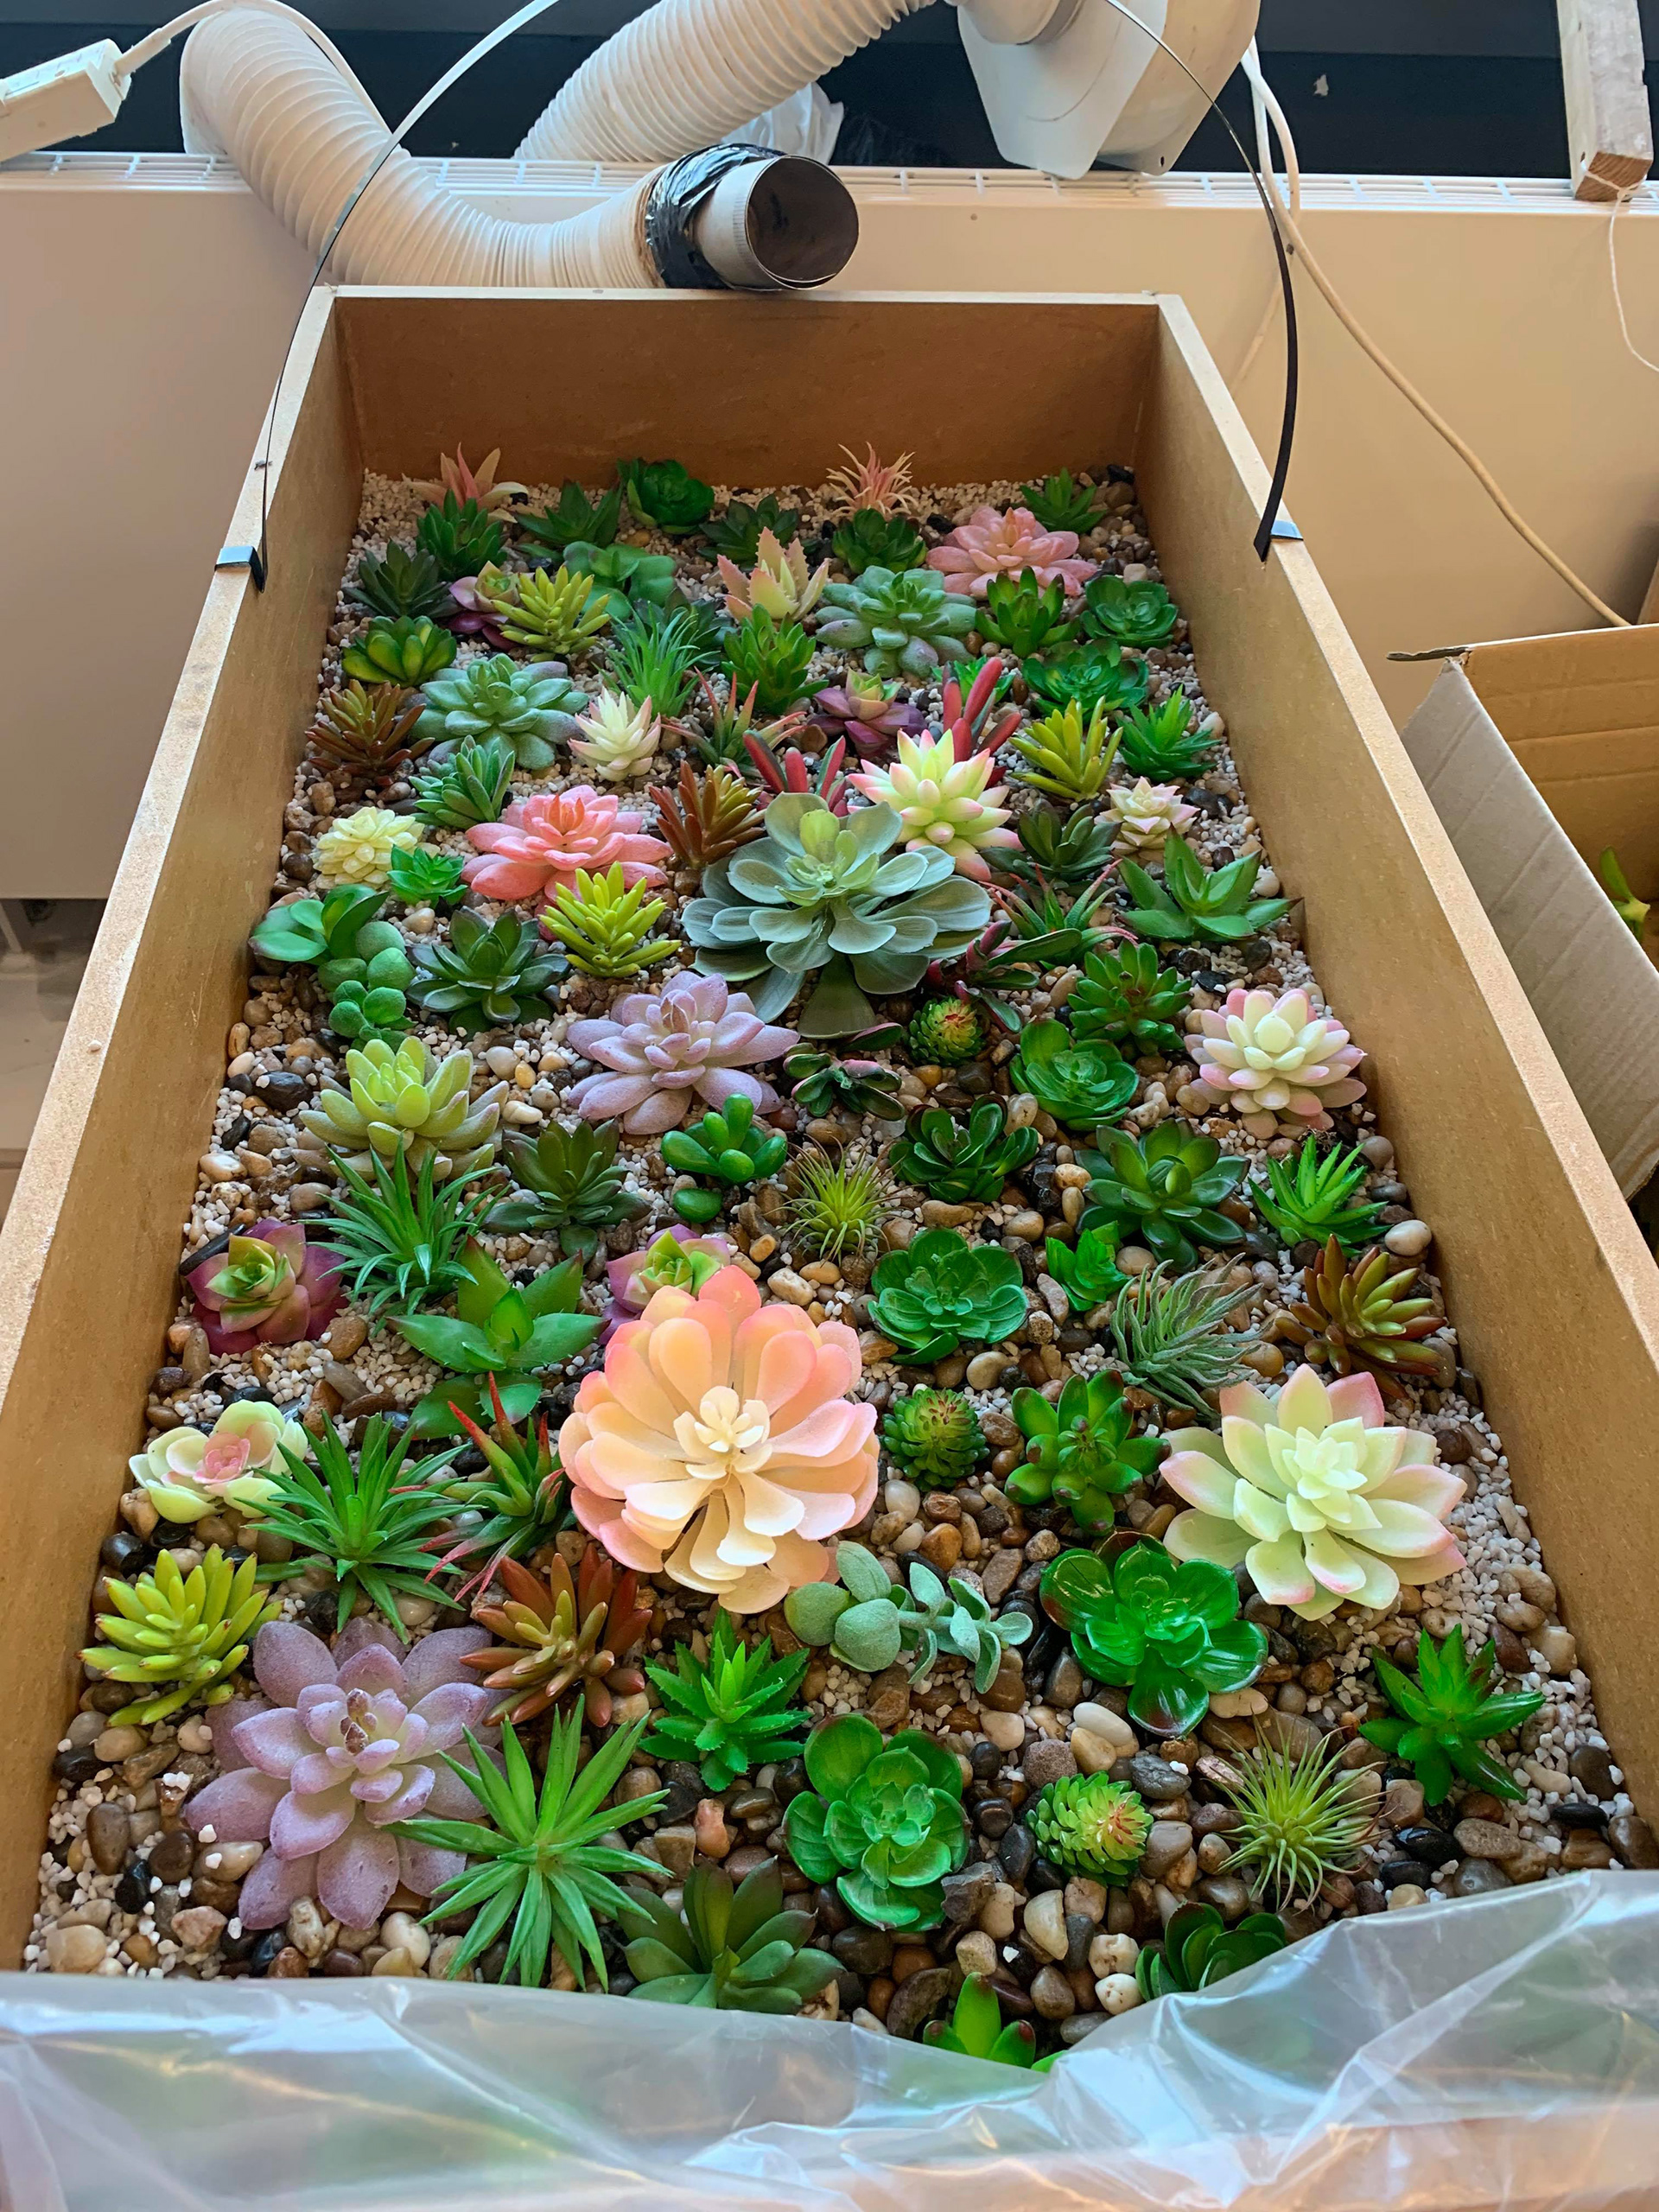

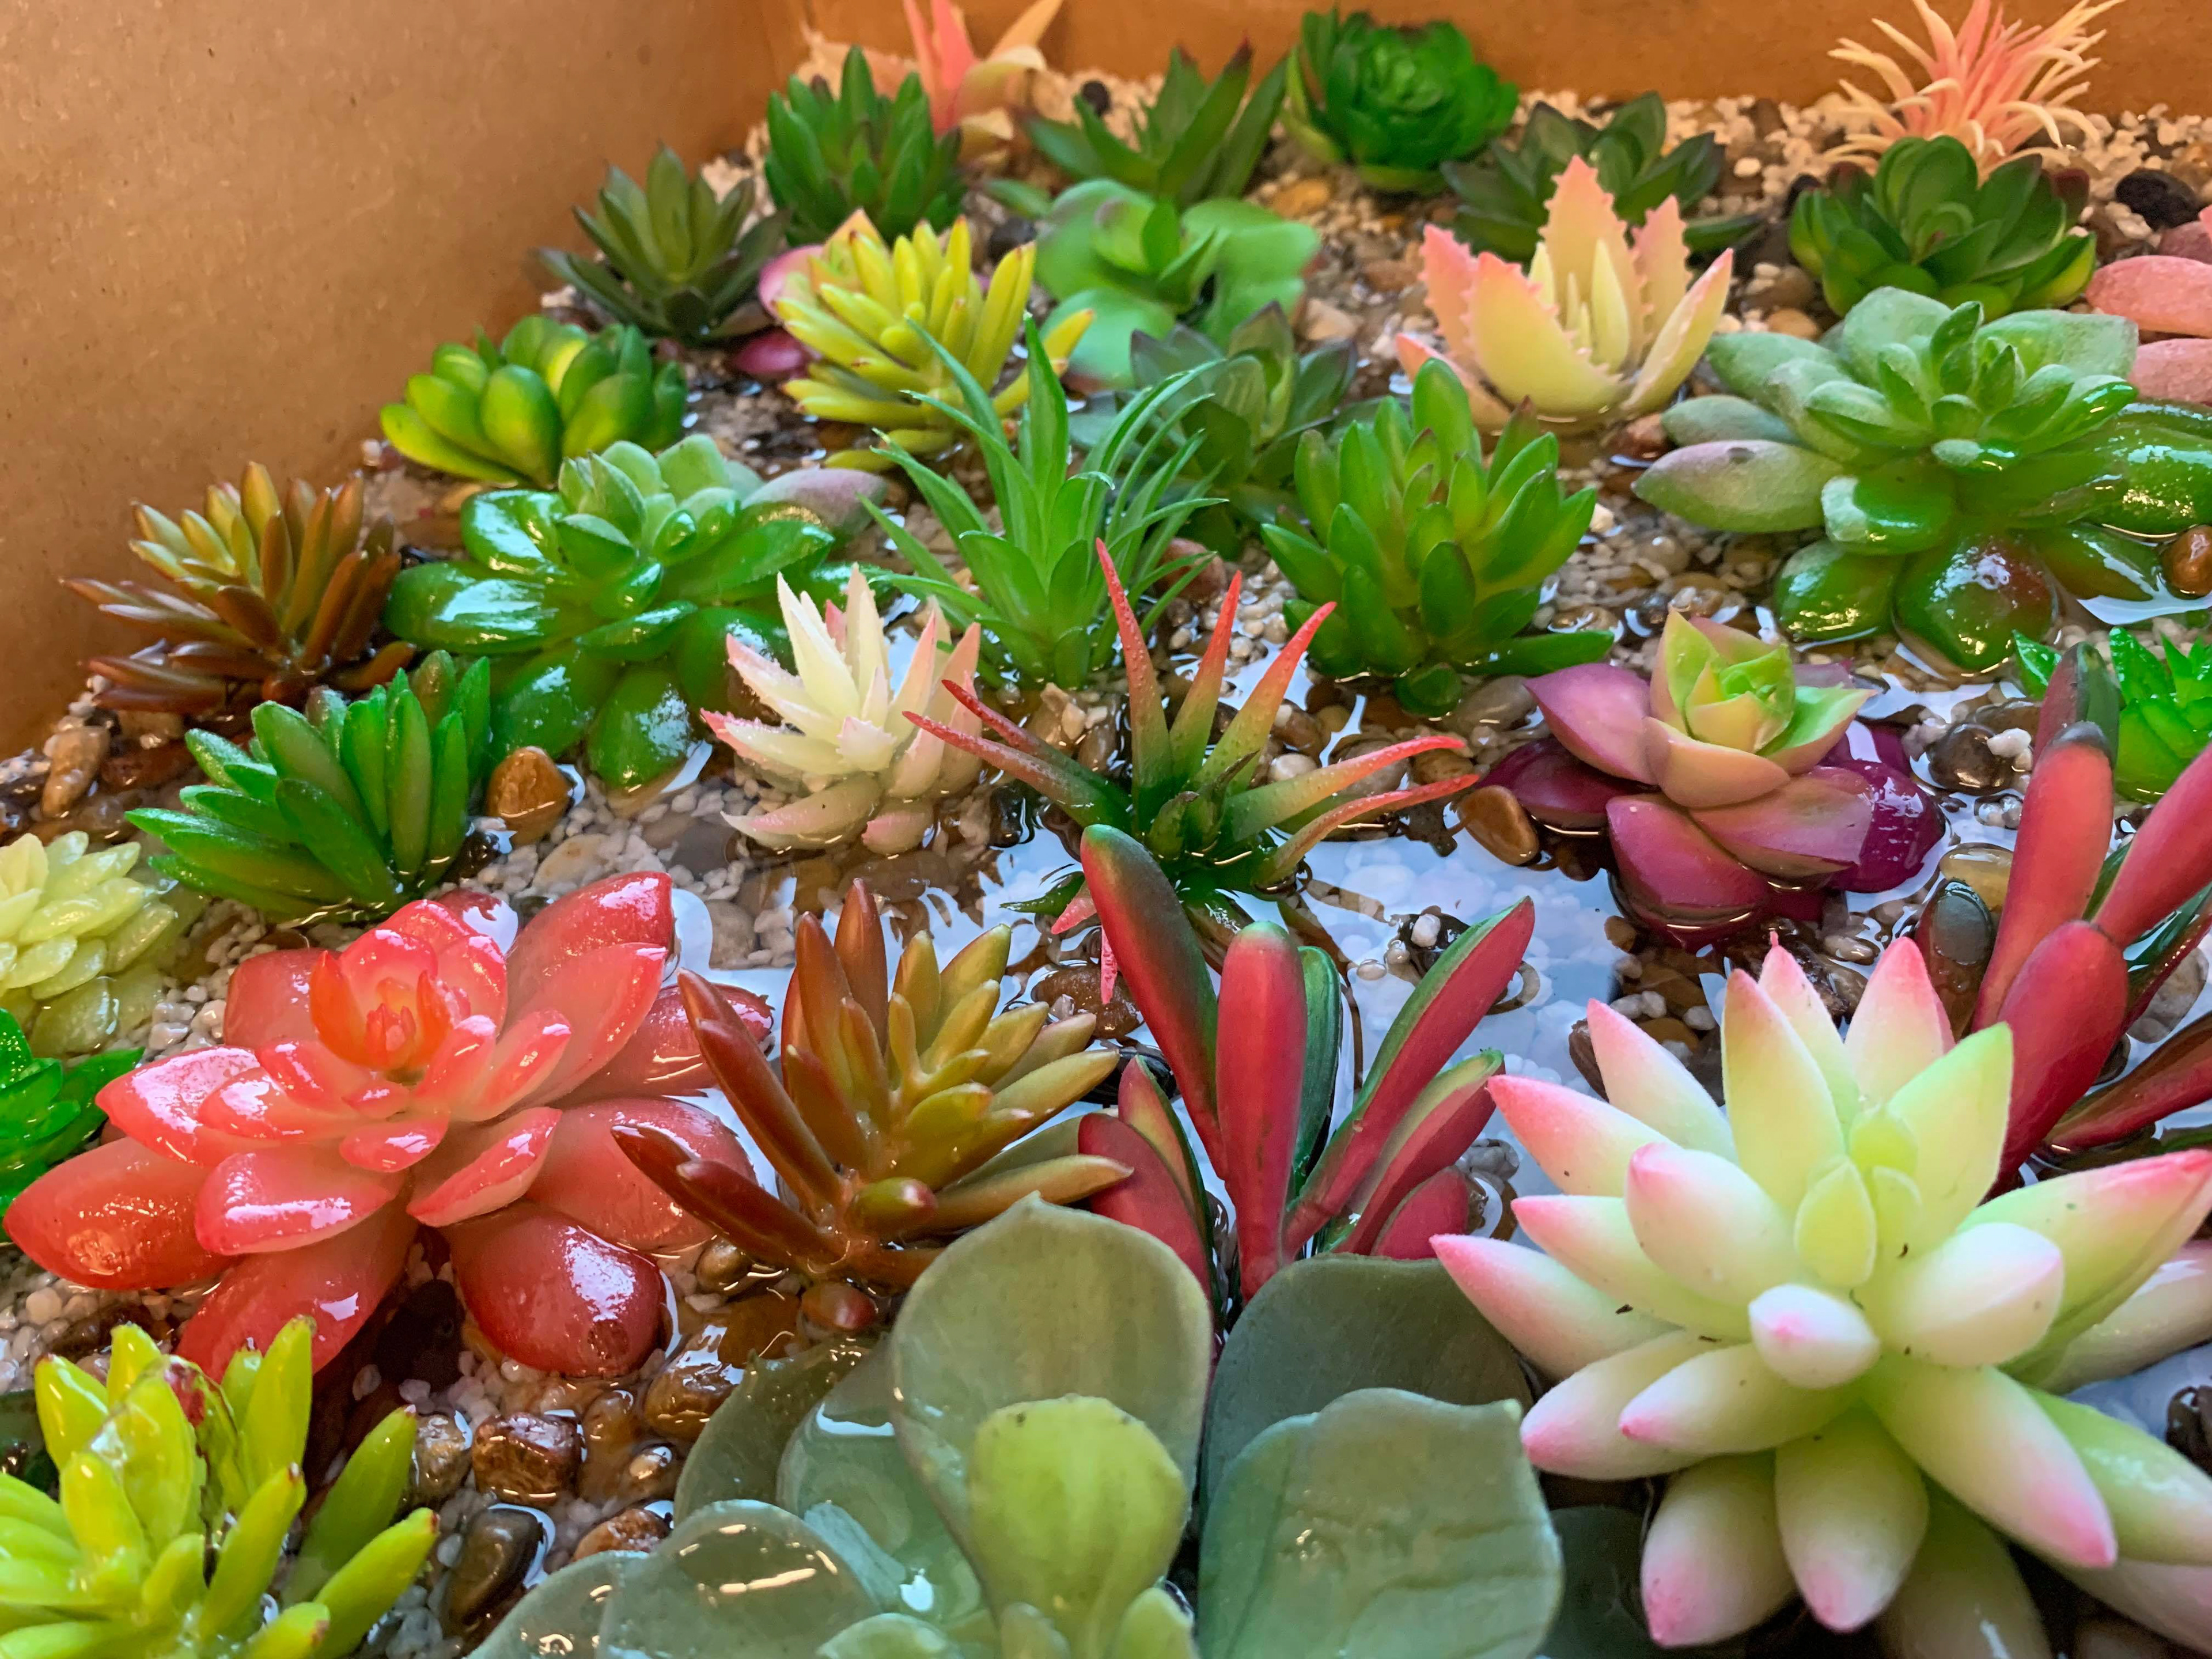
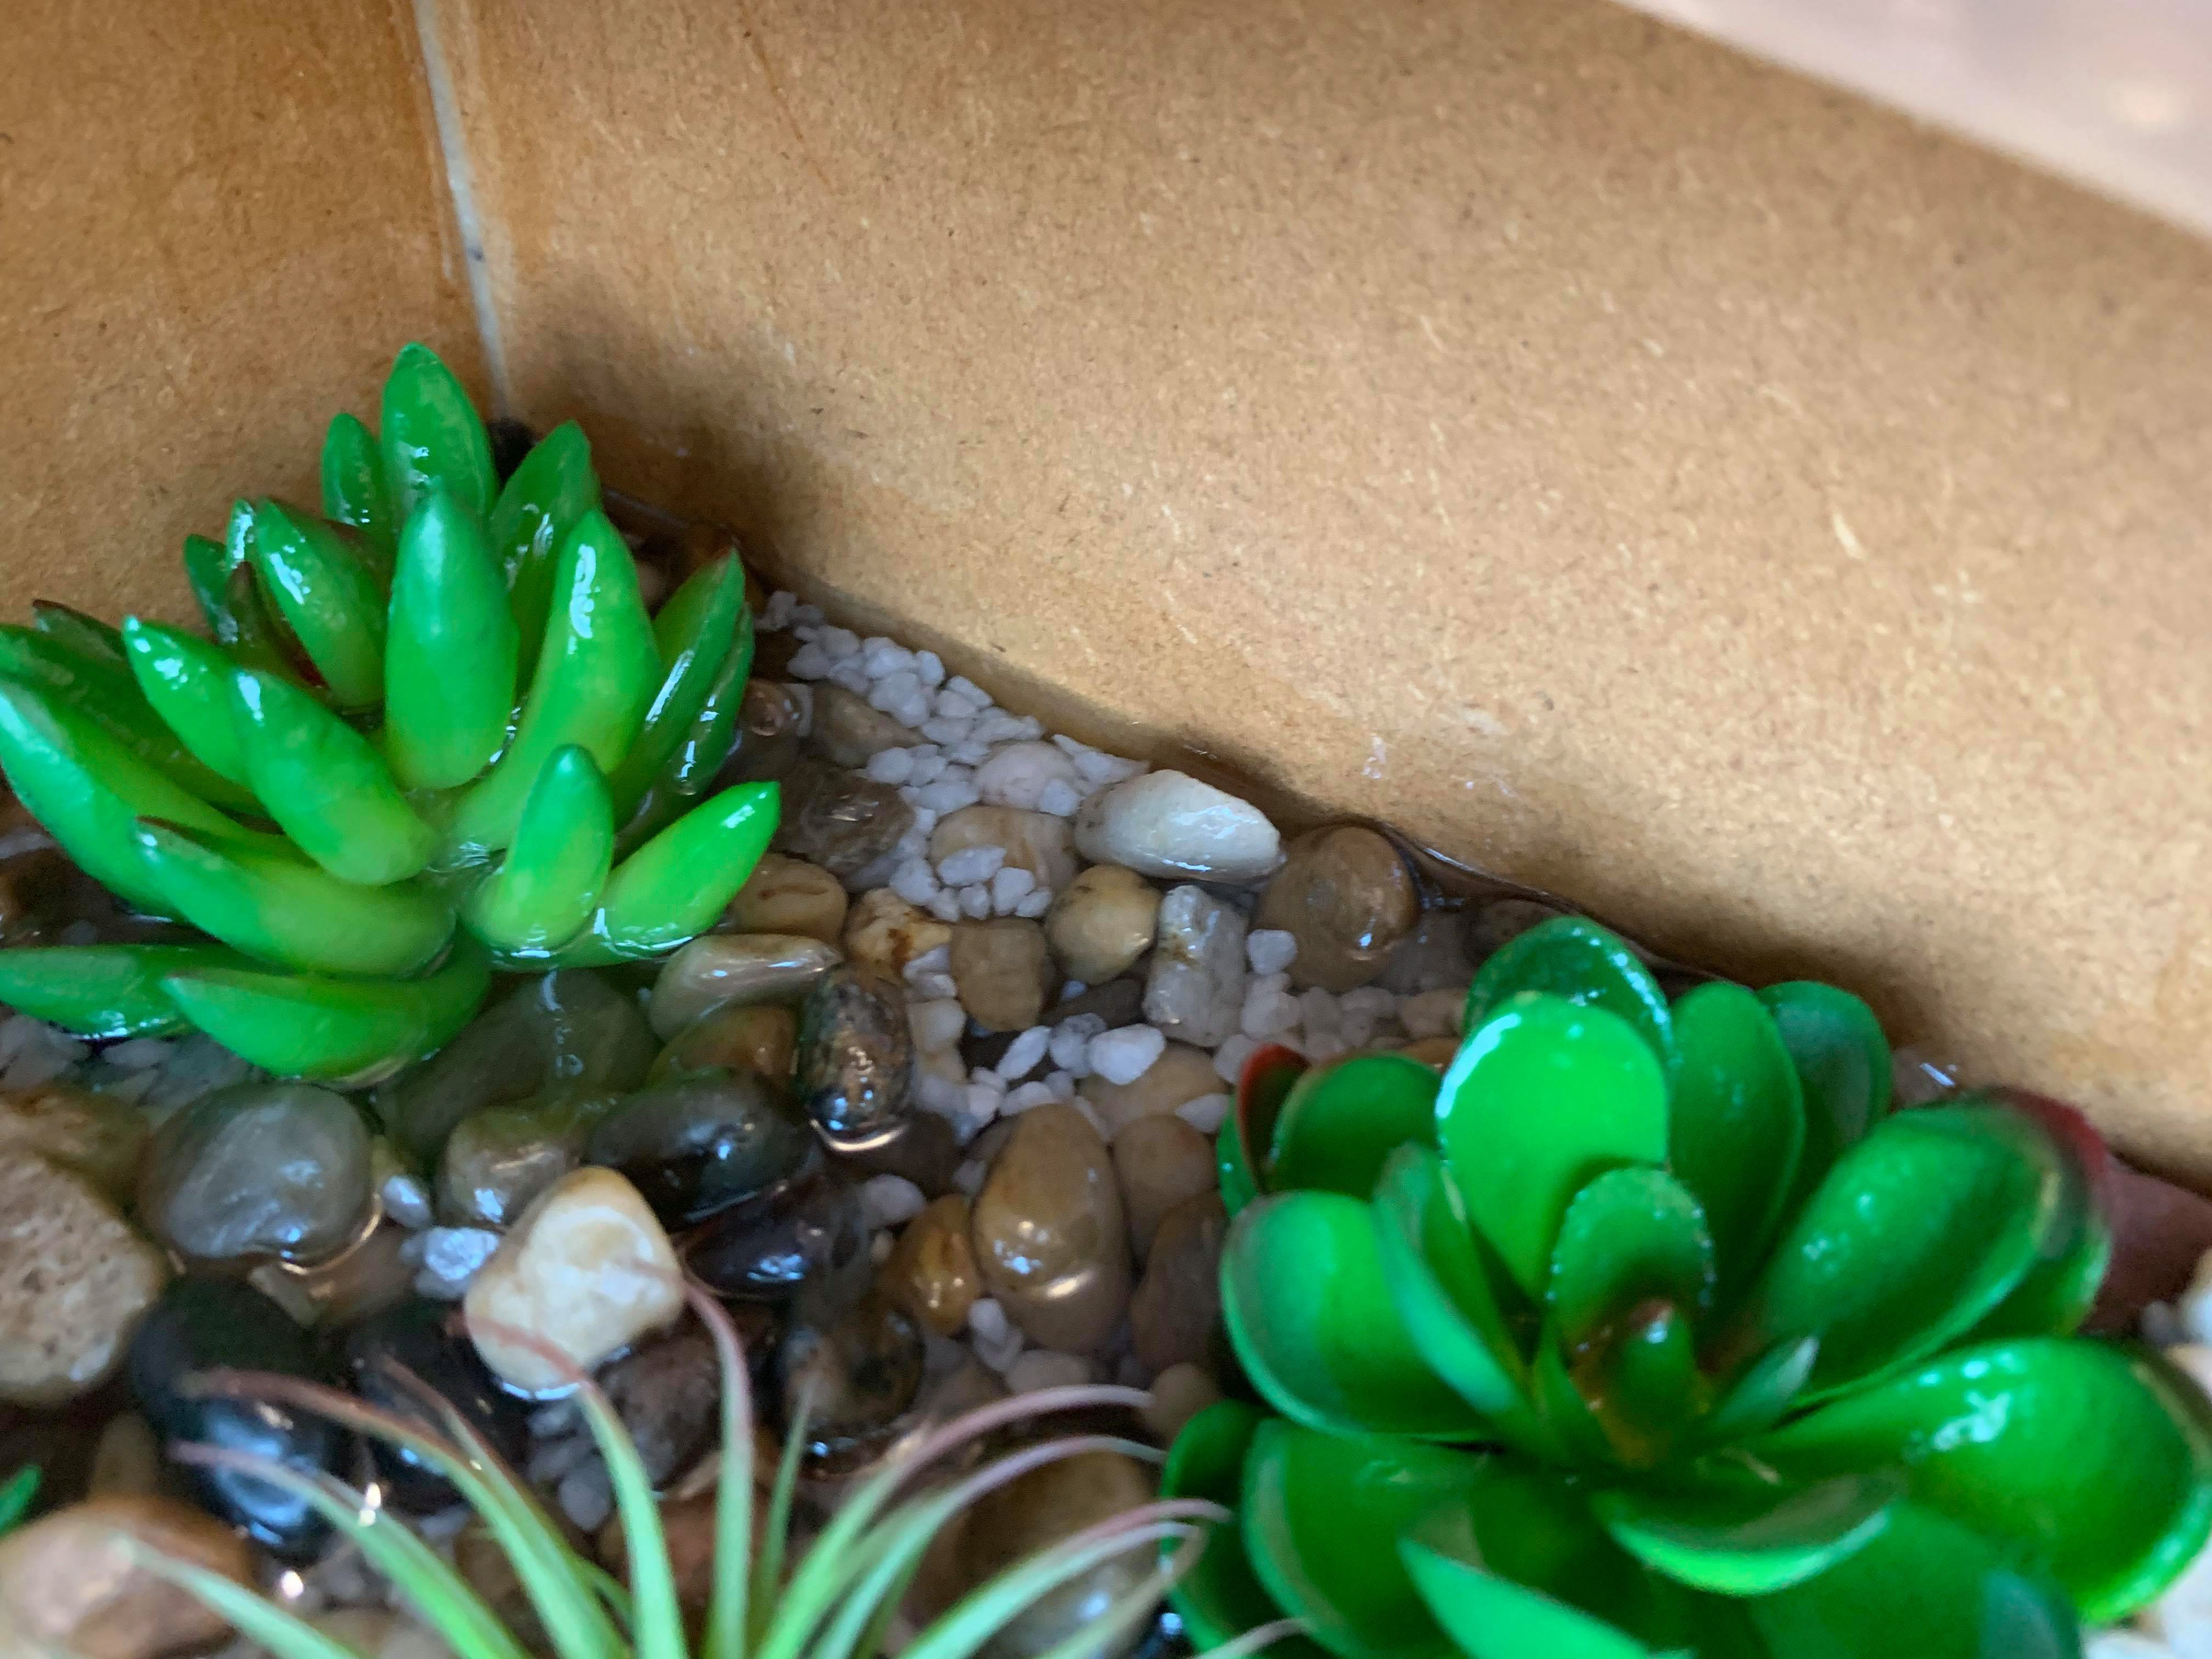
Images from first pour.
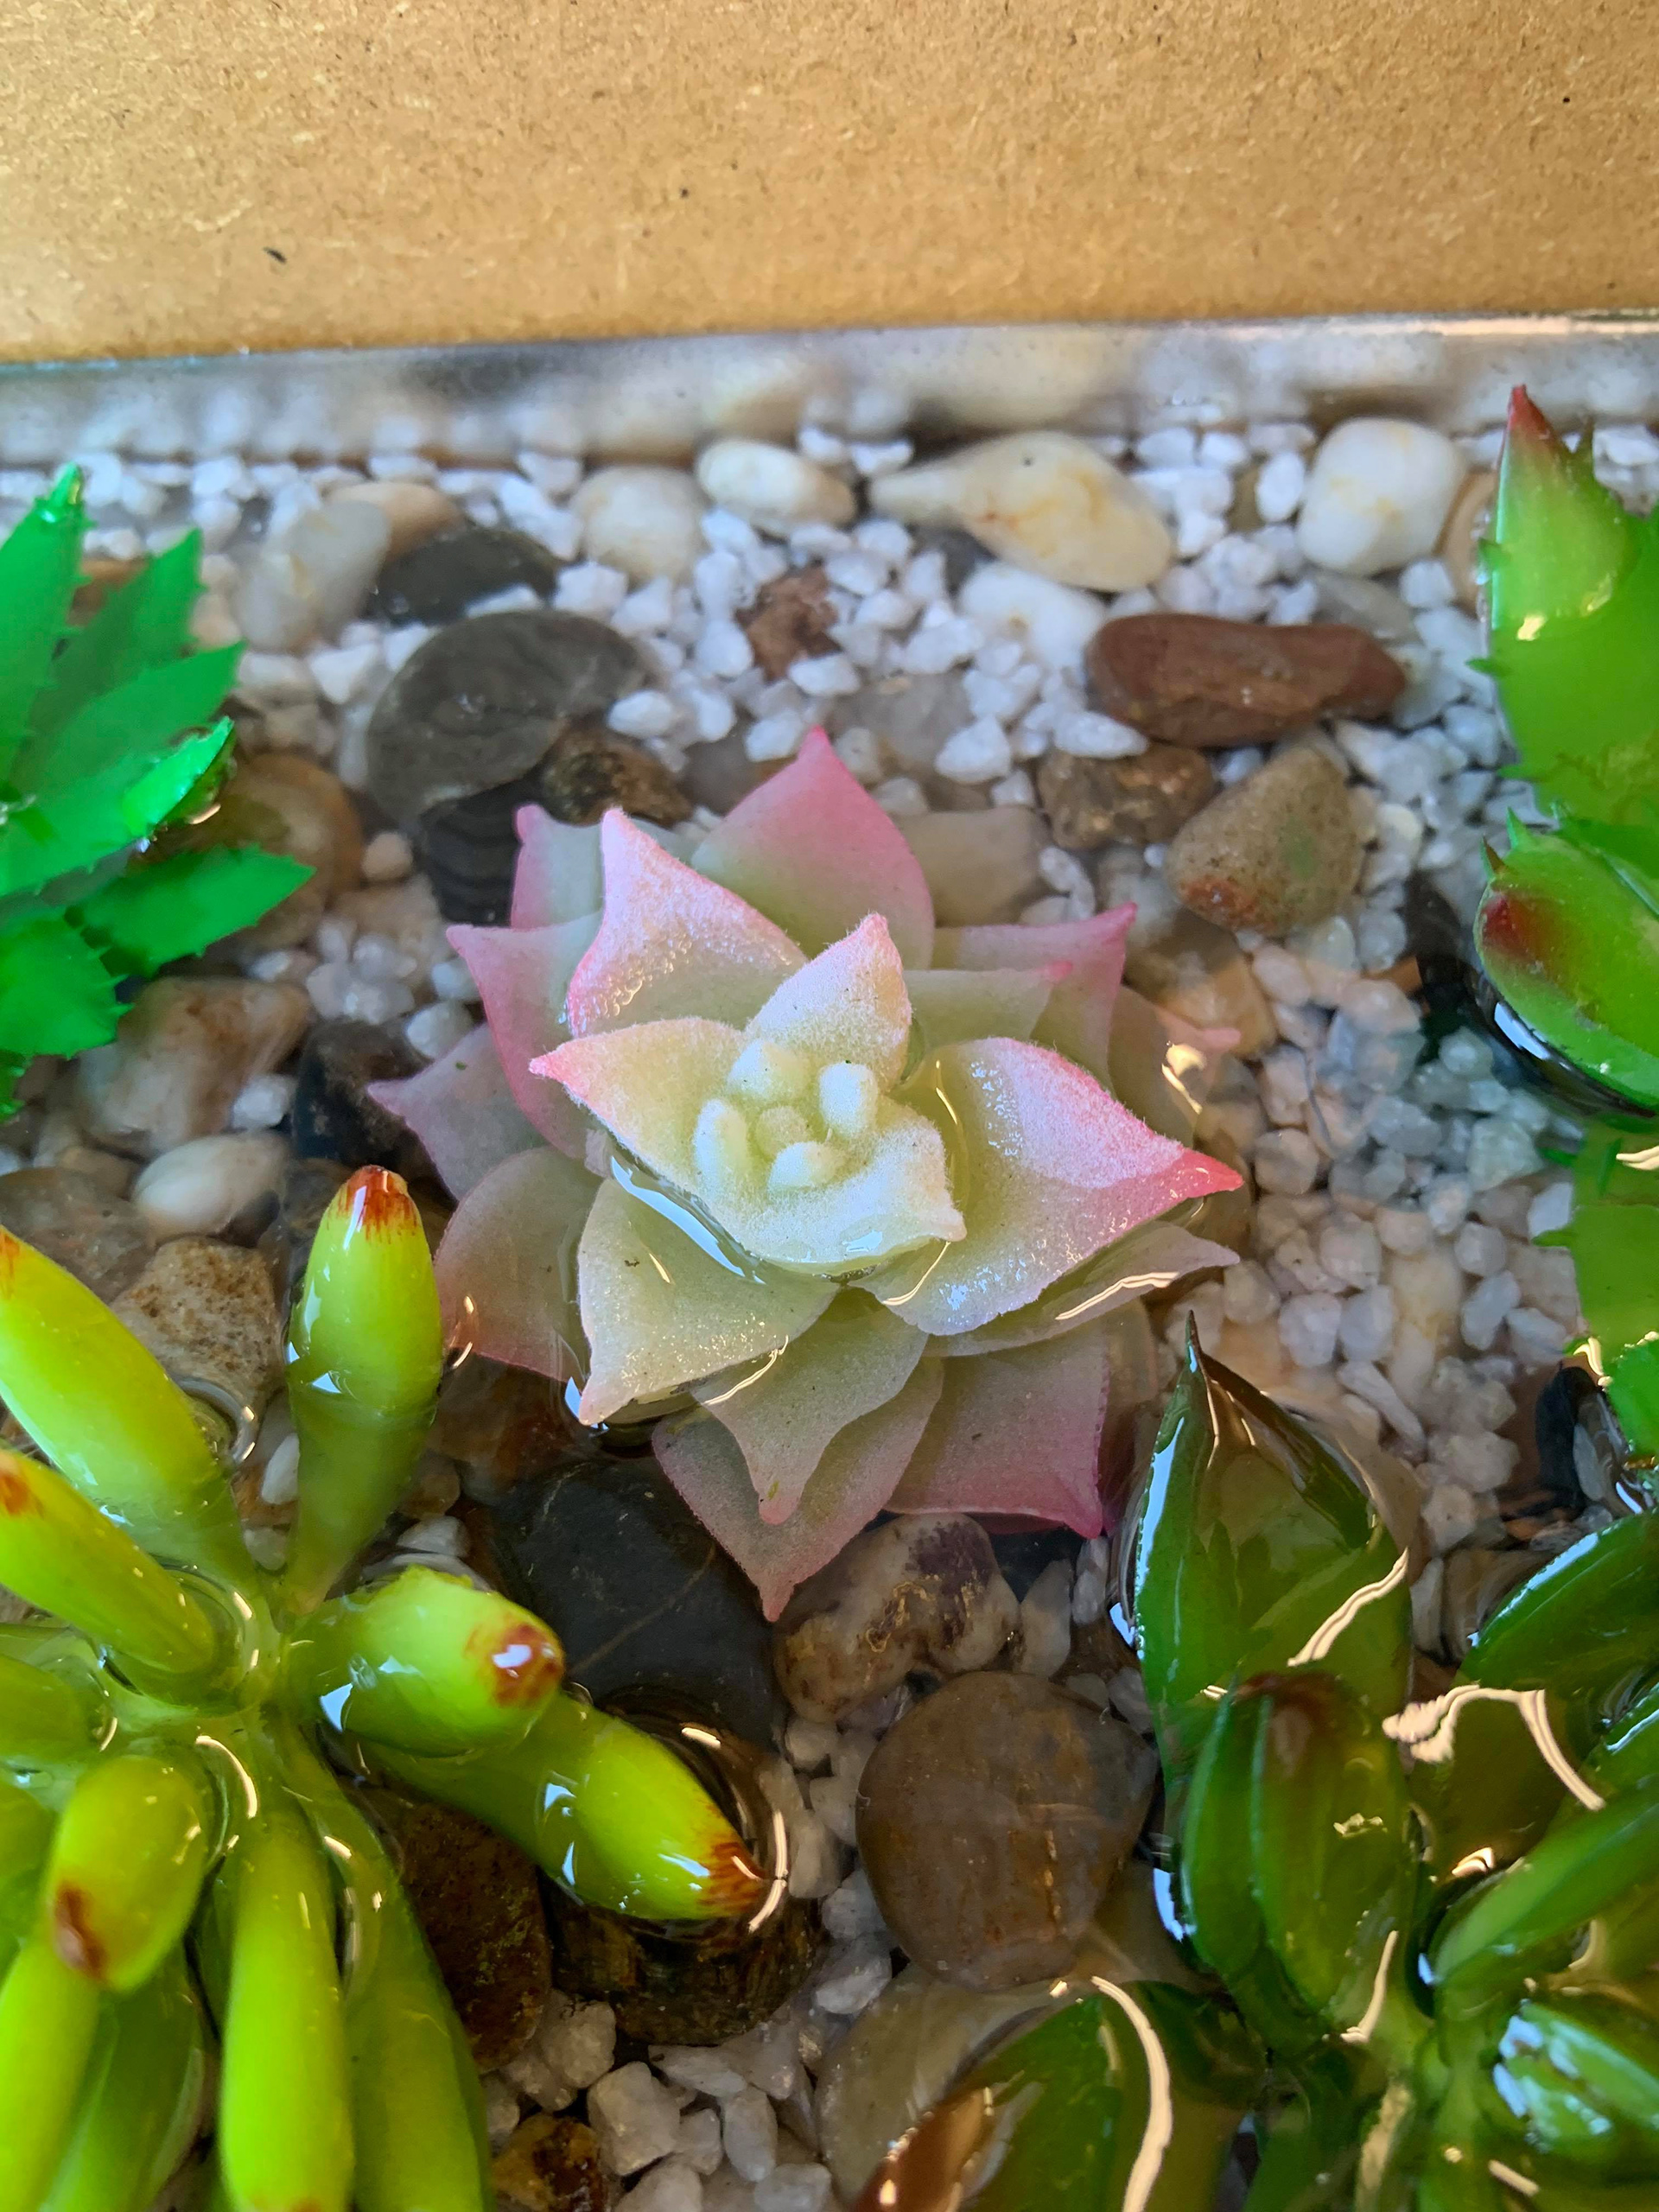
When I went in the next day, the resin had set successfully. I have definitely found a good rate to pour the resin at. Looking back at my first experience with this material (sample), it is clear to say that it was the speed and inconsistency at which I poured the resin is why I experienced my problems; cracking and warping, plus the melting of the objects. It was explained to me that because I did it so quickly the layers ended up “cooking” each other and caused most of the layers, particularly the first and last, to not set properly. Hopefully the care and patience I am taking with the actual piece will pay off and give me the result I imagined.


Images from second pour.
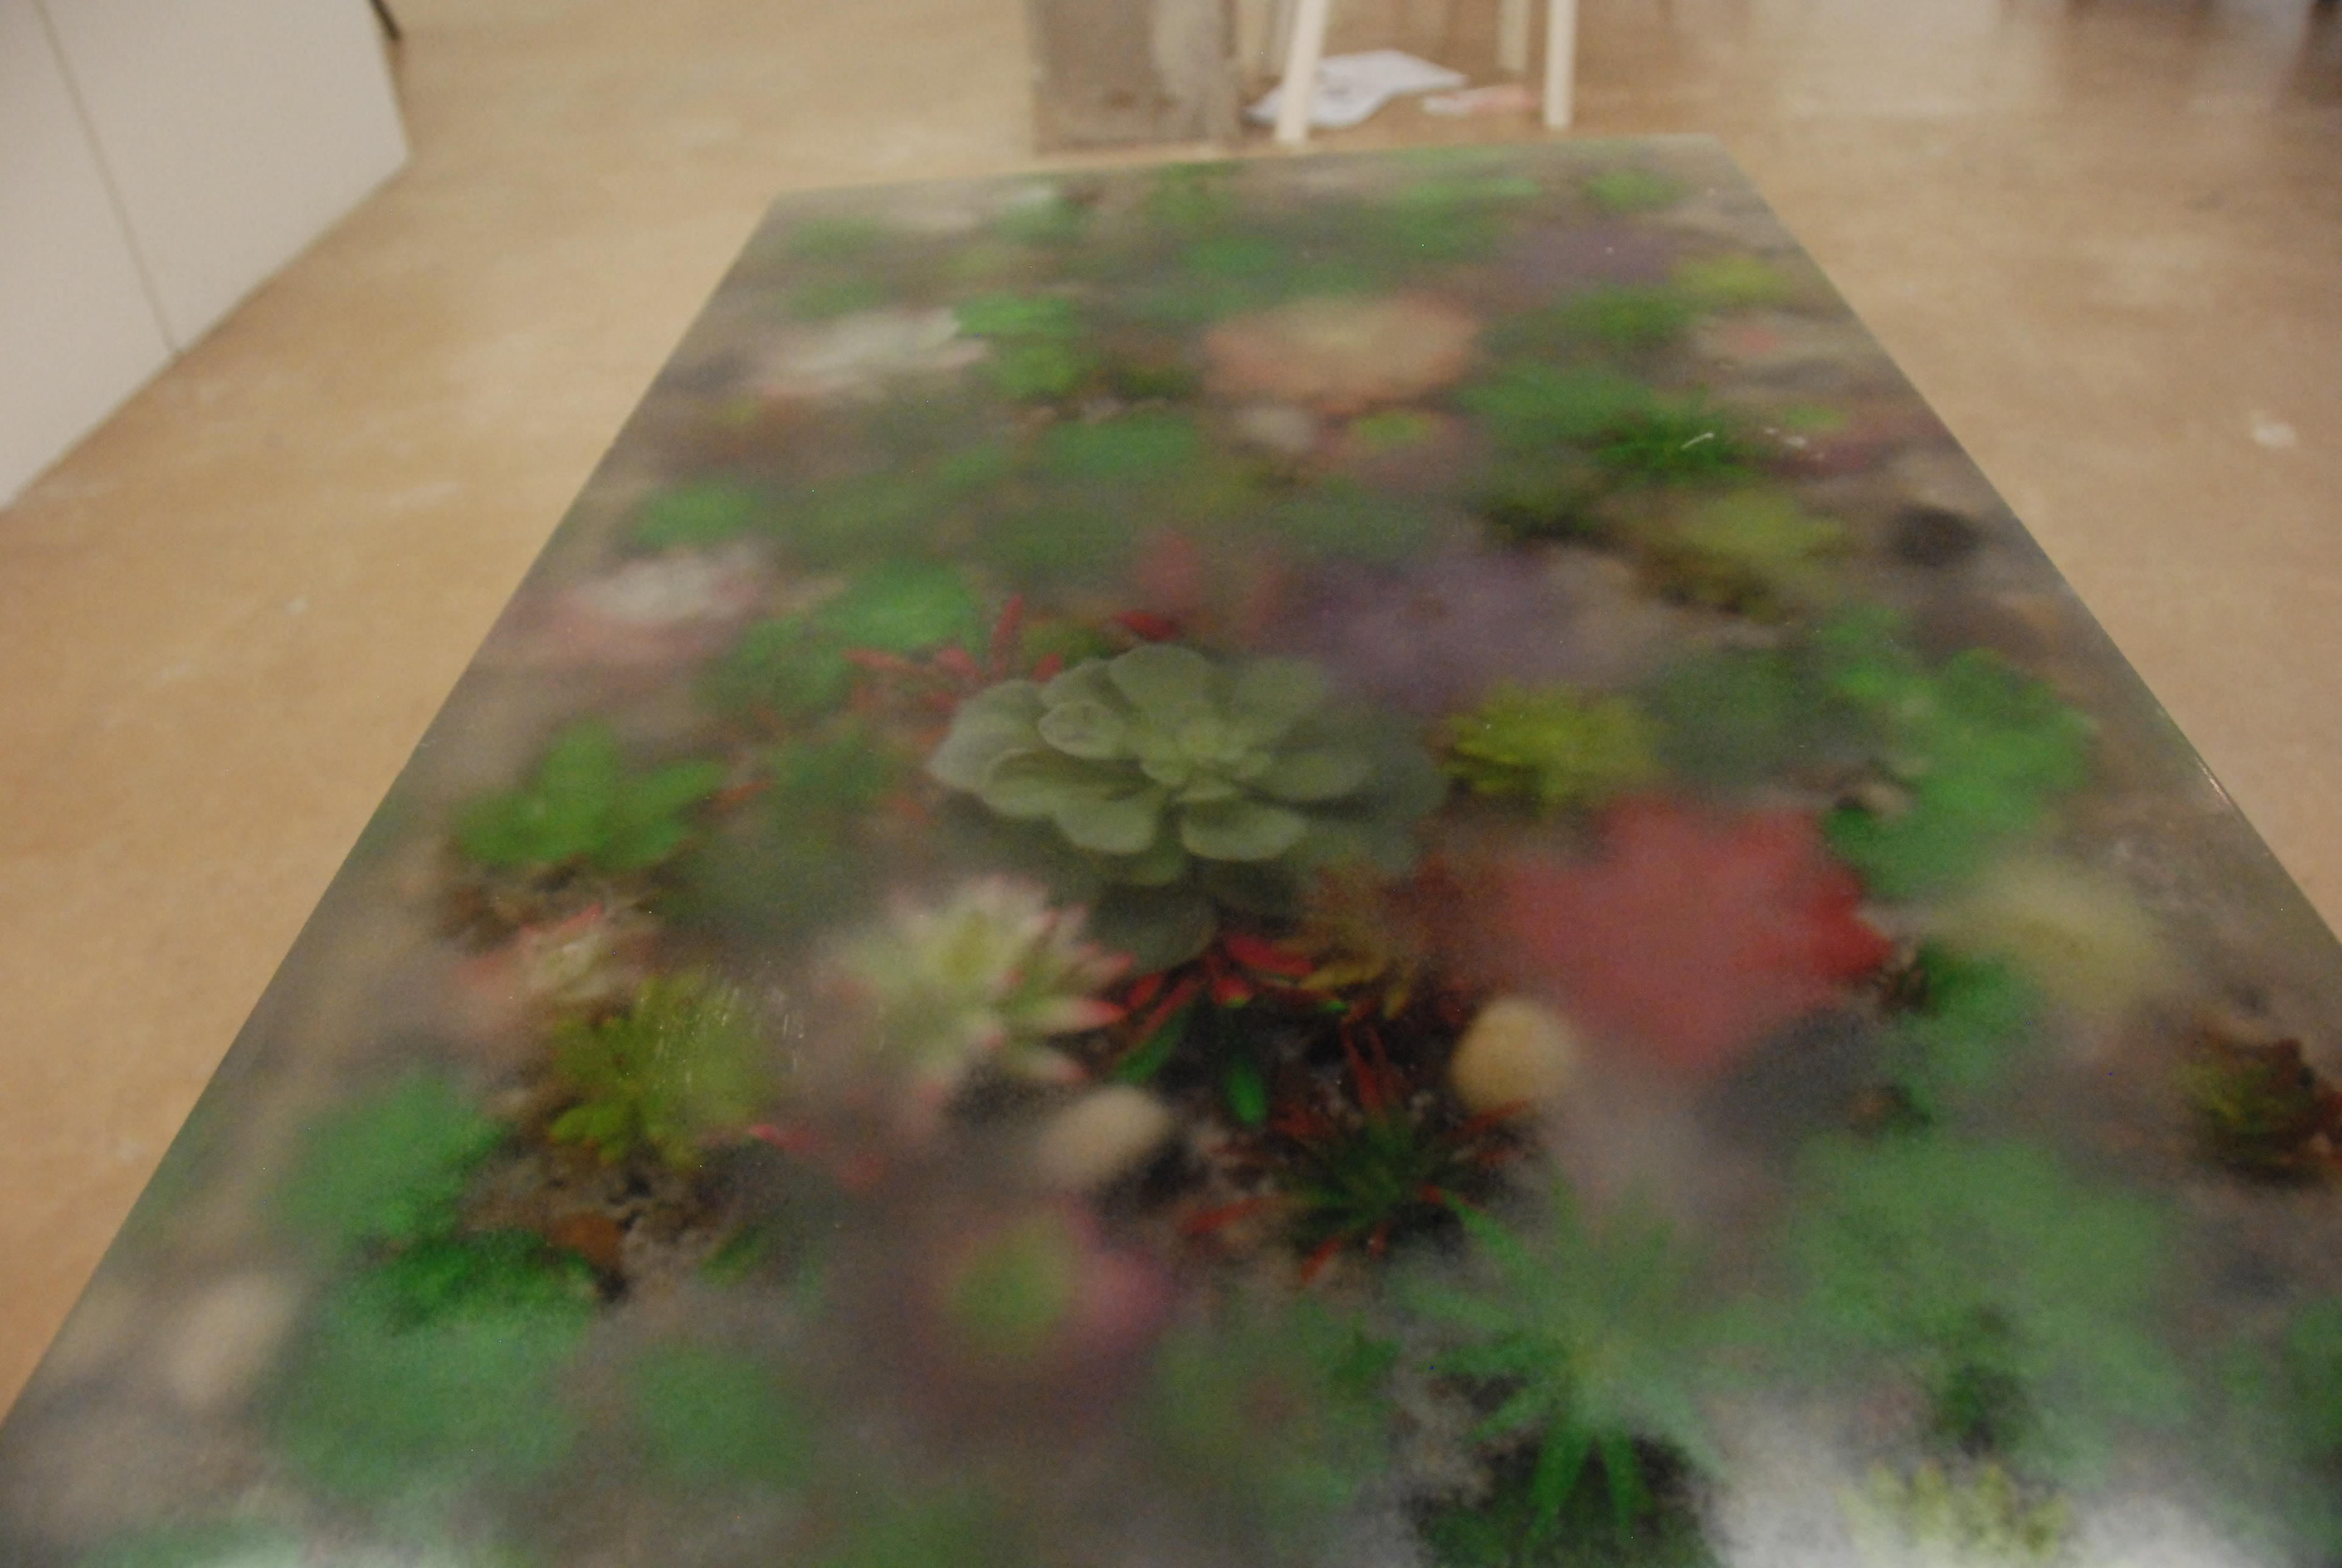
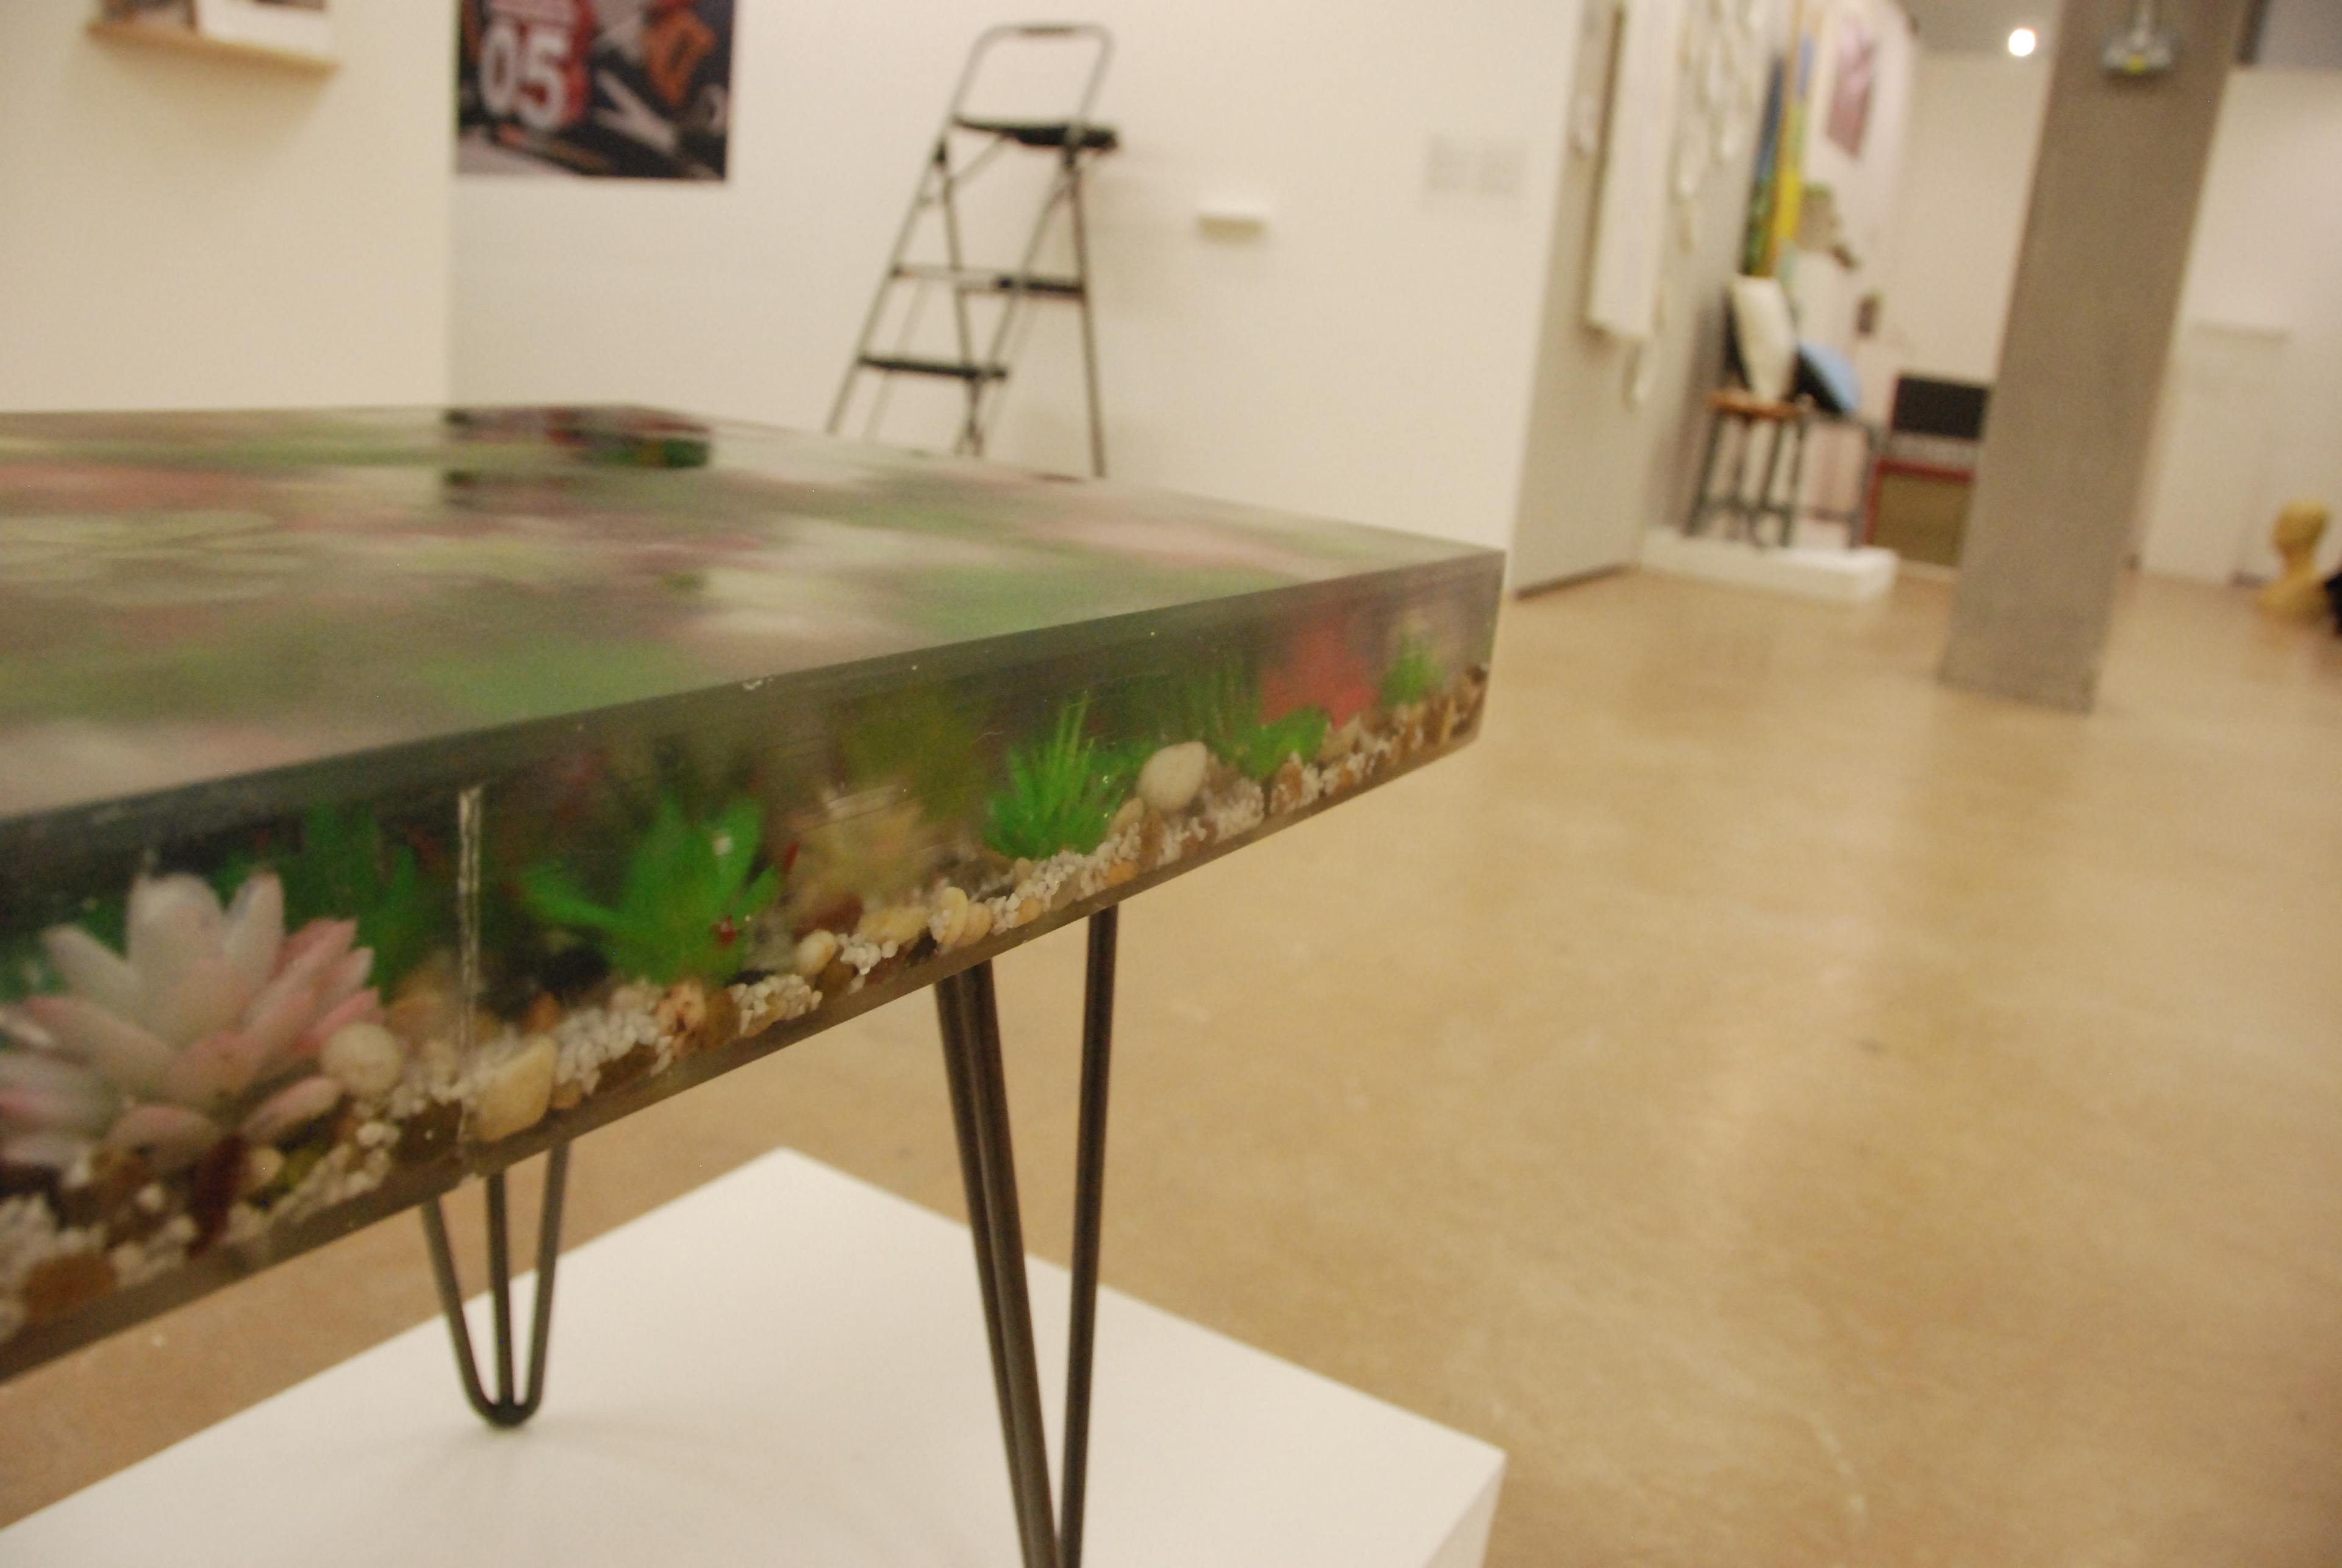
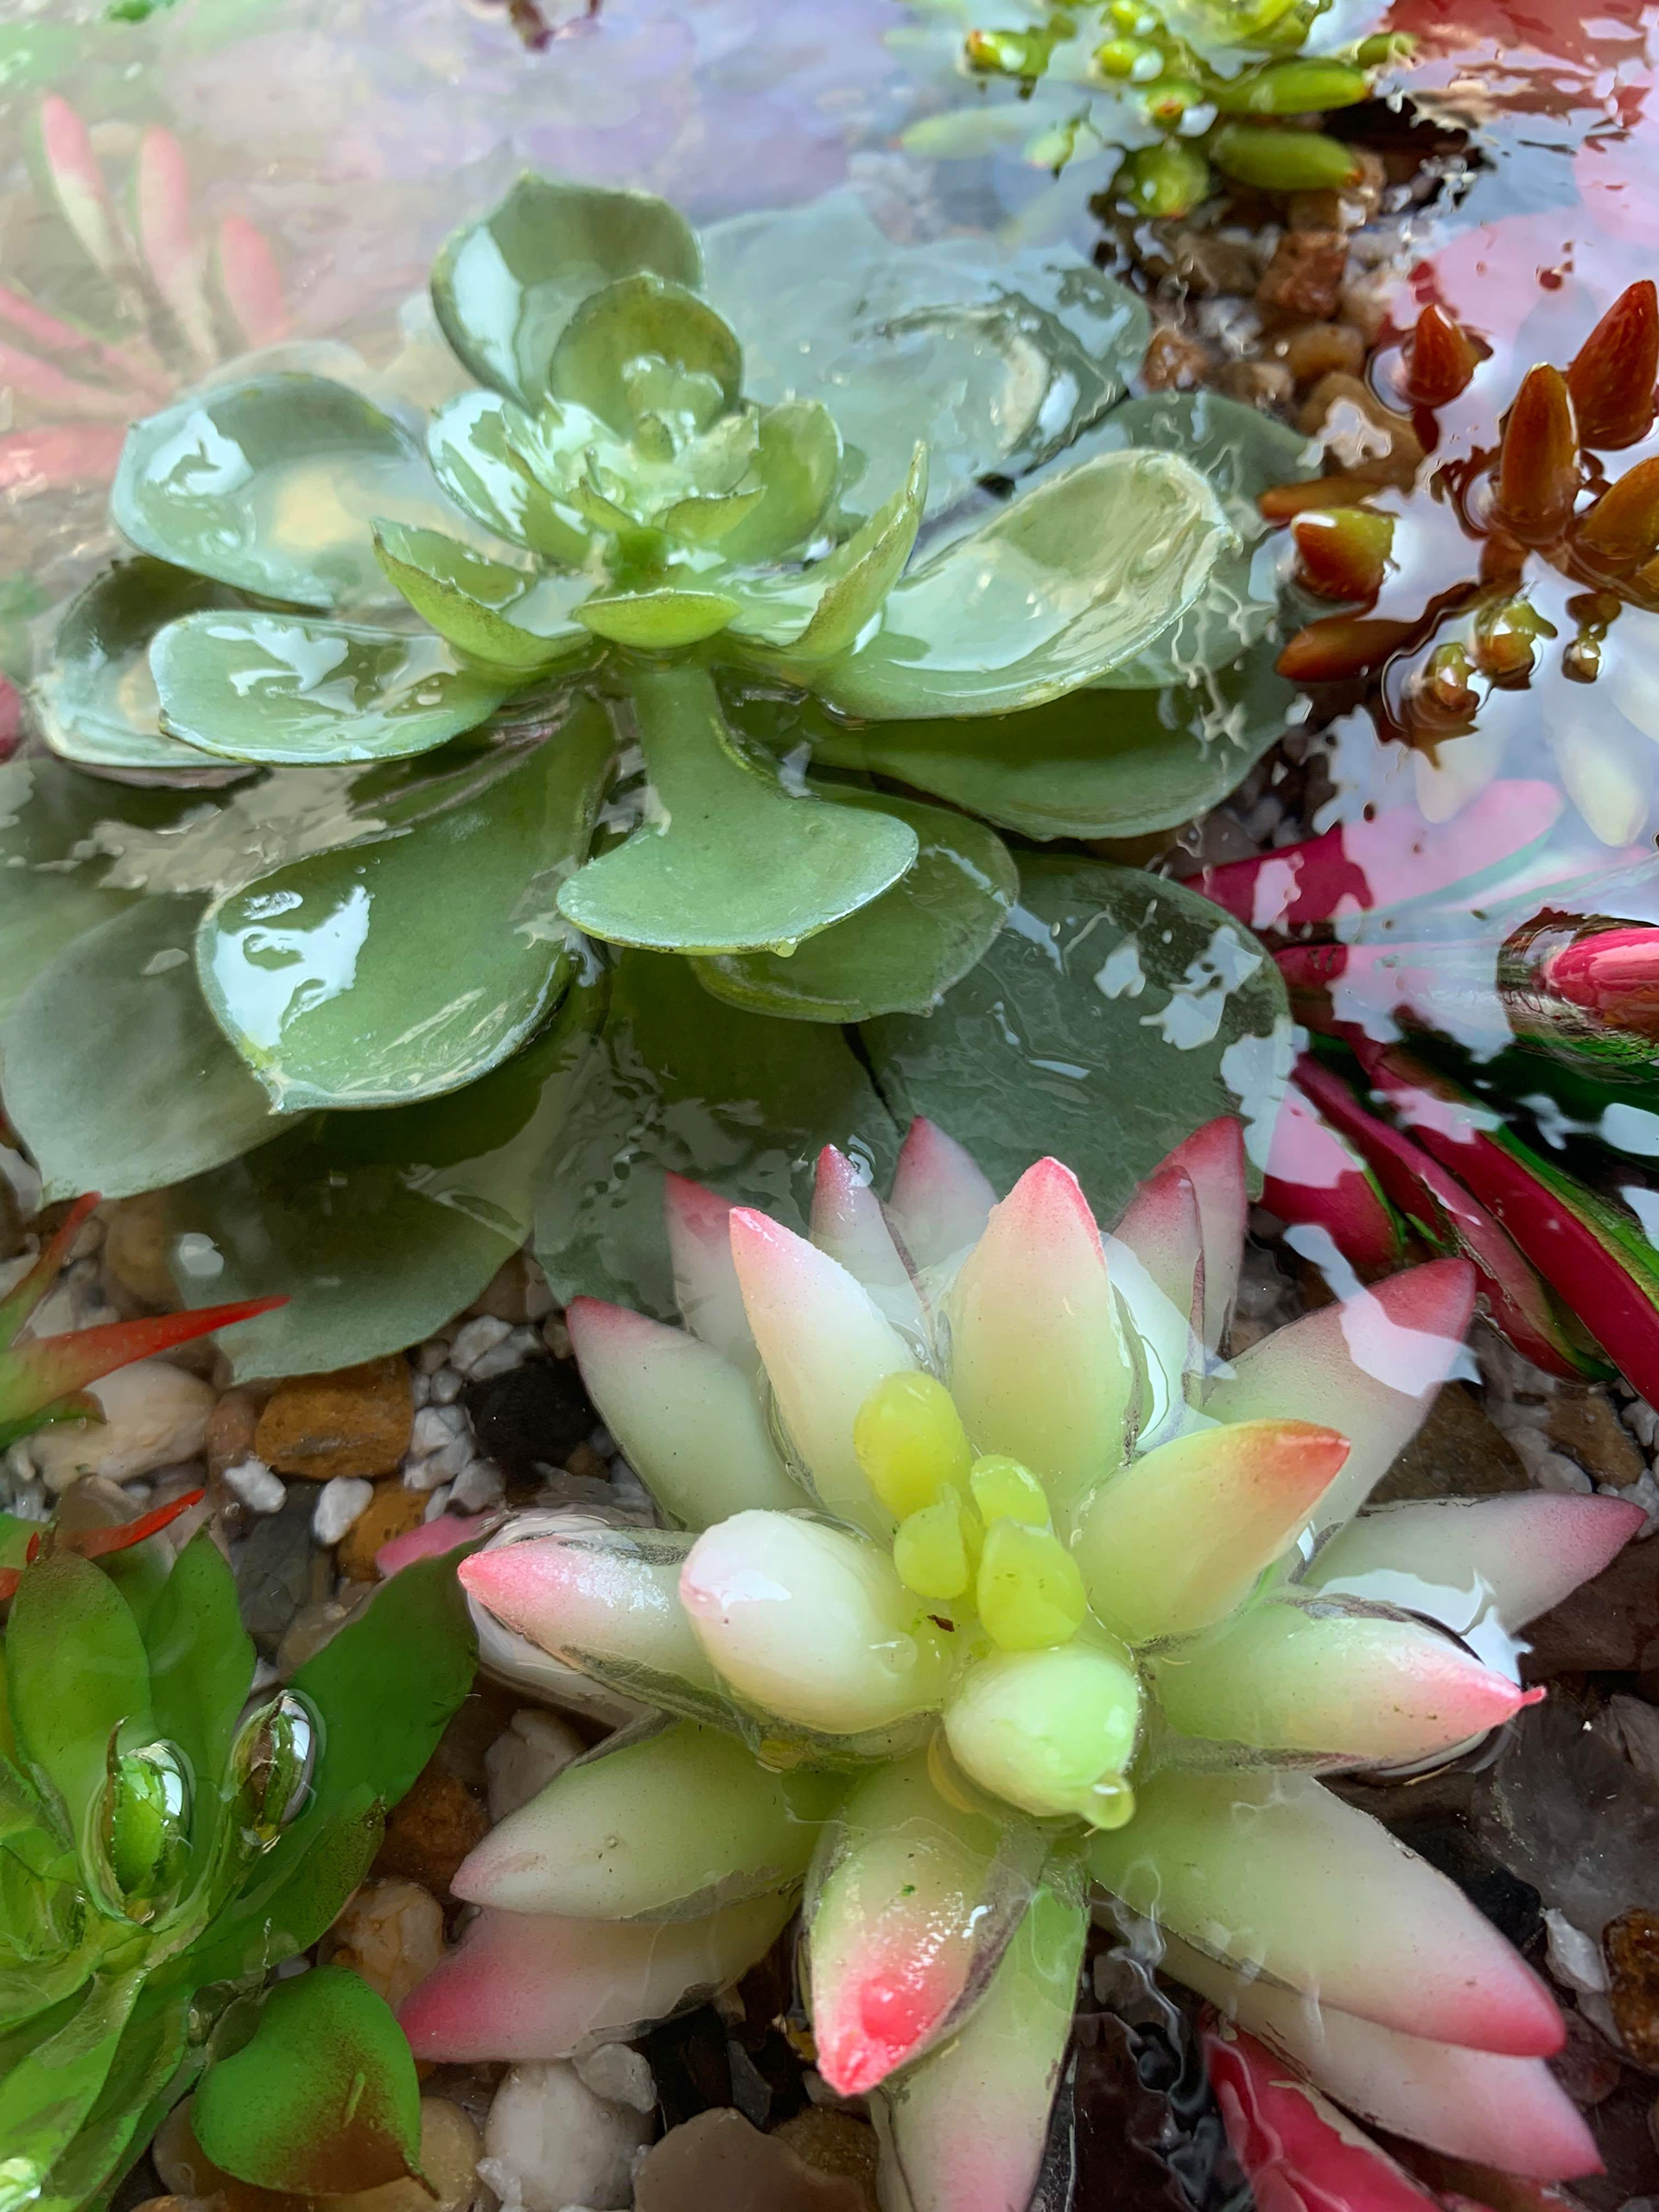
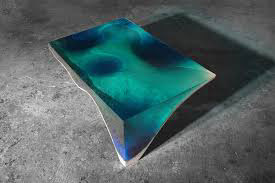
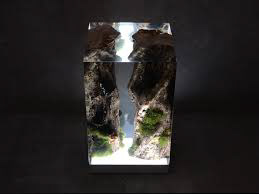
When I checked on my piece the day after the second pour, I was able to get a good idea of how it will look when it's finished. As I have been doing the pours at night, I haven't been able to see it in the daylight that much. When I looked today there is beautifully reflective edge starting to form. On my sample I did get to see this edge due to the lighting and texture of the sides (due to the silicon release I put in there). This has gotten me hopeful that this is going to work and make an attractive table that anyone would be happy to have in their homes or maybe even office.

Images showing the edge of the resin.

Images from third pour.
The third pour has revealed to me that it truly does look like the plants are submerged in water. I am truly fixated on how clear the resin is; I was sceptical about how the clarity and transparency of the resin after I saw how dark the sample was. Clearly the cracks and melted plastics had caused light to refract awkwardly around the piece giving it a dingy finish.
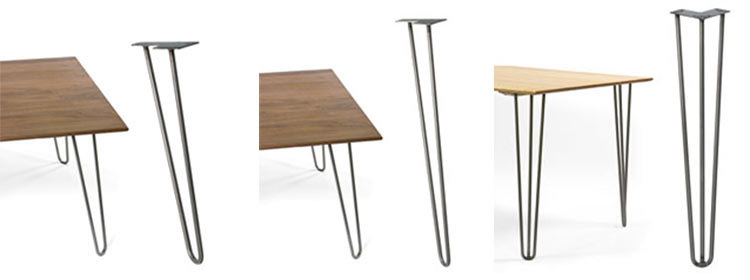
During my tutorial this week it was discussed that the table legs should match the top. By this I mean that the quality of the work should mirror the other; since I'm taking such care with the resin the table legs should look equally matched. The legs that I decided to make I did because the materials were free; I had already spent so much that I wanted to find a way to limit the expenses. I know that I do not currently have the skills to make a pair of table legs that would look amazing, so I made the decision to buy a set of legs that would match my original design ideas. Ultimately, they didn’t cost as much as I thought they would and would finish the piece off.
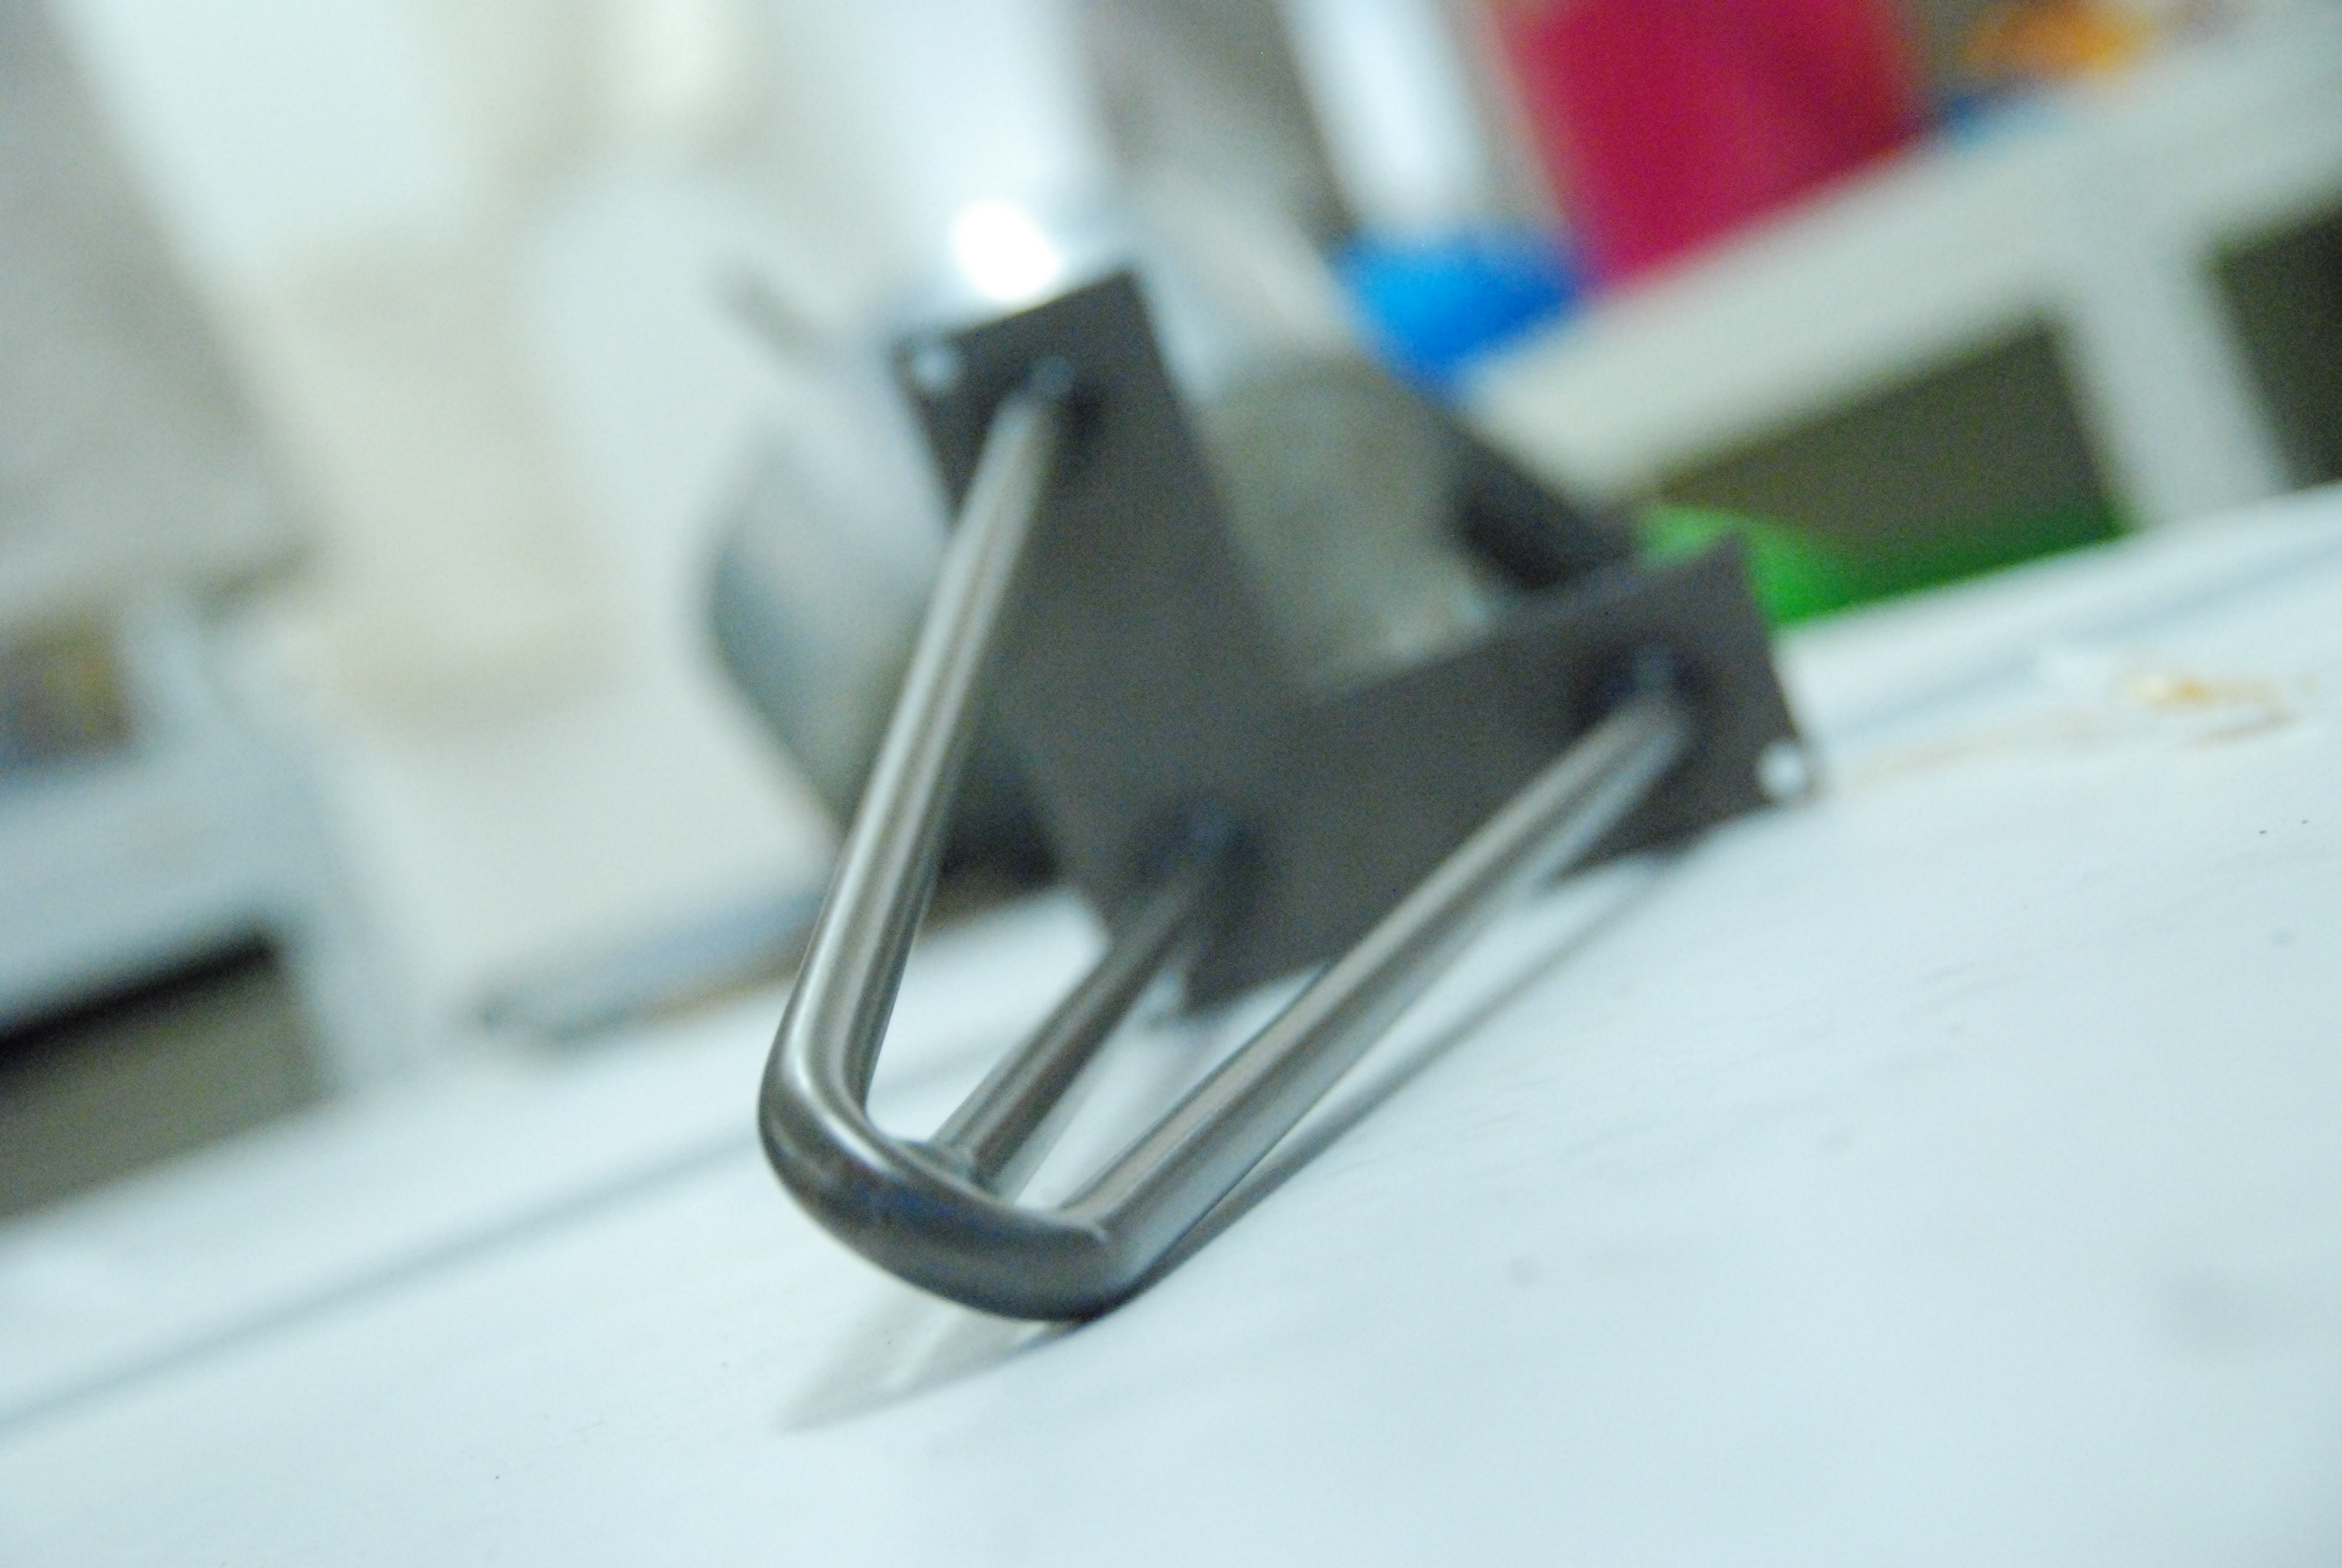

Images of the purchased legs.
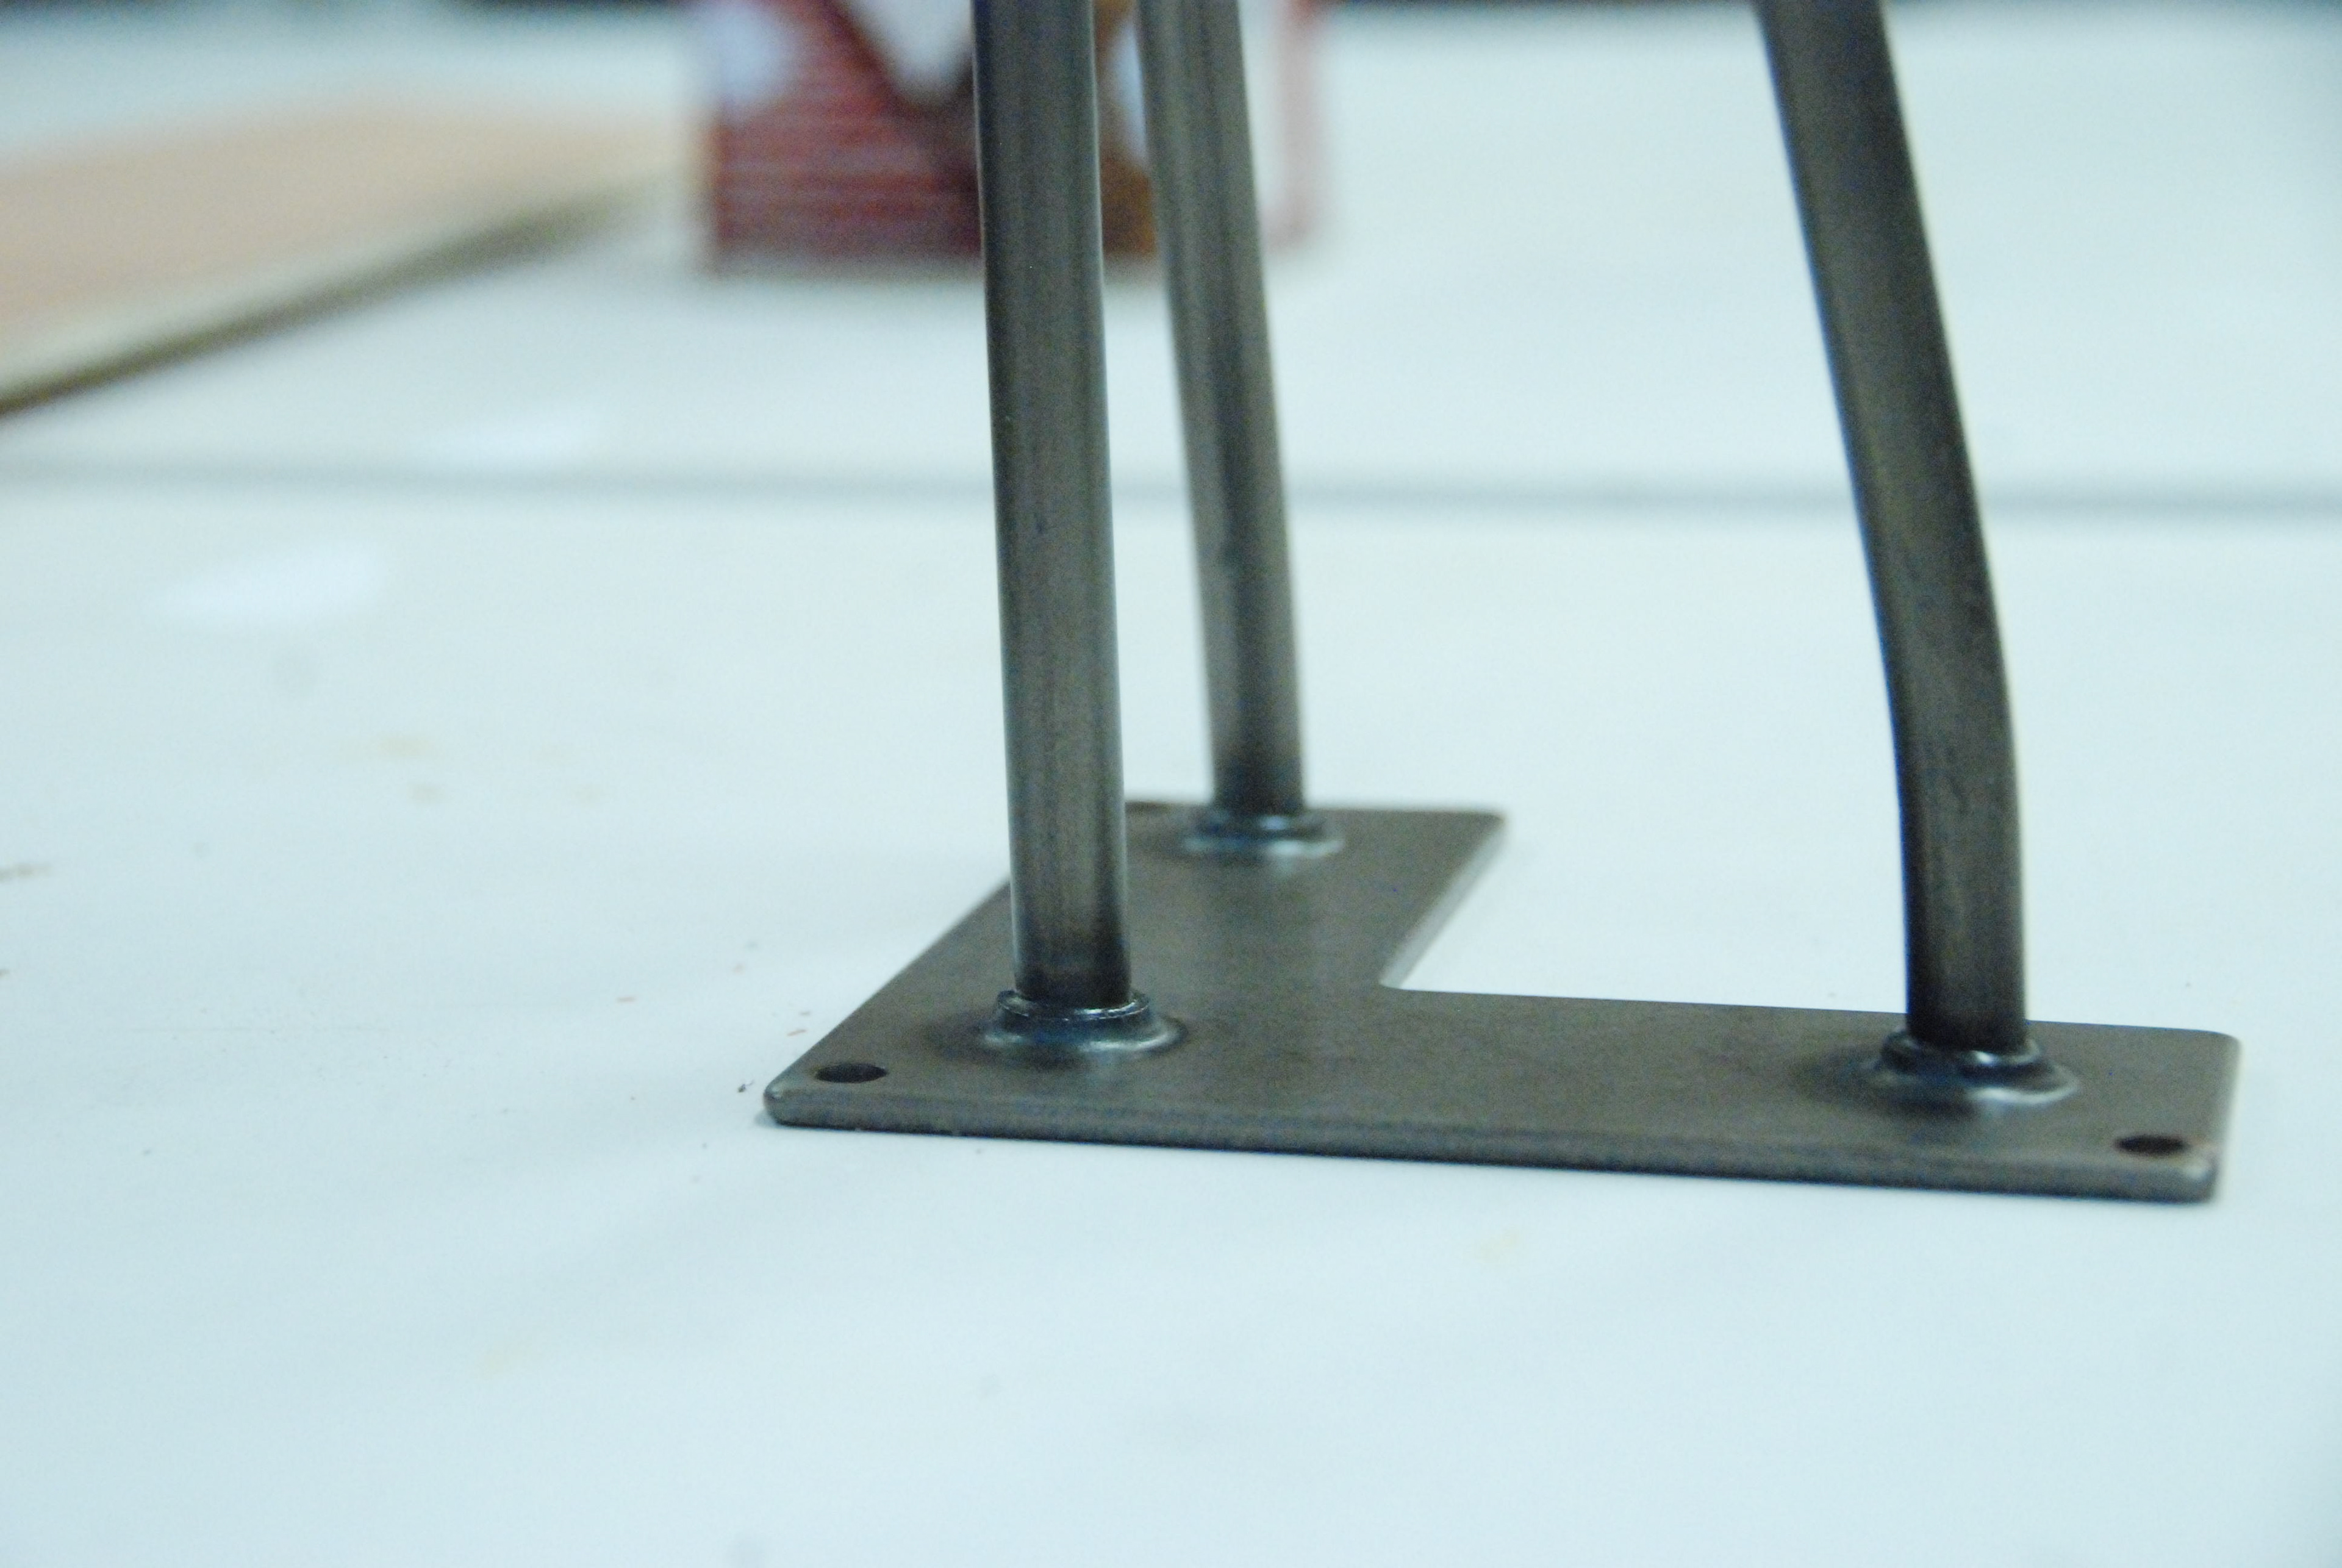
The next challenge for me was trying to find a way of attaching the legs to the table. The legs came with some screws; I don’t want to screw the legs on as this may damage the resin or show through the layer of stones. My initial thought was to create blocks out of plywood the same size and shape as the top of the legs. The legs could be screwed into this and then glued to the resin top. However, when I was discussing this with the tech dem, he said that it just wouldn’t look good. Obviously, that would defeat the point of buying the legs in the first place. After rethinking what would work, I decided to make a simple metal frame that I could weld the legs to and attach to the top. The sheet metal would be thin enough that you wouldn’t be able to notice it and would work with the legs, and style, more coherently.

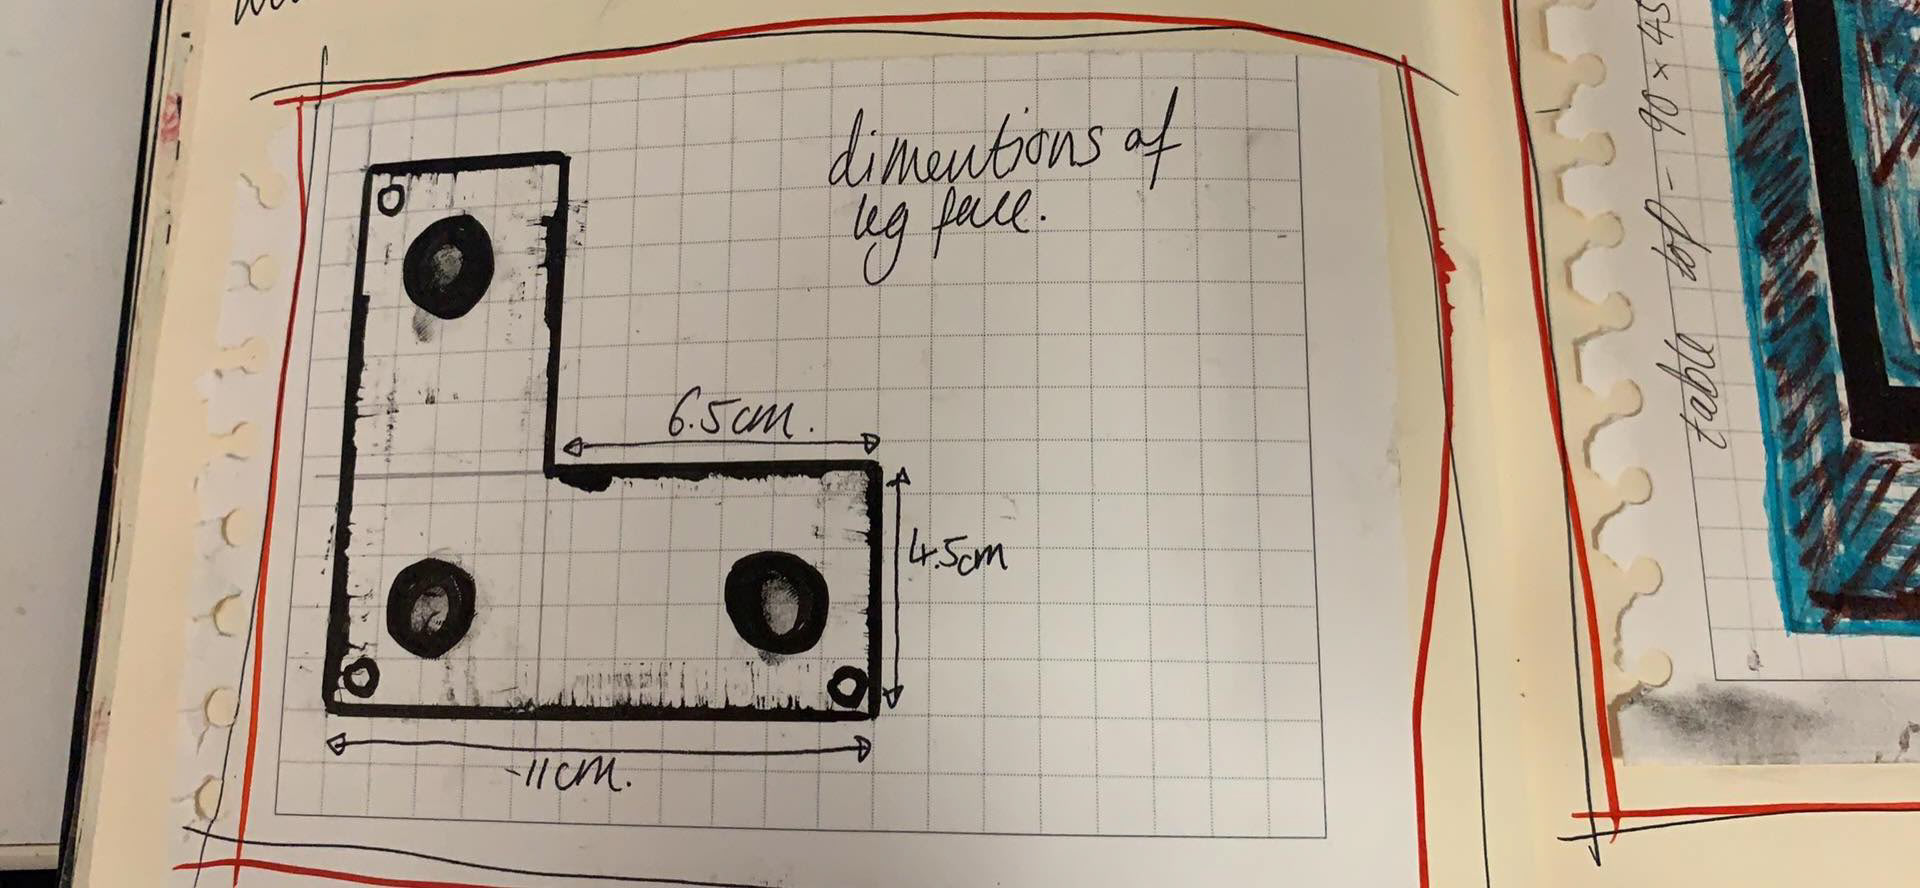
Images from sketchbook showing planning.
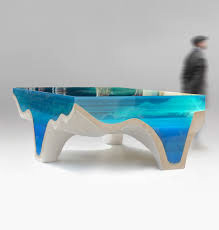
Eduard Locota. An artist and designer that works with different types of resin and casting materials to create fascinating products and installations. I first saw his work on social media when I was looking for inspiration. An example of this is his delMare table that ranges from € 7,900.00 – € 29,000.00. It is made from acrylic glass & marble. Each artwork is accompanied with a certificate of authenticity signed and dated by Locota himself. He describes it as “hypnotic”, “unconventional”, and “innovative”, and it truly is the colours and shapes are so organic and flowing you could believe that you were looking at a lagoon.

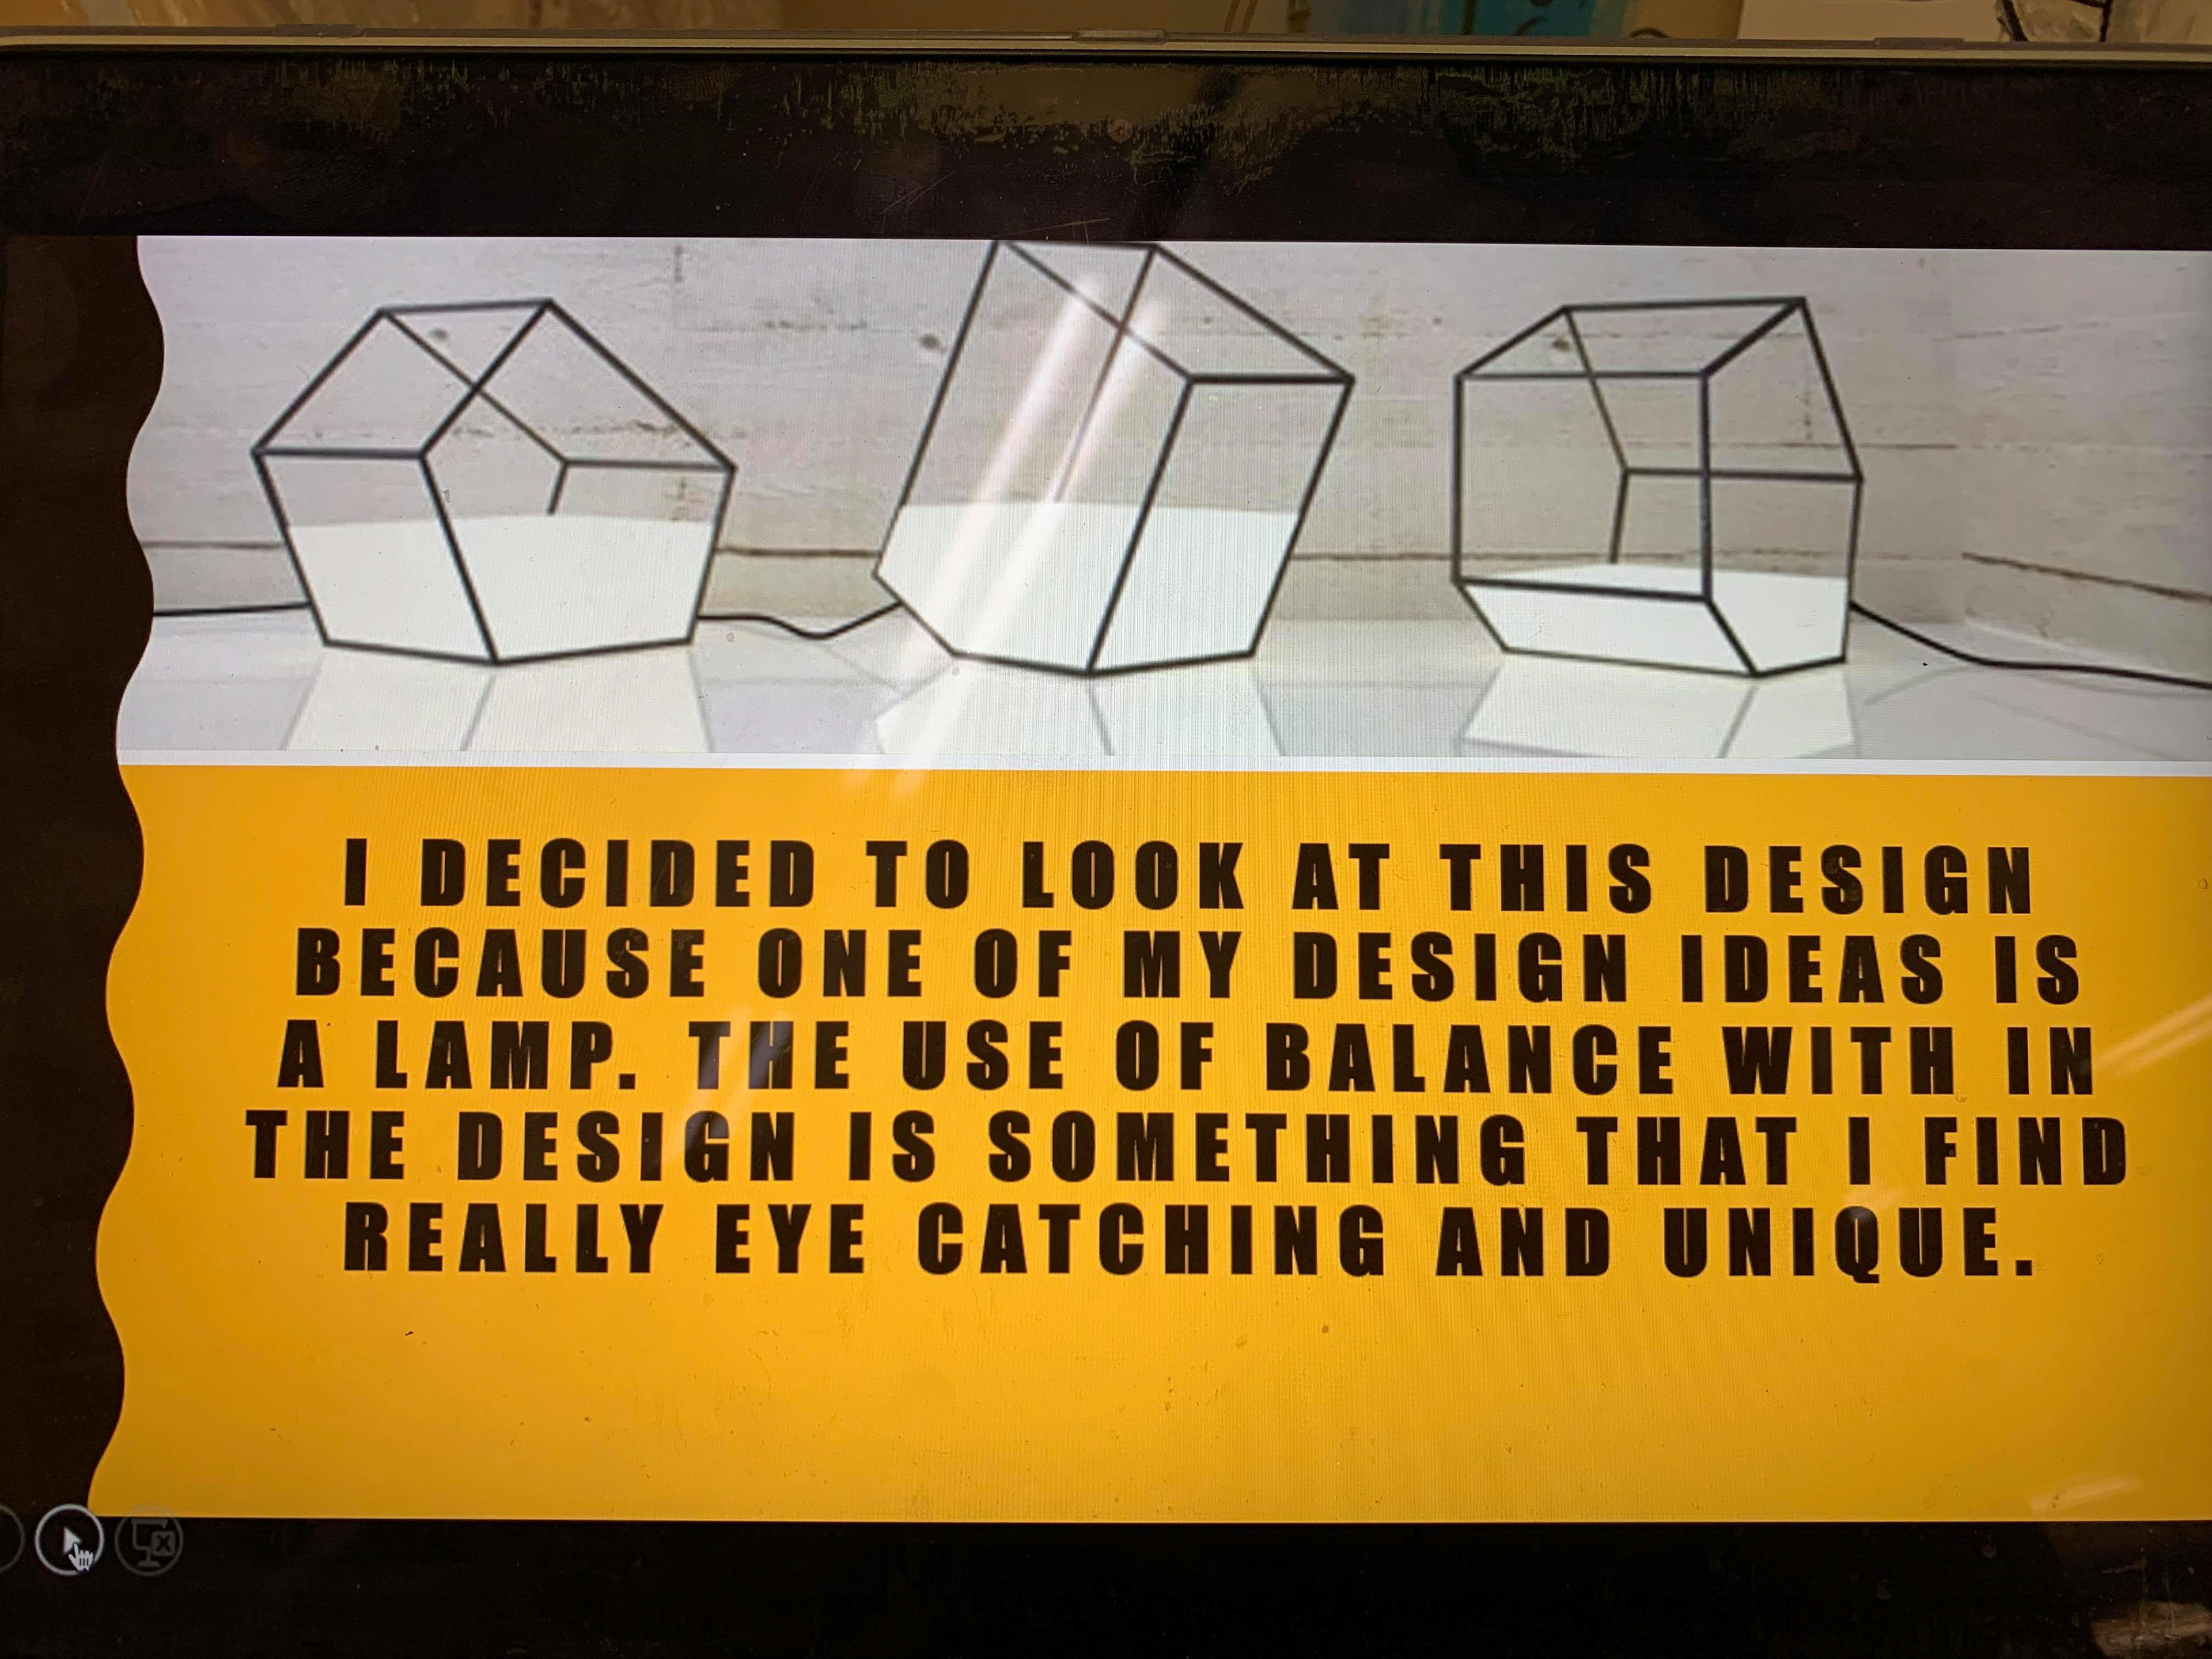
Whilst thinking about my design at the beginning of the project I considered the possibility of making a lighting installation as opposed to a table. The light would still have been made from resin and using the same materials. I thought about making it a sphere; I felt that this would be the best way for the light to disperse around the plants and surrounding environment. As I didn’t do this project this time I hope I get to do it at some point in the future.
With this in mind, I investigated the work of Alcarol. Alcarol is an experimental design duo that explores how narrative and intrinsic features of the environment and physical substances. They do this with a combination of experiences both personal and informed in the use of raw materials with pioneering and modern techniques.
I specifically looked at their Moss Lamp from their Undergrowth Collection. The lamp is formed by some logs from the undergrowth of the dolomite mountains. The logs are shaped and arranged in a way that you can see the natural communities of moss and the details of the outer husk. Where the logs have been trimmed you see a fantastic hint of the grain. The light comes from the bottom of the piece through an integrated LED system, which is turned on by simply touching the metal base. The way that the light twists around and disperses past the logs is beautiful; it gives the piece an ethereal glow that makes it seem as if it was immersed in water. As I understand it this was the intention of the piece; they have clearly achieved this and is something that I would love to see close up.


For my project the next step for me was to release my resin slab and start to sand/polish it up. This was to remove any blemishes or scratches on the surface and sides. For this I would a range of wet and dry sandpapers that would get finer each time. This was a long process. There were a fair number of small dimples in the surface of the resin that took a fair amount of sanding and time. It was at this point where I started to notice imperfections in the resin. There was a small crack a few layers down and no matter what I did I couldn’t make the resin top as clear as my original sample. I feel that the lack of clarity was caused by a small amount of wax catalyst that I was told to put in my last layer so that it was firm and completely set. Even though it was set I was unable to fix it with the knowledge that I had. I sought further advice and was told that a clear top coat should do the trick. And so, I purchased some. When spraying the lacquer, it seemed that it was doing the trick the resin appeared crystal clear and perfect as it could be. I thought that this would fix my piece, however this wasn’t the case, after I had let it dry for 24 hours I went back to find that it had gone a cloudy white colour. I had to scrape this off and ended back at square one, with no time to fix it. I have learnt from this that maybe I shouldn’t take all advice I am given, not everyone works with the same materials or at least the same brand, this can lead to a lot of time and money being wasted; you could also argue that I should have sampled it first, but I did have the spare materials to do this. It has been a learning curve and something that will have to think about in further projects. I do want to revisit resin at some point and feel that I have given myself a good base for me to build my experience upon.
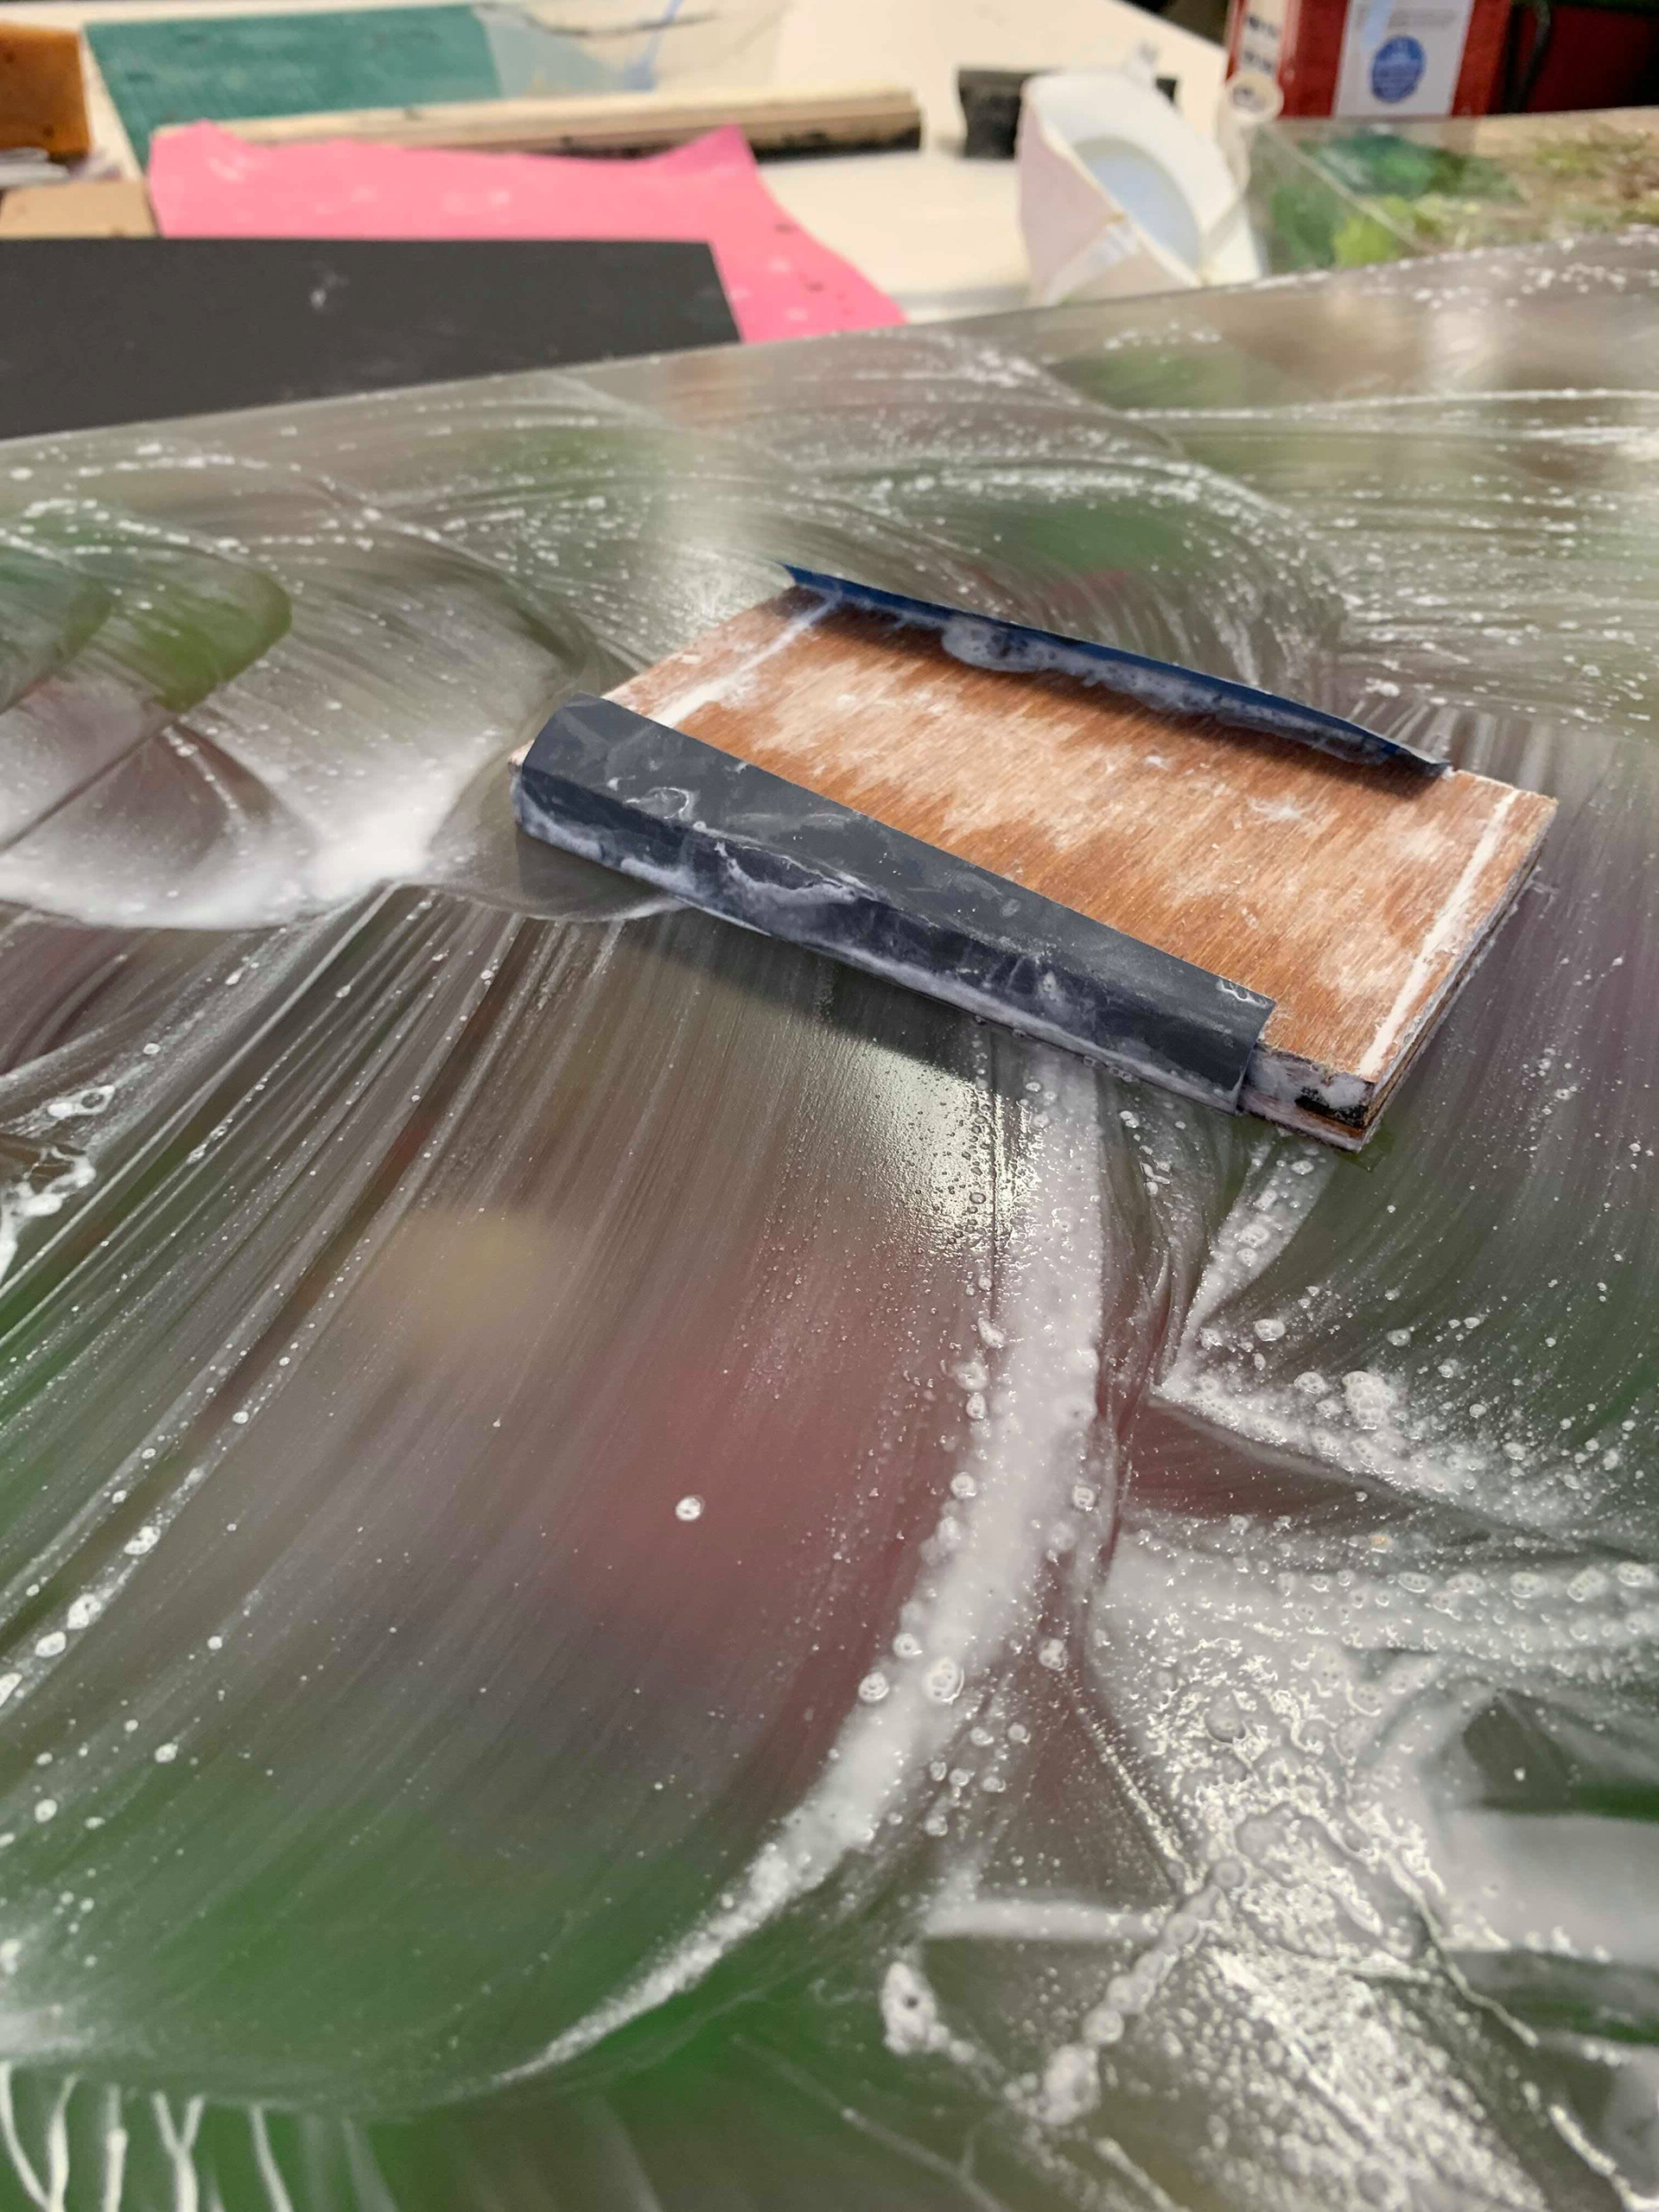

Images of sanding and the applying of lacquer
As part of this module we help the third years build their final degree show. During this process I help raise the boards and paint them. This was an interesting experience; on my foundation we didn’t have to do anything like this we just handed our work in. It was good to see how this was done and the amount of coordination is needed to get it done. When it came to raise the boards there was something for everyone to do, and halfway through we really started to get into a rhythm. I feel that knowing what it takes to getting the show ready will really make me appreciate how exhibitions come together from start to finish. Even when I was painting the boards there was a great sense of excitement and also relief amongst everyone; whether this was because everything was starting to come together or because they could see the finish line I don’t really know, but it something that I was glad to be a part of.
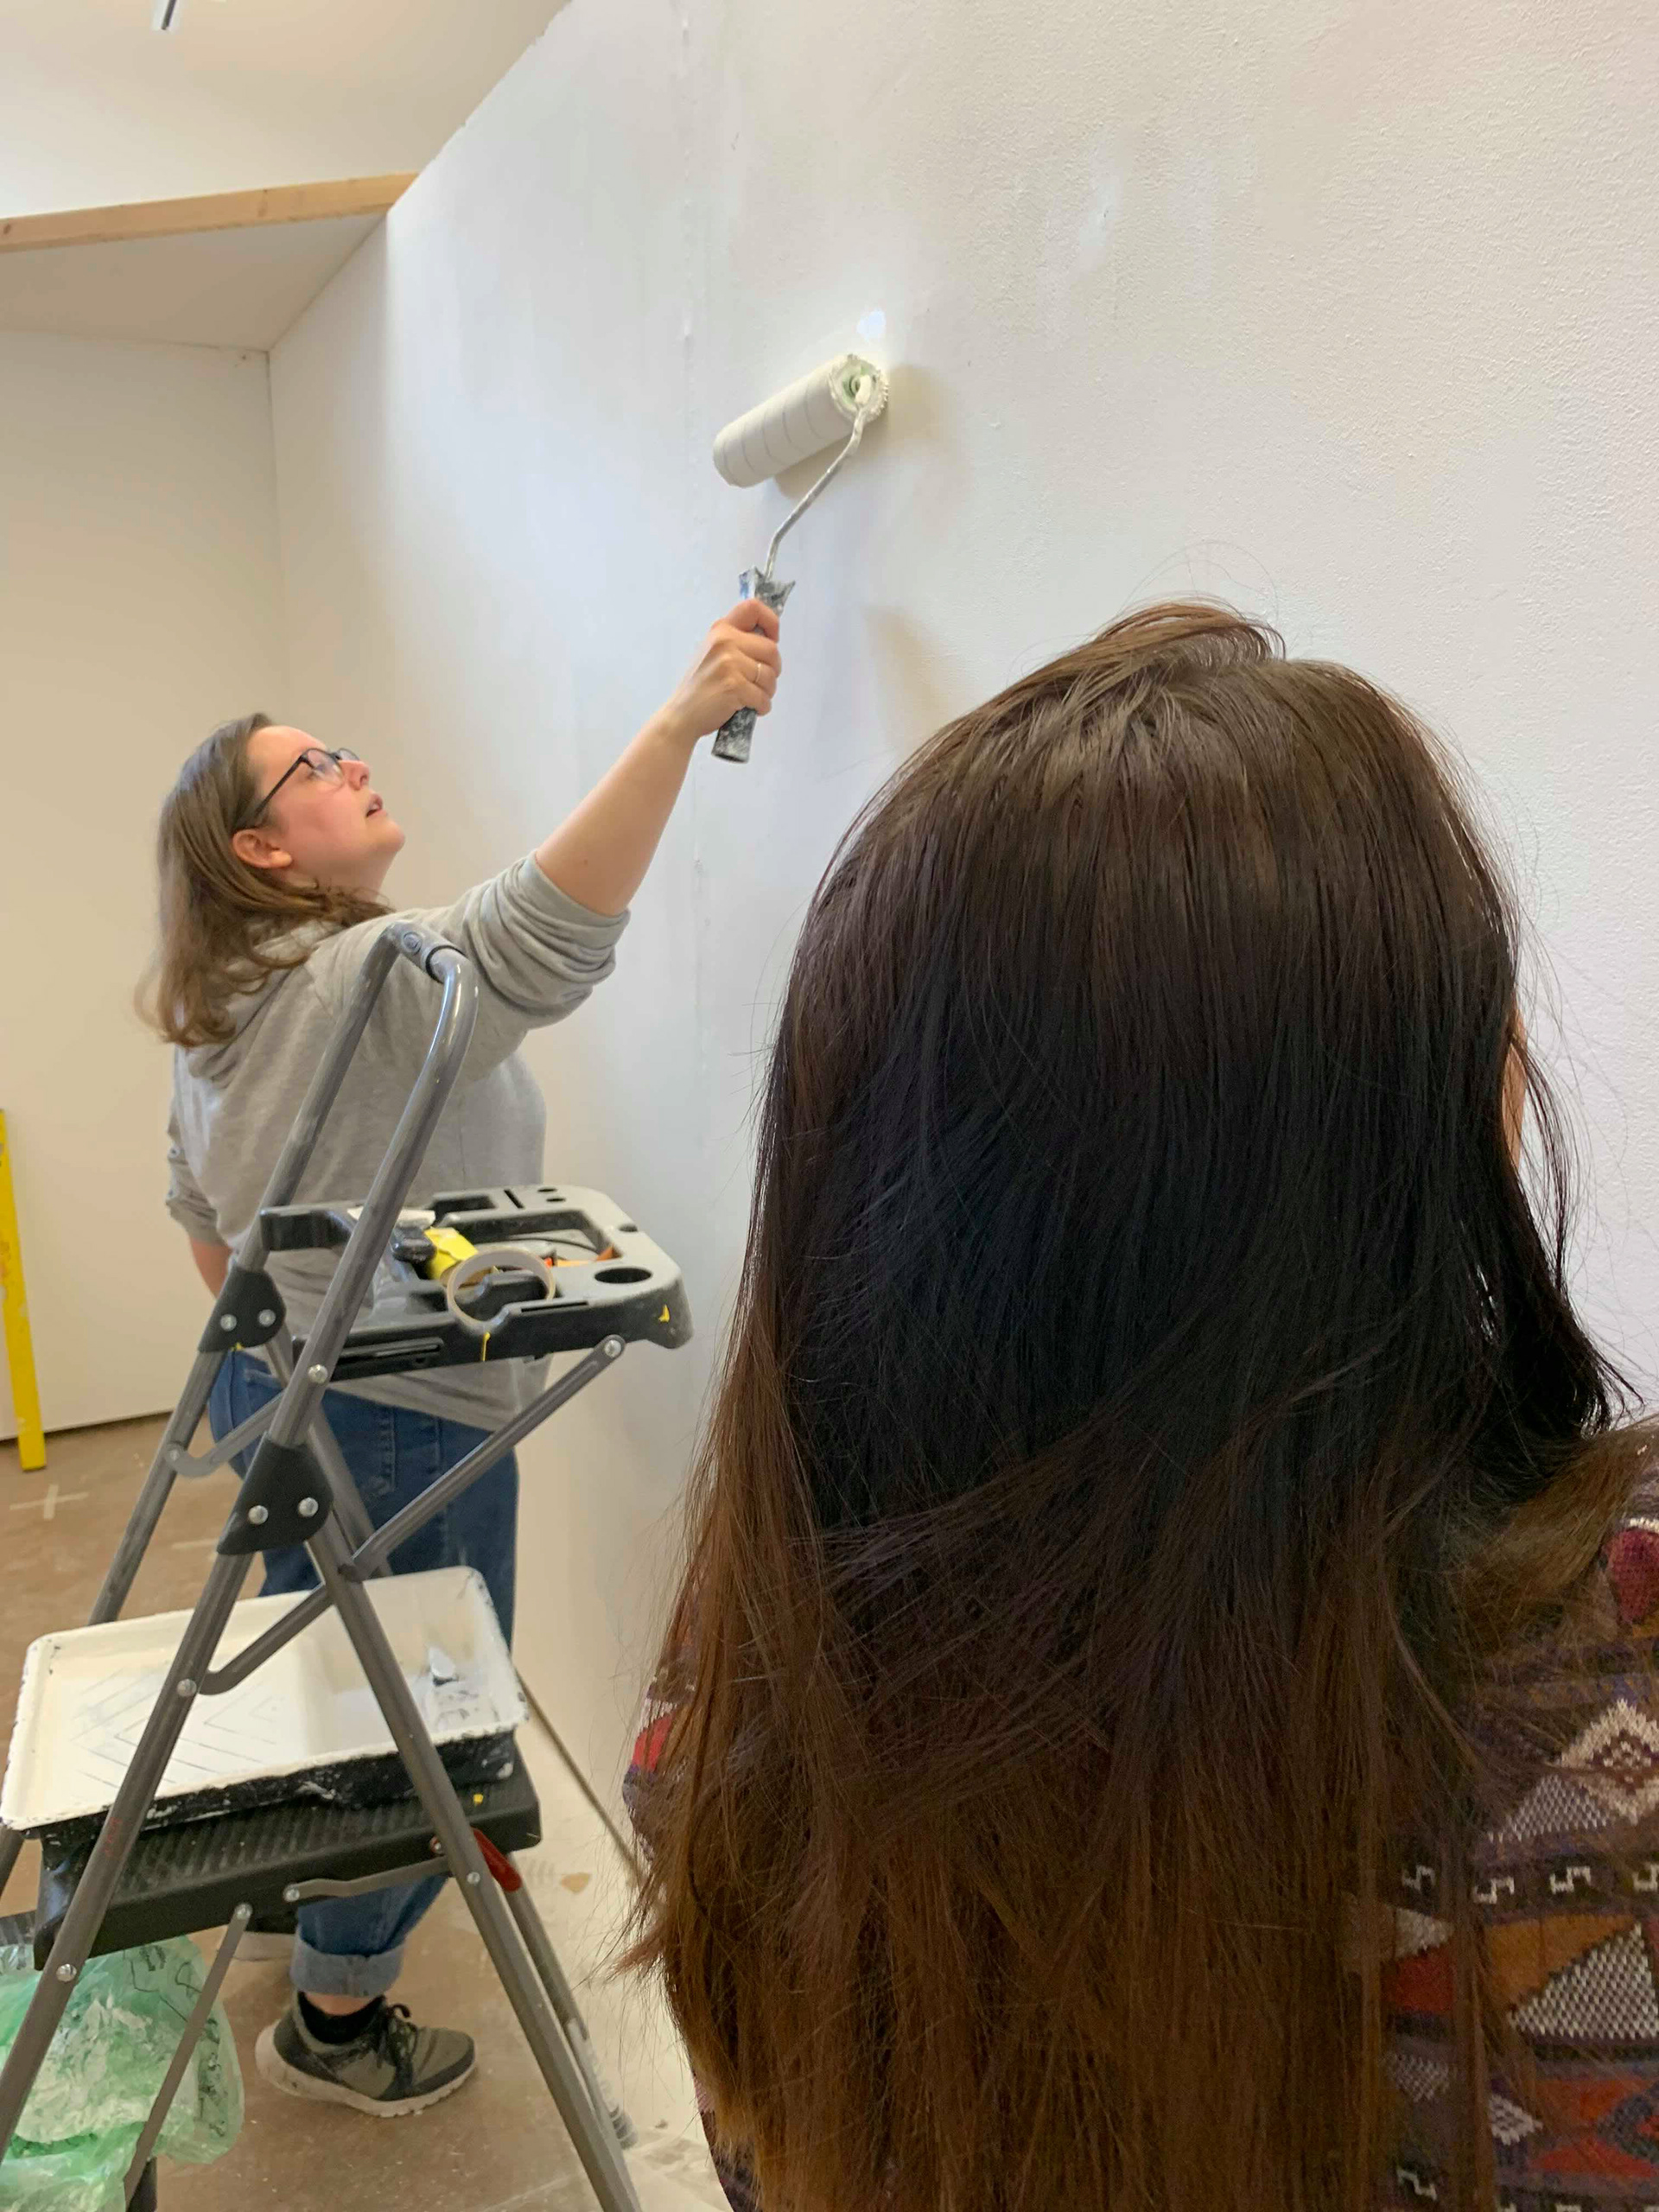

Images from the show build
After building the show and polishing the table top, there was only one thing left for me to do and that was to get the legs and base attached. As the sanding and pouring took so long I felt that I wouldn’t be able to produce an adequate set of legs for the table. This being so I purchased the legs and then attached them to the metal frame I had prepared. This was the best option for the table as I didn’t want to risk drilling into the resin in case it cracked; it didn’t seem worth the risk as I had spent so much money already and had had a relatively successful pour. I assembled the leg base by drilling corresponding holes into the sheet metal and using rivets and spot welding to secure them together. I made my own rivets meaning that I have learnt a new skill that I will be able to use in the future. Once this was done, I scored the bottom of the table top with a Stanley knife and used a silicone based clear adhesive to secure it. This worked really well and meant that my table actually started to look like one!